|
» |
|
|
|
The swinstall command installs
software from a software source (a depot or physical media) to your
local host. Features and Limitations | |
Compatibility filtering
to ensure the software will run on the installed system. Ability to perform kernel
rebuilding or rebooting. Automatic use of dependencies
to automatically select software on which to operate (in addition
to any software you specify directly). Ability to run control
scripts as part of the installation: - Checkinstall
Analyses each target to
determine if the installation and configuration can take place. - Preinstall
Performs file operations
(such as removing obsolete files) before installation of software
files. - Request
Requests an interactive
response from the user as part of the installation or configuration
process. (Executed by swask, swconfig, and swinstall.) - Configure
Configures installed filesets
or products. (See “Configuring Your Installation (swconfig)”.) - Postinstall
Performs additional install
operations (such as resetting default files) immediately after a fileset
or product has been installed. - Unpostinstall
Undoes a postinstall script
in case swinstall must initiate recovery during
the installation process. - Unpreinstall
An undo preinstall script
in case SD must initiate recovery during the install process.
(See Chapter 11: “Using Control Scripts ”) Software can be installed
to alternate root directories.
Installing with the GUI | |
OverviewThis section provides an overview of the swinstall GUI. There are five steps in the GUI install process: Table 2-2 GUI Installation Steps I.
Start-Up | Start the swinstall GUI. | | II. Select
Source | Provide the location
of the software depot from which the software will be installed. | III.
Select Software | Choose the software to install. | | IV. Analysis
(Preview) | Analyze (preview)
the installation to determine if the selected software can be installed
successfully. | | V. Installation | Perform the actual software installation. |
Step I: Start-UpTo start the GUI or TUI for an install session,
type: /usr/sbin/swinstall The GUI is automatically invoked unless you also specify software on the command line. To invoke the GUI and specify software, include the -i option. For example, to use the GUI for a preview (analysis only)
session with BUNDLE1, type: swinstall -i -p /MyDepot/BUNDLE1 The Software Selection window appears with the
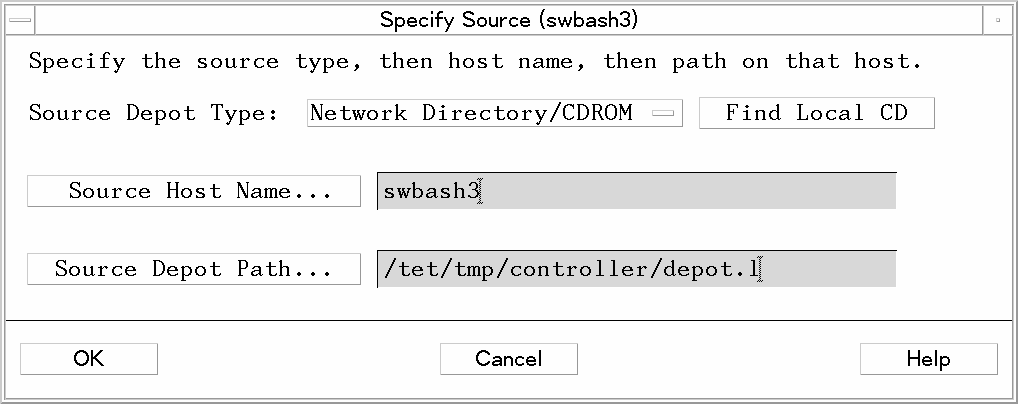
Specify Source dialog superimposed over it. Step II: Select Source In this step, you must specify
the source depot that contains the software you want to install. The
Specify Source dialog (Figure 2-1: “Specify Source Dialog ”,) automatically lists the local
host and default depot path. (This step is skipped if you include the -s source option when you invoke the GUI.) (Optional) To specify
another host system, type a source host name, or: Click on the Source
Host Name button. The system displays a dialog that lists
all host system names contained in the defaults.hosts file ($HOME/.sw/defaults.hosts or /var/adm/sw/defaults.hosts). Choose a host name from
the list. Click OK. The host name appears in the appropriate box in the Specify Source
dialog.
(Optional) To specify
the path to the depot, type a new path, or: Click on the Source
Depot Path button to display a list of registered depots
on the source host. Highlight one of the depots. Click OK to make it appear in the Specify Source dialog.
Click OK. The Specify Source dialog closes, and the Software Selection window
displays the software contained in the depot you specified.
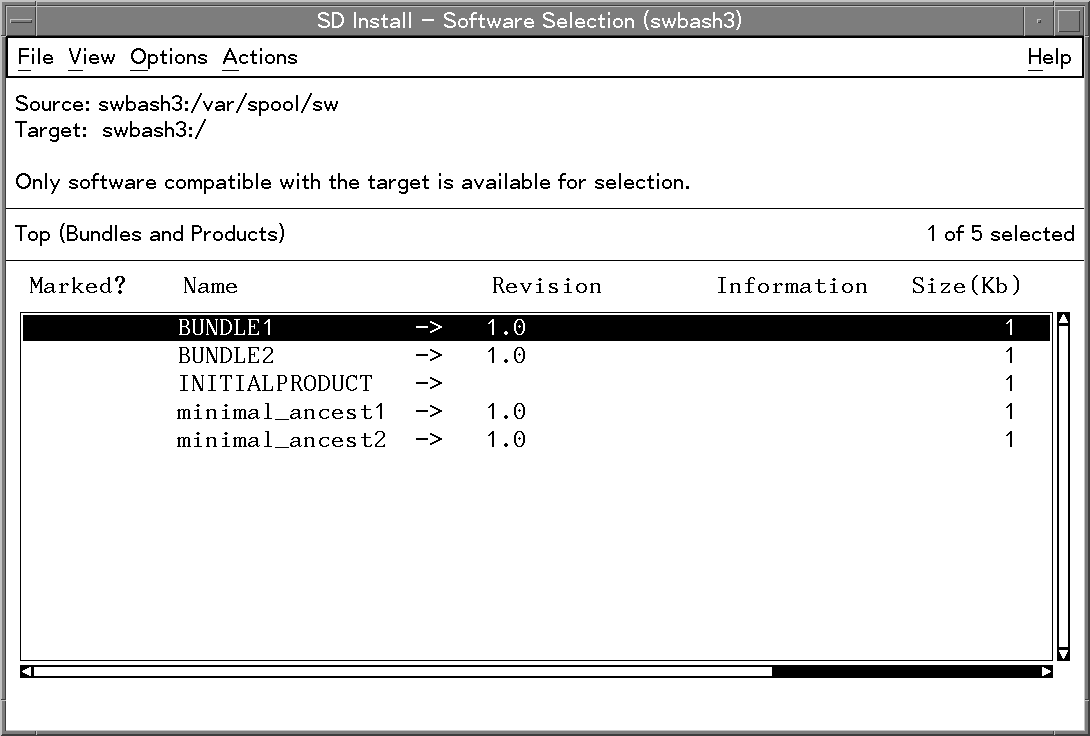
Step III: Select Software In this step, you use the Software Selection window to
select the software you want to install. Select software from the
object list: Highlight an item Select Actions→Mark For Install — or — Right-click to display the pop-up, then select Mark For Install
The Marked? flag
in the object list changes to Yes to match your selection. (The flag Partial may appear if you select only a component of a software object or
if such components are automatically selected due to dependencies.) | | | |  | NOTE: If multiple versions of a product exist in the
same depot, SD-UX lets you select only one version during each installation
session. | | | | |
(Optional) Use choices
from the Actions menu: Match What Target
Has examines your current Installed Product Database to match
your existing filesets with new filesets (those with the same names)
that you are going to install. This feature is most helpful when you
are updating a system to newer versions of the same software. This
option can be set from the Options Editor. If multiple targets are
specified, the first target in the list is used as the basis for selections. Add Software Group displays a list of previously saved software group files or lets
you specify a directory. Selecting a file adds the software selections
in the file to any selections you have already made in the Software
Selection window. Save Software
Group lets you save your current list of marked software
as a group. Manage Patch Selections lets you select from a list of patches to install, select filters
for patches, and set other patch options. (See “Installing Patches” for more information.) Change Source...cancels your software selections and returns you to the Specify Source
dialog. Add New Codeword lets you add a new codeword to unlock protected software. (This
option is available only when SD-UX detects that the source contains
protected software.) Change Target... displays the Select Target Path dialog. This lets you specify an
alternate root for products that are relocatable. Show Description
of Software (available only for a single item highlighted
in the object list) displays more information on the selected software.
Select Actions→Install to start the analysis (preview) step. The Analysis dialog appears.
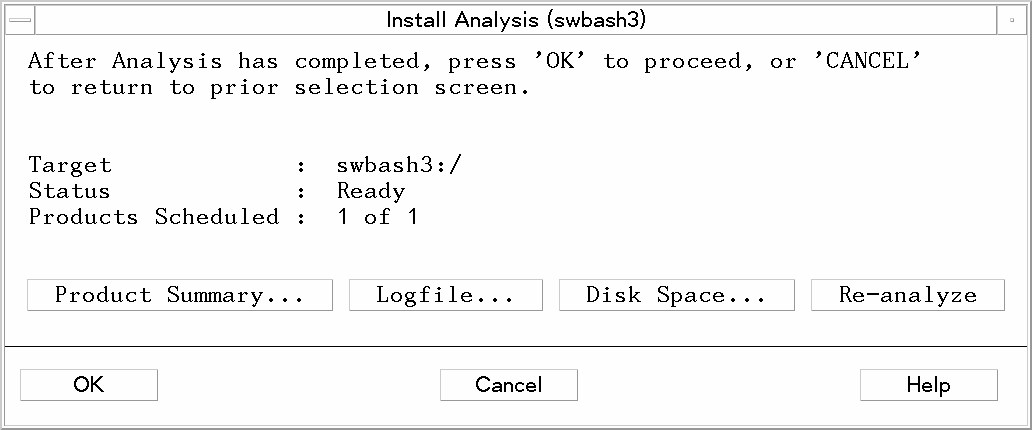
Step IV: Analysis (Preview)In this step, SD-UX analyzes the software
you have selected. The Analysis window displays status information
about the analysis process. When the analysis is complete and the
host status shows Ready, click OK to start the actual installation (see “Step V: Installation”). The Analysis
dialog is then replaced by the Install dialog. If you started a preview session, the install
stops after the analysis. Clicking Cancel returns
you to the Software Selection window. The following actions are available: Product Summary gives additional information about the product or bundle and provides
a Product Description button that displays information
about additional information about dependencies, copyright, vendor,
etc. Logfile presents a scrollable view of detailed install information written
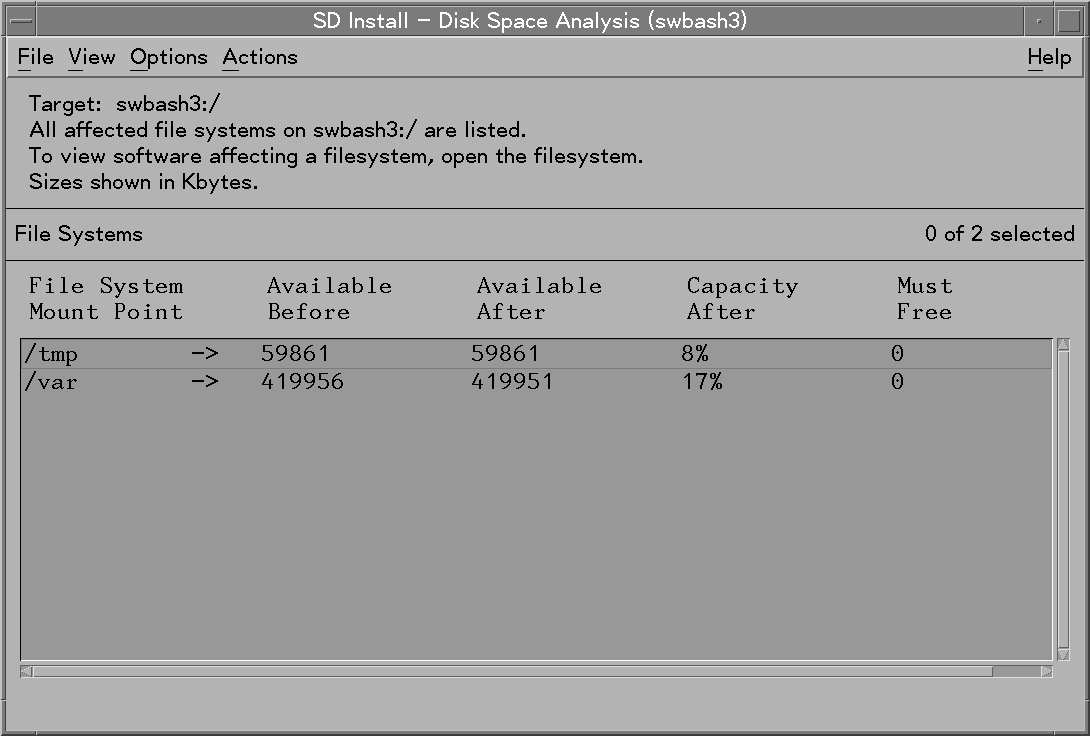
to the logfile. Disk Space displays the Disk Space Analysis window (Figure 2-4: “Disk Space Analysis Window”,) which shows: The file system mount
point, How much disk space was
available before installation, How much will be available
after installation, What percent of the disk’s
capacity will be used. How much space must be
freed to complete the operation.
Menu choices in this window let you: Open items to look at
the projected size requirements for specific filesets.
Re-analyze repeats the analysis process.
When Analysis completes,
the status for any host displays as either Ready or Excluded from task. If any of the selected software can be installed onto
the host, the status shows Ready.
If none of the selected software can be
installed onto the host, the status shows Excluded
from task. The following list summarizes the status results.
You can find details about most problems by clicking the Logfile button. - Ready
There were no errors or
warnings during analysis. The installation may proceed without problems. - Ready
with Warnings
Warnings were generated
during the analysis. Errors and warnings are logged in the logfile. - Ready
with Errors
At least one product selected
will be installed or copied. However, one or more products selected
are excluded from the task because of analysis errors. Errors and
warnings are logged in the logfile. - Communication
failure
Contact or communication
with the intended target or source has been lost. - Excluded
due to errors
Some kind of global error
has occurred. For example, the system might not be able to mount the
file system. - Disk
Space Failure
The installation will
exceed the space available on the intended disk storage. For details,
click the Disk Space button.
The Products Scheduled row shows the number of products ready for installation out of all
products selected. These include: Products selected only
because of dependencies Partially selected products Other products and bundles
that were selected
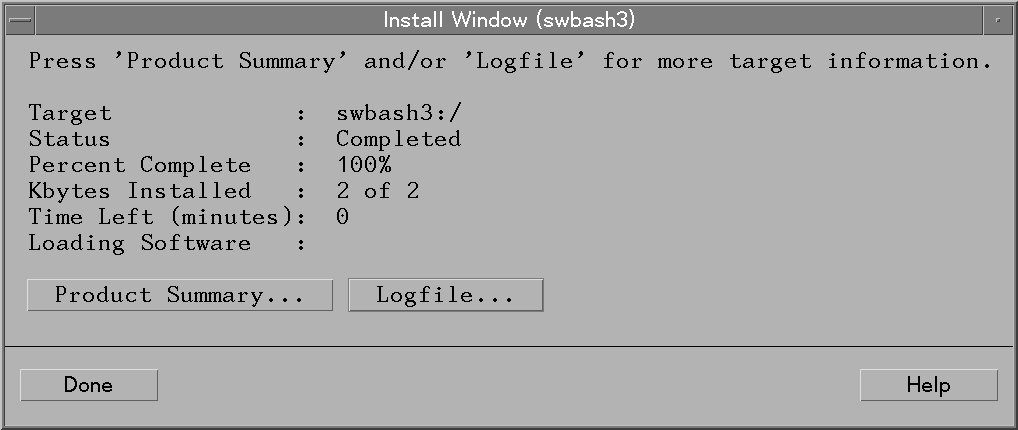
Step V: InstallationIn this step, SD-UX proceeds with the actual installation. After you click OK in the Analysis window, SD-UX starts installation and displays the
Install Window, which shows status information. These action buttons are available: Done returns
you to the Software Selection Window. You can then begin another install
or exit the GUI (File→Exit). Product Summary display installation and product information (name, revision, installation
results, installation summary). Logfile displays the logfile. (Appears only for kernel
installations) Resume restarts a suspended installation.
This lets you fix problems before continuing. (Appears only for kernel
installations) Abort cancels a suspended installation.
Installation may suspend if: An error occurs in a script Customization for kernel-related
filesets fails A tape change is needed
(if you are installing from multi-tape media)
Installing from the Command Line | |
Swinstall syntaxThe syntax for swinstall is: swinstall [XToolkit_Options] [-i] [-p] [-r] [-v] [-c catalog] [-C session_file]
[-f software_file] [-Q date] [-s source]
[-S session_file] [-t target_file] [-x command_option=value]
[-X option_file] [software_selections] [@ target_selections] |
Options and Operands- XToolkit_Options
X window options for the
GUI. See “XToolkit Options and Changing Display Fonts ”. - -i
Run the command in interactive
mode by invoking the GUI or TUI. See “Installing with the GUI”. - -p
Preview the install task
(perform analysis only). - -r
Operate on an alternate
root directories. See “Installing to an Alternate Root ”. - -v
Turn on verbose output
to stdout and display all activity to the screen. - -c catalog
Store a copy of a response
file or other files created by a request script in catalog. See “Requesting User Responses (swask)”. - -C session_file
Save the current option
and operand values to session_file for reuse
in another session. See “Session Files”. - -f software_file
Read the software selections
from software_file instead of (or in addition
to) software you specify on the command line. See “Software Files”. - -Q date
Schedules a job for the
given date when remote operations are enabled. See “Scheduling Jobs from the Command Line” and Chapter 7: “Remote Operations Overview” - -s source
Use the software source
specified by source instead of the default, /var/spool/sw. The syntax is: [host:][/directory] host may be a host name, domain name, or internet address (for example, 15.1.48.23). directory is an
absolute path. - -S session_file
Use option and operand
values saved from a previous installation session and stored in session_file. See “Session Files”. - -t target_file
Read target selections
from a target_file instead of (or in addition
to) targets you specify on the command line. See “Target Files”. - -x command_option=value
Sets command_option to value, overriding default values or
values in options files. See “Changing Command Options ”. - -X option_file
Read session options and
behaviors from option_file. See “Changing Command Options ”. - software_selections
One or more software objects
to be installed. See “Software Selections”. - target_selections
The target on which to
install the software selections. See “Target Selections”.
Changing Command Options You
can change the behavior of this command by specifying additional command-line
options when you invoke the command (using the -x option) or by reading predefined values from a file. The following
table shows the defaults and options that apply to swinstall. Table 2-3 swinstall Command Options and Default Values admin_directory=/var/adm/sw agent_timeout_minutes=10000 allow_multiple_versions=false allow_split_patches=false autorecover_product=false autoselect_dependencies=true autoselect_minimum_dependencies=false autoselect_reference_bundles=true distribution_source_directory=/var/spool/sw enforce_dependencies=true enforce_kernbld_failure=true installed_software_catalog=products logfile=/var/adm/sw/swinstall.log
| mount_all_filesystems=true patch_filter=software_specification reinstall_files_use_cksum=true reuse_short_job_numbers=true rpc_binding_info=ncacn_ip_tcp:[2121] ncadg_ip_udp:[2121] software_view=all_bundles use_alternate_source=false
|
For More InformationSee Appendix A for more information about setting options and a complete listing
and description of each option. Installation Tasks and Examples | |
This section provides examples of commands for
installing software products. Note that The \* is
an optional shorthand wildcard meaning “all products and filesets
or all available software.” To start an install session via the command line,
you must assemble any options (if needed), host and source names,
and software selections into a command string. For example: swinstall -p -s softsource -f softlist \
@ myhost:/mydirectory |
The @ myhost:/mydirectory is optional
if you are installing to your local host and default directory (root). | | | | | NOTE: If you do not specify a source, swinstall uses the local host’s default depot directory, /var/spool/sw. | | | | |
To install a pre-determined
list of software products in the file mysoft that are physically on a CD-ROM (mounted locally at /mnt/cd) to the default directory (/) on the local
host: swinstall -f mysoft -s /mnt/cd To select all software
in the default depot (/var/spool/sw) located
on a host named server to the default directory
on host myhost and preview the process
(-p) without actually installing: swinstall -p -s server \* @ myhost A depot location (:/depot) is not specified because it is assumed that
the software is located in the default /var/spool/sw on server and will be installed at / on myhost. The -p analysis option is explained under “Changing Command Options”. To select all products
named C and Pascal from the default depot on the host named sw_server and start an interactive GUI session (-i): swinstall -i -s sw_server C Pascal To update HP Omniback
software (already installed in the default directory on the local
host) with a newer version from a CD-ROM mounted at /mnt/cd: swinstall -s /mnt/cd Omniback
For complete instructions for updating from a
previous HP-UX release to HP-UX 11i, use the new update-ux command,
as explained in Chapter 2 of HP-UX 11i Installation
and Update Guide. This document and complete OS documentation is
available on your HP-UX Instant Information CD-ROM and at: http://docs.hp.com/hpux/os/11i/ The swinstall command has a
variety of patch management features, including a patch management
dialog in the GUI. See Chapter 5: “HP-UX Patching and Patch Management” for complete details on patches
and using the swinstall GUI patch features. Installing Software That Requires a System Reboot Software packaged with
the is_reboot attribute set to true
requires the host to be rebooted after the software is installed.
However, when installing to alternate root file systems, the host
will not be rebooted. If a local installation entails a reboot, the
system reboots the target and the controller, so there is no process
left to report success or failure. (SD-UX does not automatically reconnect
to the target after a reboot.) To find out if a software product requires the
local host to be rebooted, get a description of the software either
from the Software Selection window, using the menu item Show
Description of Software, or from the Analysis dialog using
the Product Summary and Product Description buttons. Using Software Codewords and Customer IDs To protect software from
unauthorized installation, HP (and other vendors) use special codewords
and customer identification numbers to “lock” the software
to a particular owner. These codewords and customer IDs are provided
to you when you purchase the software (or receive it as update). HP
lists them on the Software Certificate which is packaged with the
software. To properly store the customer_id/codeword for
a CD-ROM, you can run swinstall (or swcopy or swlist) on the host serving the CD-ROM. After
the codeword has been stored, clients installing software using that
host and CD-ROM as a source will no longer require a codeword or customer_id. SD searches the.codewords file on the server that is providing protected software to other
hosts. It looks for valid customer_id/codeword pairs. In doing so,
SD eliminates the need for you to enter codewords and customer_ids
on every host that is “pulling” the software. This is a time saver if you are updating multiple
systems. SD-UX prompts you for these codewords or numbers prior
to the installation of protected software. You can enter or change
the numbers via the GUI using the Add New Codeword choice from the Actions menu in
the GUI, or by using the appropriate default option on the command
line: For example, if
you want to store the codeword 123456789101bcdf (from the /CD-ROM mount point) and your
customer_id was xyzCorp, you would enter
on the command line: # swinstall -p -x customer_id=xyzCorp \
-x codeword=123456789101bcdf \
-s /CD_ROM |
(Since the purpose of this command is only to
store codewords and customer IDs, the -p option runs the command in preview mode so that no actual software
installation takes place.) See Appendix A for more information on codeword and customer_id options. Re-installing Software DistributorThe software product called SW-DIST provides all Software Distributor functionality, commands, and tools.
If the files that make up SW-DIST are deleted or corrupted, you may
need to re-install the product. This process uses the new install-sd
command, which is described in Appendix C. Installing Multiple VersionsYour installation
may commonly having multiple versions of a software product installed
at various hosts on the network. Multiple installed version let you: Back out defective versions
(by removing the new version and reconfiguring the old version, if
necessary) Let users migrate to newer
software versions at their own pace
You can decide whether to allow multiple
versions by controlling the allow_multiple_versions command option. If set to false, installed or configured multiple
versions (that is, the same product, but a different revision, installed
into a different location) are not allowed. While multiple installed versions of software are allowed, multiple configured versions are not recommended. Once multiple versions of software are installed
into a location, you can manage them by specifying the product attribute
in the software specification of SD-UX commands. (This is as opposed
to specifying other version attributes such as revision and architecture).
This lets you install old and new versions of software at the same
time and configure both versions (if the software packaging supports
it). You can avoid unauthorized, privately installed
versions of software by controlling access to the IPD and restricting
the use of the swinstall tool. | | | | | NOTE: Managing multiple versions of a software product
on your system requires close attention to the cross-product dependencies
that may exist for each version. When you installing multiple versions,
make sure you also install multiple versions of the cross-product
dependencies. If the dependencies are not relocatable and each version
you want to install depends on a different version of the same product,
multiple versions of the original product cannot be installed. | | | | |
Installing to an Alternate Root Software
is usually installed relative to the primary root directory (/) but you can also install to an alternate root directory. The automatic configuration and compatibility
filtering that is part of the swinstall command
is not performed when installing to an alternate root. You can, however,
perform configuration separately from installation by using the swconfig command. See “Configuring Your Installation (swconfig)”. Compatibility Filtering and Checking SD-UX normally filters out software products that are
incompatible with any selected targets. Compatible means that the
architecture of the hardware matches that required by the software
(determined by the system uname attributes). It also means that the
OS version is the proper one for the software. The actual check for
incompatible software is performed during the selection phase. Compatibility
filtering and checking are controlled by the allow_incompatible option and depend on the host’s uname attributes. | | | | | NOTE: HP strongly advises that you do not install software
that is incompatible unless you are advised to do so by your HP Support
representative. | | | | |
Table 2-4 Product Compatibility Product attribute | Product value (Pattern to match) | Target Root attribute |
|---|
machine_type | ia64* | IA | uname
-m | | machine_type | 9000/* | IA or
PA | uname -m | os_name | HP-UX | HP-UX | uname -s | os_release | ?.11.* | B.11.11 | uname -r | os_version | * | C | uname -v |
If allow_incompatible=false (the default), swinstall restricts the installation
of incompatible software and automatically filters the products on
the source. The Software Selection window shows only those products
compatible with the hardware and OS of all target systems. If allow_incompatible=true, swinstall allows the installation of any software.
The GUI displays all products on the source for selection. You can also use the -x os_nameand-x os_release options to check
compatibility. During an OS update, for example, if a system has been
installed as 11.0/32 bit and you wish to update to the 64-bit version
of HP-UX, you can make the system appear as a 64-bit system for the
purpose of compatibility checking against the merged depot by specifying
the options-x os_name=HP-UX:64 and -x os_release=B.11.00. (You can also specify these
options at a fileset level.) | | | | | NOTE: Compatibility filtering does not apply to alternate
root file systems. You must select software that you know to be compatible
with the alternate root. | | | | |
|