|
|

If you have a set of XML pages that you want to make available to device users, you work with them in a Design Studio XML project. For XML projects, you import into Design Studio an XSL style sheet that you created in another application. Design Studio uses the imported XSL style sheet to transform the XML pages.
 |
Note If you need to use more than one XSL style sheet to handle different device protocols, use the Import XSL rule as described in the "Using Several XSL Style Sheets for a Project" section. |
The following sections describe how to use Design Studio to work with XML projects:
An XML project contains an XSL style sheet and the XML pages you want to transform. You create an XSL style sheet outside of Design Studio. Be sure to validate an XSL style sheet before importing it. Design Studio does not validate imported style sheets.
To create an XML project, perform these steps:
The name of the current configuration file appears in the title bar of the Design Studio window.
Step 2 From the Projects menu, choose Create Project.
The Create Project dialog box appears.
Step 3 Enter a name to identify the project, for example, "command pages."
Step 4 Click the XML radio button.
Step 5 Click OK.
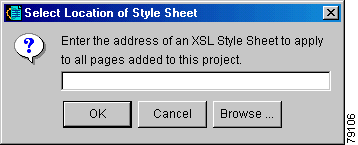
The Select Location of Style Sheet dialog box appears.
Step 6 Enter the fully-qualified URL of an XSL style sheet, or click Browse, navigate to a filename, and click Open.
Step 7 Click OK.
Design Studio creates the project, imports the style sheet, and adds the Style Sheet tab to the window.
Step 8 To view the style sheet, click the Style Sheet tab.
After you create a project, you add web pages to it as described in the "Adding a Page to an XML Project" section.
To add a page to an XML project, perform these steps:
Step 2 Enter the XML page URL in the Address field.
Design Studio opens the requested page in the Browse tab. The XML is formatted according to the XSL style sheet you imported in this project.
If the requested page does not appear, the CTE server or the server for the web page may not be running.
If the page information pane (lower-left portion of window) includes the message "Passes Identifier Rules," see the "Using an Identifier Rule for Multiple Pages" section.
If a Redirection message displays, see the "Handling Page Redirects" section.
Step 3 In the lower-left pane, click Add Page to Project.
Design Studio adds the XML page to the project and displays it in the View Original tab, formatted according to the imported XSL style sheet.
Step 4 Create identifier rules for the pages as described in the "Identifying a Page" section.
Step 5 Save and publish XML projects just like HTML projects.
After you change and validate an XSL style sheet in another application, update it in Design Studio.
To update an XSL style sheet, perform these steps:
Step 2 Choose Update Style Sheet from the shortcut menu.
![]()
![]()
![]()
![]()
![]()
![]()
![]()
![]()
Posted: Mon Aug 18 16:34:04 PDT 2003
All contents are Copyright © 1992--2003 Cisco Systems, Inc. All rights reserved.
Important Notices and Privacy Statement.