|
|

Table Of Contents
Replacing the CompactFlash in the VPN 3000 Series Concentrator
Shutting Down and Powering Off
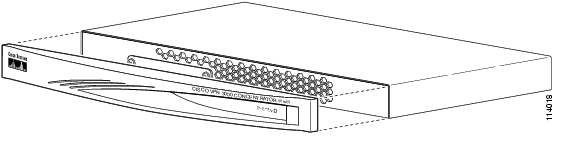
Replacing the CompactFlash in the VPN 3000 Series Concentrator
Because of a manufacturing process problem, some VPN 3005 Concentrators might have corrupted file systems. This defect might result in failure to save certificates and configuration files. The affected VPN 3005 Concentrators include, but are not limited to, those with serial numbers in the range CAM0708xxxx through CAM0750xxxx, where xxxx is unique suffix for each Concentrator (CSCed68739, CSCed72955).
You might be experiencing this problem if you observe the following symptoms:
•
In VPN 3000 Series Concentrator software versions prior to Release 4.1.1, a failure to save certificates to the file system generates an SSL event and displays certificate errors under the Administration | File Management menu.
•
•
Follow these instructions to replace the CompactFlash in the VPN 3005 Concentrator.
Before You Begin
Save the current VPN Concentrator configuration file and copy it to a remote system before you proceed. See the Administration | File Management | TFTP Transfer screen in the VPN Concentrator Manager.
Parts/Cisco Supplies
The upgrade kit includes these parts:
•
•
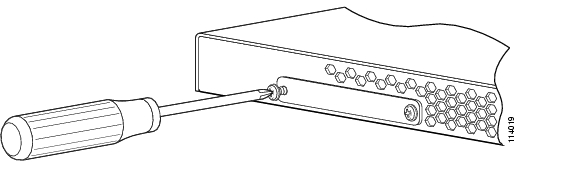
Tools You Need
No. 2 Phillips screwdriver.
Shutting Down and Powering Off
Note: Photos are only for reference. Line drawing will replace these in the actual document.
Shut down and power off the VPN Concentrator before you install the CompactFlash card.
Step 1
Step 2
Step 3
Step 4
Step 5
Warning
Step 6
Step 7
Step 8
Step 9
Note
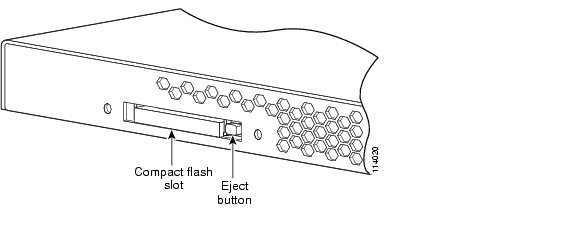
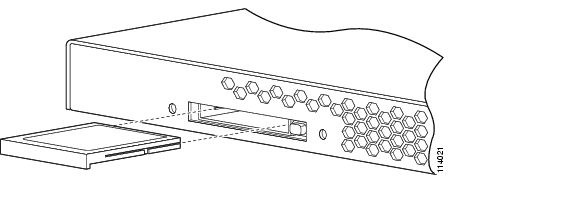
The CompactFlash is fully inserted when the Eject button and the CompactFlash are flush.Step 10
Step 11
Step 12
Step 13
Step 14
Troubleshooting
If you see the message: "Boot ROM found no IDE devices", or if the unit does not complete the boot process to the login prompt, verify that the CompactFlash is properly inserted.
Copyrights and Trademarks
CCIP, CCSP, the Cisco Arrow logo, the Cisco Powered Network mark, Cisco Unity, Follow Me Browsing, FormShare, and StackWise are trademarks of Cisco Systems, Inc.; Changing the Way We Work, Live, Play, and Learn, and iQuick Study are service marks of Cisco Systems, Inc.; and Aironet, ASIST, BPX, Catalyst, CCDA, CCDP, CCIE, CCNA, CCNP, Cisco, the Cisco Certified Internetwork Expert logo, Cisco IOS, the Cisco IOS logo, Cisco Press, Cisco Systems, Cisco Systems Capital, the Cisco Systems logo, Empowering the Internet Generation, Enterprise/Solver, EtherChannel, EtherSwitch, Fast Step, GigaStack, Internet Quotient, IOS, IP/TV, iQ Expertise, the iQ logo, iQ Net Readiness Scorecard, LightStream, MGX, MICA, the Networkers logo, Networking Academy, Network Registrar, Packet, PIX, Post-Routing, Pre-Routing, RateMUX, Registrar, ScriptShare, SlideCast, SMARTnet, StrataView Plus, Stratm, SwitchProbe, TeleRouter, The Fastest Way to Increase Your Internet Quotient, TransPath, and VCO are registered trademarks of Cisco Systems, Inc. and/or its affiliates in the United States and certain other countries.
All other trademarks mentioned in this document or Website are the property of their respective owners. The use of the word partner does not imply a partnership relationship between Cisco and any other company. (0401R)
Copyright © 2004, Cisco Systems, Inc.
All rights reserved.
![]()
![]()
![]()
![]()
![]()
![]()
![]()
![]()
Posted: Wed Sep 28 12:51:26 PDT 2005
All contents are Copyright © 1992--2005 Cisco Systems, Inc. All rights reserved.
Important Notices and Privacy Statement.