|
|

This chapter describes how to install the VPN client for the Mac OS X.
The VPN client for Mac OS X runs on any Power Macintosh or compatible computer with the Macintosh operating system Versions 10.1.0 or later and 30 MB of hard disk space.
The VPN client software is available from the Cisco website and is delivered as a zipped file. Only system administrators can obtain and distribute the VPN client software.
To obtain the VPN client software from the system administrator:
Step 2 Expand and extract the zipped file.
Your browser might automatically expand and extract the zipped files. If it does not, double-click the zipped file, or if the file is in a folder, you can use unzip.
The VPN client installer is extracted to your desktop. The zipped file also remains on your desktop.
This section describes how to distribute preconfigured configuration files (user profiles) and GUI preference files to the VPN client installer.
The VPN client uses parameters that must be uniquely configured for each remote user of the private network. Together these parameters make up a user profile, which is contained in a profile configuration file (.pcf file).
 |
Note Refer to the Cisco VPN Client Administrator Guide for information on creating a user profile, configuration file parameters, keywords, and values. |
To distribute custom user profiles to the installer program, place the files inside the installer application in the directory:
CiscoVPN.app/Contents/Resources/
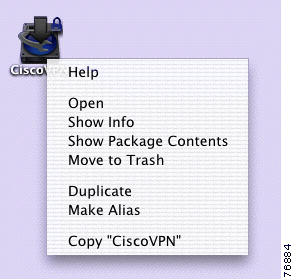
To access the Resources folder, right-click (or Ctrl-click) the VPN client installer icon to access the installer menu (Figure 2-1).
Step 3 Choose Show Package Contents to open the installer directory.
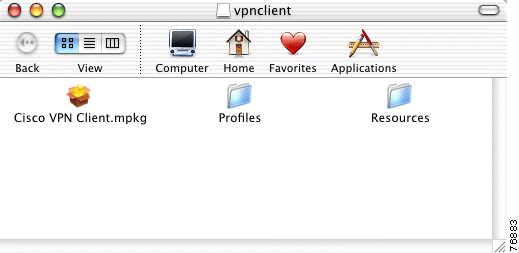
Step 4 Click on the Contents folder.
Step 5 Click on the Resources folder.
Figure 2-2 shows the Resources directory.
Step 6 Copy the configuration files (.pcf files) into the Resources directory.
Any file with a .pcf extension found in this folder is placed in the Profiles directory when the VPN client is installed.
VPN client GUI preferences, such as window locations and sizes, are stored in the file VPNClient.conf.
When you first open the VPN client, the GUI preferences file is populated with default settings. Each time you make changes to the GUI preferences, the VPNClient.conf file is updated and stored.
You can also distribute a preconfigured GUI preference file.
To distribute the preconfigured file, place the VPNClient.conf file inside the installer application in the Resources directory:
CiscoVPN.app/Contents/Resources/
During installation, the file is installed in /etc/CiscoSystemsVPNClient/Resources/VPNClient.conf.
The following sections describe how to install the VPN client software. The VPN client for Mac OS X installer program installs both the graphical user interface and the command-line version of the VPN client.
|
Note You must uninstall any previous version of the VPN client for Mac OS X before you install a new version. For more information, see "Uninstalling the VPN Client" section 2-13. |
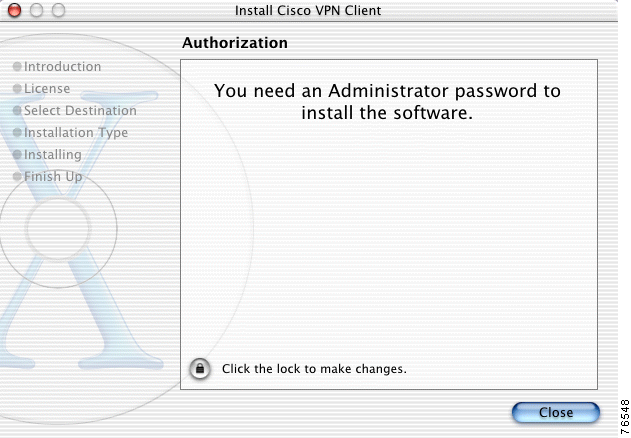
Before you can start the installation process, you verfiy that you have installation privileges.
The Authentication window appears (Figure 2-4). You must have an Administrator password to install the VPN client application.
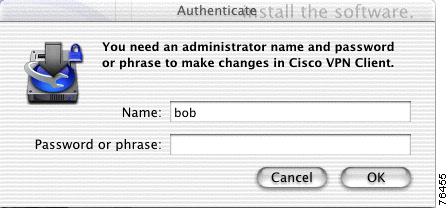
Step 2 Click the lock at the bottom left corner of the Authentication window. The Authenticate dialog box appears (Figure 2-5).
Step 3 Enter your administrator username and a password or challenge phrase.
Step 4 Click OK.
If the authentication is successful, continue to the installation process. Contact your network administrator if you cannot authenticate for installation.
Before you can use the VPN client software, you must complete all of the following steps in the VPN client installation process .
At any time during the installation process, you can go back to a previous step and adjust your selections or restore the default selections.
The installation process includes the following steps:
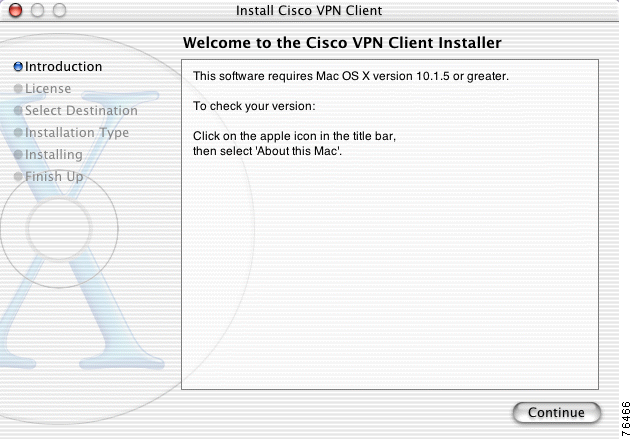
The first window that appears during the installation process is the Introduction window. The right pane of the Introduction window (Figure 2-6) describes the installation process and lists preinstallation recommendations. The left pane displays each of the installation steps. Each completed step is highlighted with a blue bullet.
Click Next to continue or Cancel to quit the installation process.
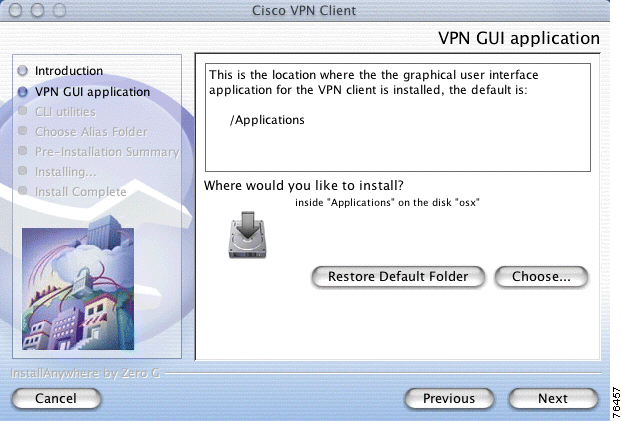
Install the VPN client application in the default folder, /Applications, or choose another folder. If you choose another folder, a browser window appears. Locate a new directory for the VPN client application and click Choose. The new application folder is listed in the VPN GUI Application window (Figure 2-7).
Click Next to continue, Previous to go back to a previous step, or Cancel to quit the installation process.
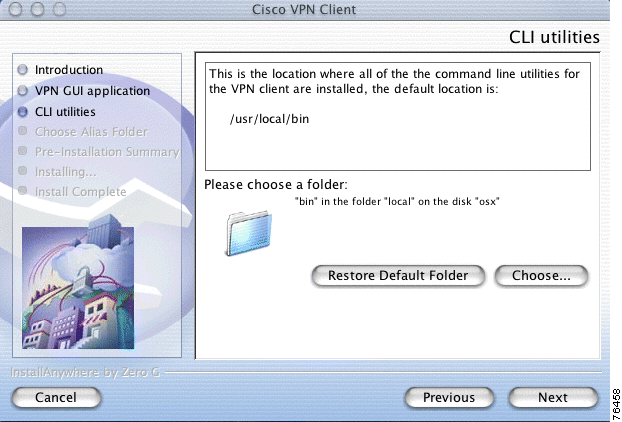
Install the VPN client command-line utilities in the default folder /usr/local/bin, or choose another folder. If you choose another folder, a browser window appears. Locate the directory for the CLI installation and click Choose. The new CLI utilities folder is listed on the CLI Utilities window (Figure 2-8).
|
Note If you choose a different folder for the CLI utilities to reside in, you must update your chosen paths or use the full path when you run the VPN client application. |
|
Note If you are running Macintosh OS Version 10.2, /usr/local/bin is not provided as the default path. |
Click Next to continue, Previous to go back to a previous step, or Cancel to quit the installation process.
The alias folder contains the shortcut to VPN client application. You can store aliases:
Creating aliases is optional. If you do not want to create aliases, select the Don't create aliases radio button.
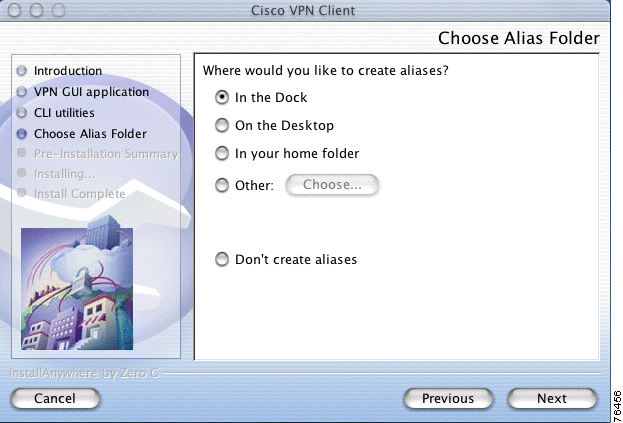
Click Next to continue, Previous to go back to a previous step, or Cancel to quit the installation process.
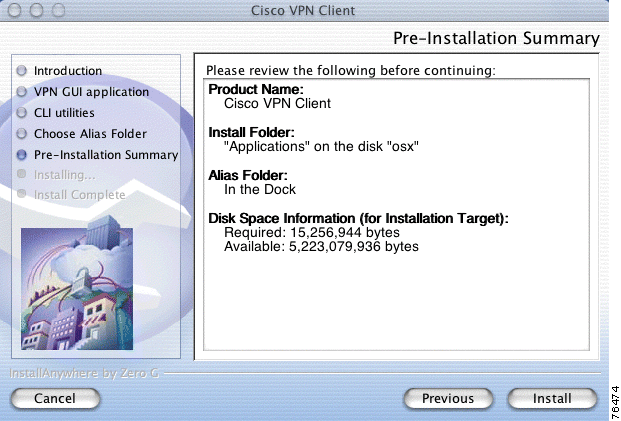
The Preinstallation Summary window (Figure 2-10) lists the installation selection that were chosen in the previous installation steps.
Be sure that all of the installation selections are correct.
During the application installation, the operations taking place are displayed above the blue progress bar at the bottom of the Installing Cisco VPN Client window (Figure 2-11).
The VPN client application installation process includes the following:
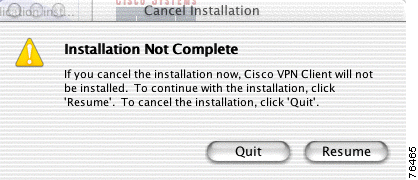
To stop the installation process, click Cancel. A warning prompt appears (Figure 2-12) to remind you that the installation is not complete.
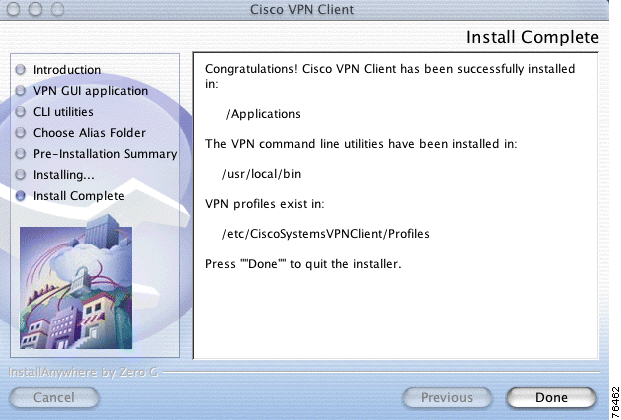
The Install Complete window appears when the installation is complete (Figure 2-13).
To close the installer, click Done .
If you do not receive this confirmation, the installation was not successful. You must start the installation process again from the beginning or contact your network administrator for assistance.
The VPN client installer includes both the graphical user interface and the command-line version of the VPN Client for Mac OS X. You can choose to manage the VPN client using only the command-line.
Use the following commands to start, stop, and restart VPN service:
During the installation process, the application binaries are copied to the specified destination directory.
The following sections describe how to uninstall the VPN client.
|
Note You must uninstall any previous version of the VPN client for Mac OS X before you install a new version. |
To uninstall the VPN client for Mac OS X (CLI version—Release 3.6.x or earlier):
Step 2 You are prompted to remove all profiles and certificates.
To uninstall the VPN client (GUI-based — Release 3.7):
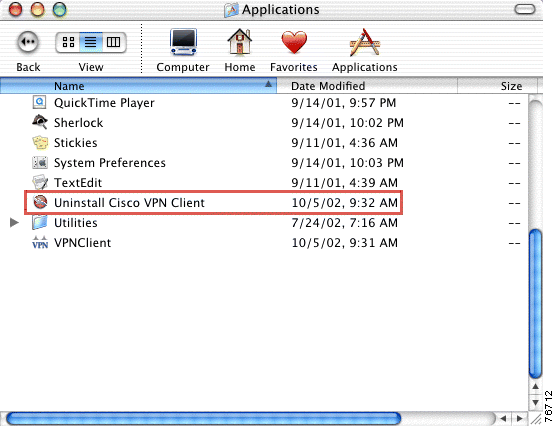
Step 2 Double-click the Uninstall Cisco VPN Client file, located above the Utilities folder (Figure 2-14).
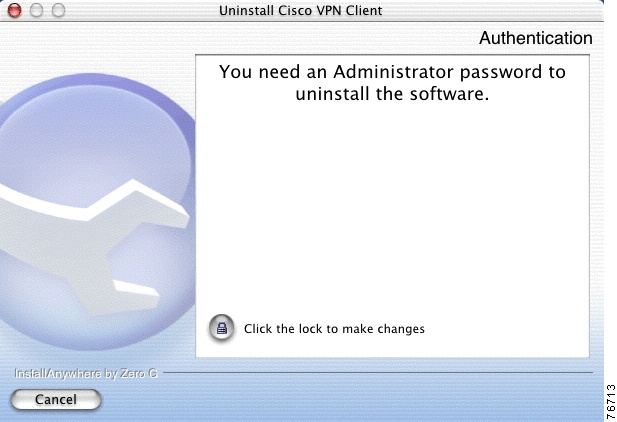
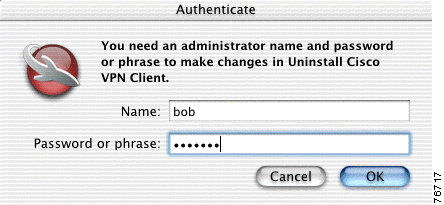
The Authentication window appears (Figure 2-15). You must have an administrator password to uninstall the VPN client.
Step 3 Click the lock at the bottom left corner of the Authentication window. The Authenticate dialog box appears (Figure 2-16).
Step 4 Enter your administrator username and a password or challenge phrase.
Step 5 Click OK. If the authentication is successful, you can continue to uninstall the VPN client. Contact your network administrator if you cannot authenticate for an uninstall.
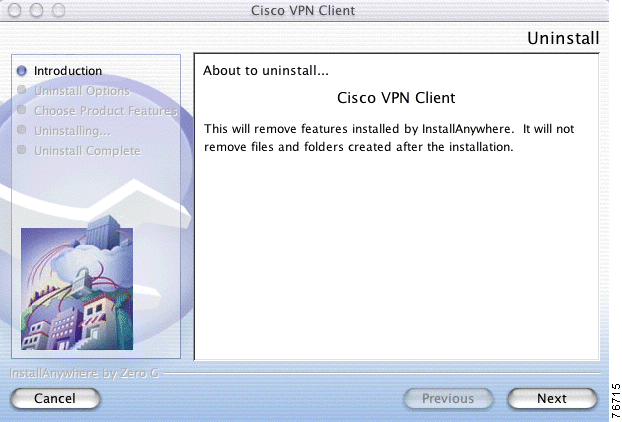
The Uninstall Introduction window appears (Figure 2-17).
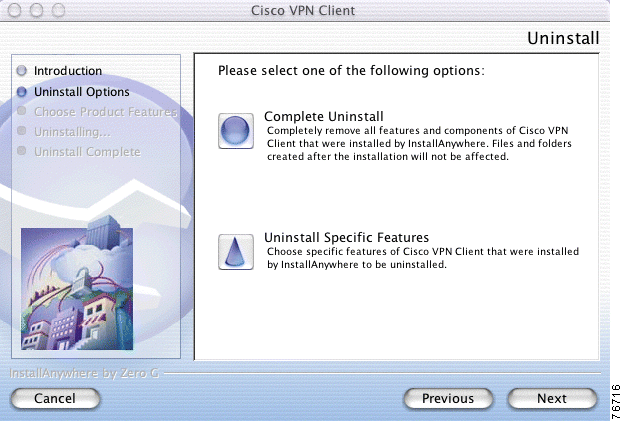
Step 6 Click Next to continue. The Uninstall Options window appears (Figure 2-18).
Step 7 Select your uninstall option. Click Next to continue.
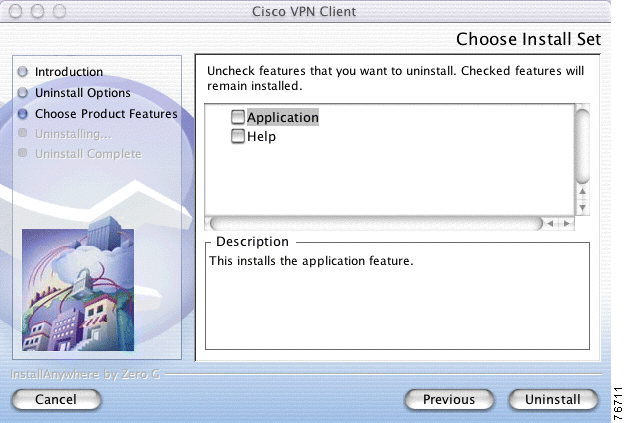
Step 8 Uncheck features to uninstall. Any feature that is checked will remain installed.
Step 9 Click Uninstall. The VPN client application, folders, and aliases are uninstalled.
If an error message appears while you uninstall the VPN client software, contact your network administrator for assistance.
To reinstall the VPN client software, go to the "Installing the VPN Client" section.
![]()
![]()
![]()
![]()
![]()
![]()
![]()
![]()
Posted: Mon Dec 23 16:37:50 PST 2002
All contents are Copyright © 1992--2002 Cisco Systems, Inc. All rights reserved.
Important Notices and Privacy Statement.