|
|

This chapter describes the Baseline View in the Cisco Voice Routing Center (VRC) server application.
The VRC Baseline View provides the currently distributed dial plan and topology for the entire managed network. The baseline dial plan is the currently distributed dial plan.
From the Baseline View you can:
To open the Baseline View, follow these steps:
Step 1 From the main VRC window, choose Open Baseline from the menu. The Baseline View window appears (Figure 4-1).
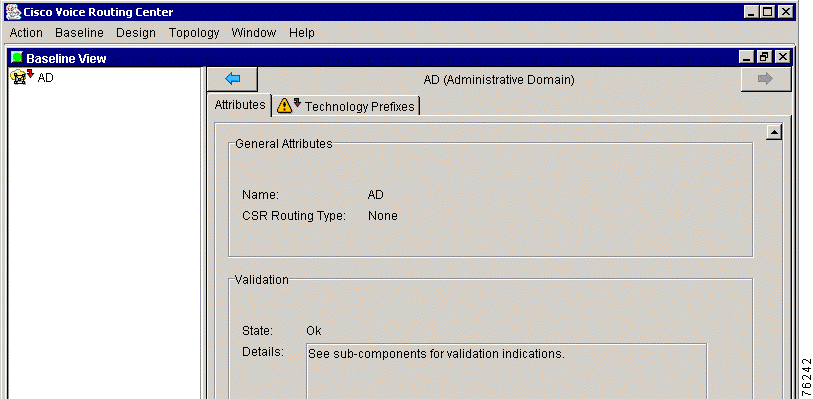
The Baseline View window is divided into two panes.
The following is a list of AD elements and the information required to configure them:
The Export process exports the baseline dial plan to your desktop. This allows you to save the XML file from the browser window. You can upload this saved file to the server using ftp, to the /tftpboot/clientinput directory and then reopen it in a future design session.
To export the baseline dial plan to your desktop, follow these steps:
Step 1 From the Baseline menu, choose Export Baseline.
A dialog box appears and prompts you to confirm your decision.
Step 2 Click OK. A processing window appears. Then the browser window opens.
A copy of the baseline dial plan appears in a browser window. For example, the browser window displays:
<?xml version="1.0" ?> <!DOCTYPE AD (View Source for full doctype...)> - <AD routingType="prefix" exportType="AD" adId="AD0" exportId="AD0"> <TechPrefix description="Voice Gateway" prefix="1#" adDefault="1" techPrefixId="TekPf-1-393928" /> </AD>
This section describes how to distribute the baseline dial plan to the elements in the specified scope. You can distribute the dial plan to a specified scope (the entire AD, a single managed region, or to a single network element).
 |
Note You must be in the Baseline View to distribute the dial plan. |
To distribute a dial plan, follow these steps:
Step 1 Expand the AD to view all elements.
Step 2 Locate the scope that you want to perform a distribution on.
Step 3 Right-click and choose Distribute from the menu. A confirmation dialog box appears and asks you to confirm your decision. Click OK.
Before the distribution takes place, the VRC checks if all network elements receiving the updated dial plan configuration are connected. The distribution process starts at the lowest level in the AD hierarchy to minimize the impact on the AD if a failure occurs. VRC distributes the dial plan to the specified scope.
Step 4 An information dialog box appears when the operation is successful. Click OK.
![]()
![]()
![]()
![]()
![]()
![]()
![]()
![]()
Posted: Wed Oct 2 14:30:41 PDT 2002
All contents are Copyright © 1992--2002 Cisco Systems, Inc. All rights reserved.
Important Notices and Privacy Statement.