|
|

May 1, 1997
These release notes provide information about changes to CiscoWorks Blue Native Service Point 2.0 that are not documented in the CiscoWorks Blue Native Service Point for SOLVE:Netmaster User Guide. Use these release notes to supplement the CiscoWorks Blue Native Service Point for SOLVE:Netmaster User Guide. These release notes contain these sections:
This section contains instructions for installing the service update diskette (Service Upgrade 1) to NSP Version 2.0 for SOLVE:Netmaster. Do not install this Service Update before installing the base NSP Version 2.0 for SOLVE:Netmaster.
Look in the NCL Procedures dataset where NSP is installed. If you find a member named FIXLOG, this service upgrade may have been installed already. If you have any questions about this, or about the contents of FIXLOG, please call Cisco Service for NSP.
This section contains the following subsections:
Table 1 lists the files contained on the NSP Service Upgrade diskette.
| File | Contents |
| NMF1LOAD.CMD | Installation CMD for OS/2 |
| NMFFIX1.TXT | A portion of this document in text format |
| NMF1NCLS.SEQ | Replacement NCL procedures |
| FIXLOG | Current history of fixes |
| NSPAID | NSPAID command prompt panel |
| NSPCCMDS | Command prompt for CIP commands |
| NSPCMDA | Interactive router command panel |
| NSPDB | NSP VSAM support utility command |
| NSPEDMON | Message automation routine |
| NSPIDISP | Interface performance display command |
| NSPIMON | Interface monitoring routine |
| NSPMGRA | Router status display command |
| NSPMGRT | Router extended status display command |
| NSPRGET | Common service routine for executing runcmds |
| NSPRMON | Router monitoring routine |
| NSPRVDIS | VTAM status query routine |
| NSPSCMDS | User show commands menu |
| NSPSRIF | Routine to obtain RIF data from SNA View VSAM data base |
| NMF1PNLS.SEQ | Replacement panels |
| NSPHDLIS | Help panel for NSPDLIST |
| NSPHGP1 | List of commands for NSP |
| NSPHIDSH | Help for interface statistics history |
| NSPHIDSP | Help for interface performance history |
| NSPTDB01 | Help for NSPDB PUT command |
| NSPVSCM2 | Show command user-definition panel |
| NMF1SAMP.SEQ | Samplib |
| NMPNLRP | Sample JCL to restore panels |
Although you can upload the NSP files using different methods, NSP provides an installation utility that automatically uploads the NSP compressed files to an MVS host in binary format to data sets that have a fixed-block record format (RECFM=FB) and an 80-byte record size (LRECL=80). The NSP installation utility uses the SEND command supported by the IBM Communications Manager/2 Release 1.11 (or later) on IBM Operating System/2 (OS/2).
If you are not installing from OS/2 using Communications Manager/2, use the upload utility available with your TN3270 package and ensure that the NSP files are uploaded with a fixed-block, 80-byte record format (RECFM=FB and LRECL=80). This is the required format in which the NSP files must be uploaded to convert them to partitioned data sets during the NSP installation.
You must upload the data sets, shown in Table 2 to MVS. The installation command (NMF1LOAD) requires OS/2 and Communications Manager/2.
| File | Contents | Format |
| NMF1NCLS.SEQ | NCL Procedures | Unloaded Partitioned Data Set |
| NMF1PNLS.SEQ | Panels | Unloaded Sequential Data Set |
| NMF1SAMP.SEQ | Samplib | Unloaded Partitioned Data Set |
To upload the NSP files to an MVS host from OS/2, follow these steps:
Step 1 Start a TN3270 session and log into the MVS Time Sharing Option (TSO).
Step 2 On the TSO main menu panel, type 6 in the Select Option field and press Enter. The TSO Command Processor panel is displayed.
Step 3 Insert the NSP Service Upgrade diskette into the disk drive of your PC.
Step 4 At the OS/2 command prompt, type the letter that represents the drive in which the NSP disk is located and press Enter.
Step 5 At the OS/2 command prompt, type the following command and press Enter:
nmf1load local_disk host_session prefix
Where:
| local_disk | Is the drive in which the NSP disk is loaded. |
| host_session | Is the host emulator session I. |
| prefix | Is the file prefix, if your system requires a prefix (the NSP default prefix is your TSO User ID). If the TSO User ID option is on, do not specify a file prefix. |
Step 6 When the upload process is complete, verify that the NSP files have been uploaded to the MVS host. Return to your TSO session. On the TSO main menu, type 3.4 in the Select Option field, and press Enter. The Data Set List Utility panel is displayed.
In the DSNAME LEVEL field, type userid.nsp* (where userid is your TSO user ID or system prefix) and press Enter. The following NSP data sets should be listed on the DSLIST panel:
| NMF1NCLS.SEQ | NMF1PNLS.SEQ | NMF1SAMP.SEQ |
After you upload the NSP data sets to the MVS host, convert the NSP data sets to partitioned data sets by following these steps:
Step 1 On the DSLIST panel, position the cursor in the Command column to the left of the first data set (NMF1NCLS.SEQ).
Step 2 Type receive inds (/) and press Enter.
Step 3 At the next prompt, press Enter. The partitioned data set should be created.
If the receive command is terminated, type an S in the command column to the left of the data set to display details about the data set. Review the data set details to verify that the data set was uploaded to MVS with a record format of F or FB and a record size of 80.
If these values are correct, type a B in the command column to the left of the data set to browse the NSP data set. The data should be skewed but readable. If you cannot read the data, then either an ASCII or CRLF format may have been used to upload the data set. If these formats were used, repeat the upload procedure as described in the "Uploading the NSP Files" section and ensure that the proper format is used.
Step 4 Press Tab to move to the next file, type receive inds (/), and press Enter.
Step 5 When prompted, press Enter.
Step 6 Repeat Steps 4 and 5 for the remaining NSP data sets.
Step 7 When you have converted all the NSP data sets to partitioned data sets, press F3 to return to the Data Set List Utility. Then press Enter. The DSLIST panel is displayed with a refreshed list of data sets.
In addition to the first three NSP data sets, the list should now include the following data sets:
NETMV1R2.FIX01.NSPNCLS
NETMV1R2.FIX01.NSPPNLS
NETMV1R2.FIX01.NSPSAMP
This section adds the NCL procedures and Panels to SOLVE:Netmaster. When copying the NCL procedures to the user data set, use the replace option.
Step 1 Copy the NCL procedures to the data set that contains NSP V1R2 NCL procedures.
Step 2 Use REPRO to copy the PANELS to the NSPR2 User PANEL library using JCL NMPNLRP that is located in the NSP samplib.
All the NCP procedures and Panels should now be available for use. You need not restart SOLVE:Netmaster. However, you must issue a sysparms unload=cccccc command for each of the following procedures in order to use them.
| NSPAID | NSPCCMDS | NSPCMDA |
|---|---|---|
| NSPDB | NSPEDMON | NSPIDISP |
| NSPIMON | NSPMGRA | NSPMGRT |
| NSPRGET | NSPRMON | NSPRVDIS |
| NSPSCMDS | NSPSRIF |
This section describes documentation changes for installing and configuring NSP Apply these changes to the CiscoWorks Blue Native Service Point for SOLVE:Netmaster User Guide.
In the "Uploading the NSP Files" section of the "Installing and Configuring Native Service Point" chapter of the User Guide, Step 5 on page 3-2 and Step 7 on page 3-3 define the meaning of the prefix argument. The correct information for the prefix argument is as follows:
In the section "Modifying the SOLVE:Netmaster Data Sets" on page 3-6 of the User Guide, Step 2 should also refer to a sample procedure PNALLOC that is supplied in the NSPSAMP data set. You can use the PNALLOC procedure to allocate the VSAM data set needed for the NSP panels when a PNLUSER data set is not available. If you want to add a data set for additional user panels, modify NMINIT as shown in the following sample procedure:
Step 1 In NMINIT, find this block of lines:
IF &PANLUSR = .YES &THEN +
       &DO
       &DD   = PANLUSR
       &DSN  = &&000$NMDSNQ.PANLUSR
       &DISP = SHR
       &GOSUB .ALLOC
       &IF &RETCODE = 0 &THEN +
             UDBCTL OPEN=PANLUSR  ID=PANLUSR
Step 2 Insert the following lines after the block of lines that you found in Step 1:
      &DD   = PANLUSR2
      &DSN  = &&000$NMDSNQ.PANLUSR2
      &DISP = SHR
      &GOSUB .ALLOC
      &IF &RETCODE = 0 &THEN +
      UDBCTL OPEN=PANLUSR2 ID=PANLUSR2
Step 3 Find these lines several pages later in NMINIT:
LIBRARY DEFINE PANLDIS  EDIT=NO  DESC=V3.1 Distributed Panels
   &IF .&PANLUSR = .YES &THEN +
      &DO
Step 4 Add this line immediately after the lines that you found in Step 4:
Step 5 The series of LIBPATH statements should now look like the following sample. The added line is shown in bold.
In the section "Modifying the SOLVE:Netmaster Data Sets" on page 3-7 of the User Guide, look at Steps 5 and 6:
After installing NSP, use the following procedure to confirm that NetMaster can communicate with the router:
Step 1 Add a router and confirm that the router is active to VTAM.
Step 2 Enter the cmd command to display the SOLVE:COMMAND ENTRY panel.
Step 3 To test the unmodified $NWRUNCM command first, enter this command:
Where spname is the service point name of the router.
The amount of output depends upon the router's version and features.
Step 4 Now repeat the preceding operation using the $NWRUNCX command. The $NWRUNCX is case-sensitive and requires that the values for appl= and node= be uppercase characters. The data value is sent to the router just as you entered it; it is not converted to uppercase. In addition to allowing case-sensitive data to be sent to the router, $NWRUNCX puts the output in SHRVARS for processing. NSP uses $NWRUNCX for all its operations. Before you use NSP, ensure that $NWRUNCX works correctly.
Example 1
Both appl= and node= values not entered in uppercase characters:
Example 2
Only node= value not entered in uppercase characters:
Example 3
Both appl= and node= values entered in uppercase characters:
If you receive the following error message from $NWRUNCX:
: N03602 INVALID SYNTAX
N23610 PROCEDURE $NWRUNCX NCLID 00xxxx IN ERROR, STMT NO:
0380100 FOLLOWS:
&IF  GT 0
follow this procedure.
Step 1 Find this line in the $NWRUNCX procedure:
-EXEC $NWDS109 -* FORMAT AND SEND REQUEST 03780000
Step 2 Add these three lines immediately after the line you found in Step 1:
 &SV31TXTRC = &RETCODE                  -* SAVE RETCODE                03781006
 &IF .&RETCODE EQ . &THEN +             -* ERROR - TEST FOR NO RETCODE 03790006
   &GOTO .ERROR                         -* WRITE ERROR MESSAGE AND END 03800000
The information in "Modifying the SOLVE:Netmaster Data Sets" on page 3-8 of the User Guide describes changes to the MSGPROC procedure. While the sample contained in the actual NSPSAMP data set is correct, the example in the User Guide has minor errors. Replace Step 1 with the following version. (The changes are shown in bold.)
Step 1 Open the NMMSGS member (located in the NETMV1R2.NSPSAMP data set) and copy and add the following statements to the SOLVE:Netmaster MSGPROC member (located in the COMMANDS data set in the SOLVE:Netmaster PROC) for the operator who will receive the VTAM messages.
OR
If the any of these statements already exists in the procedure, do not copy and add the above statement, but instead add the following statement after each of the existing labels.
The section "Enabling Automatic Status Update," on page 3-8 of the User Guide, describes how to modify the MSGPROC procedure that lets NSP obtain updated status information automatically. There is an alternate procedure, called NSPEDMON (NSP Event Distribution Services Monitor), provided in NSP. A Netmaster DEFMSG command is used to define a message ID with the event name DELIVERED.590 in NSPEDMON, which then initiates an EDS profile that requests that all SNA messages be sent to this routine. The advantage of this NSPEDMON procedure is that you do not have to modify your version of the MSGPROC or PPOPROC procedure.
The NSPEDMON procedure is set up to support SNA View and NSP router monitoring. If SNA View is not installed on your system, insert a hyphen and asterisk ( -*) in front of the following statement to comment it out. Change this:
-nspsrif &node &netstat -* Update the SNA View func 00630000
to this:
-*-nspsrif &node &netstat -* Update the SNA View func 00630000
To test the NSPEDMON procedure, enter this command:
SUBMIT BMON START NSPEDMON
To stop the NSPEDMON procedure from running, enter these commands:
SH NCL=NMBMON
FLUSH ID=nclid number of NSPEDMON
SYSPARMS UNLOAD=NSPEDMON
To automate the NSPEDMON operation, change the NMREADY member (in the COMMANDS data set in the SOLVE:Netmaster PROC). Find the following line:
SUB BMON NSPEDMON
Then, add this line:
SUB BMON NSPINIT
(This line was added as part of the NSP installation procedure described in "Initializing NSP" on Page 3-17 of the User Guide.
NSP uses the NMVT SNA alerts, which are generated and forwarded to SOLVE:Netmaster, to update the status of routers in an ALERT state. NSP also uses the NMVTs to discover routers automatically and to obtain management data for the routers. For SOLVE:Netmaster to receive and process the NMVT alerts, thus enabling NSP to discover routers on the network automatically and to update router ALERT statuses, complete the following tasks:
To modify SOLVE:Netmaster to receive and process NMVTs generated by Cisco routers, do the following:
Step 1 From the SOLVE:Netmaster Primary Menu panel, select the Network Management (N) option and press Enter. The Netmaster:Primary Menu panel is displayed.
Step 2 Select the NEWS Control Functions (CF) option by typing an s to the left of the option and pressing Enter. The Control Functions panel is displayed.
Step 3 Select the Control File Category Maintenance (6) option and press Enter. The Control File Category Maintenance panel is displayed.
Step 4 Select Modify Control Records (2) and press Enter. The Category Selection panel is displayed.
Step 5 Select Product-Set Identification (001) and press Enter to define the initial processing path for NMVT records generated by Cisco routers. The Product-Set Identification panel is displayed.
Step 6 Select the record on which you want to model the new record and press Enter.
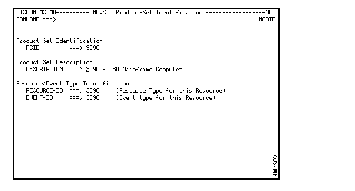
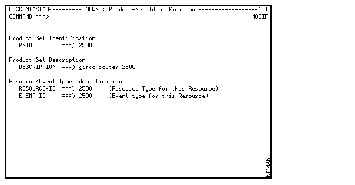
Step 7 Type over the existing entries to enter information in the following fields and press Enter:
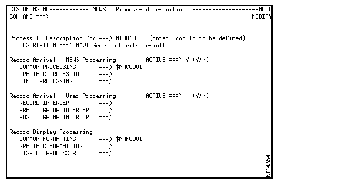
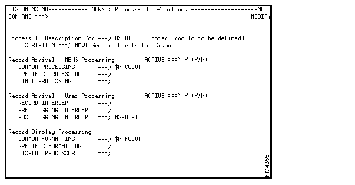
Figure 1 and Figure 2 illustrate an existing record before and after it has been modified for a Cisco 2500 Series router.
Step 8 Repeat Steps 6 and 7 for each series of Cisco routers you are monitoring using NSP.
Step 9 Return to the Category Selection panel and select the Record to Process-Id Conversion (003) option to define the initial process identifier for the records you added.
Step 10 Scroll to and select 41038D (in the RU-HDR column) and press Enter. The Record to Process-Id Conversion panel is displayed.
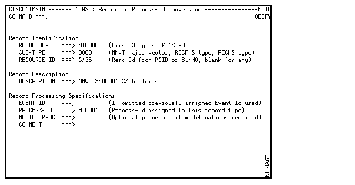
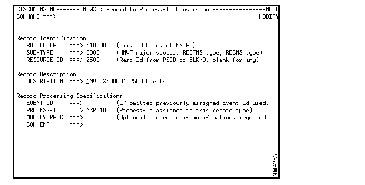
Step 11 Type over the existing entries to enter information in the following fields, and press Enter:
Figure 3 and Figure 4 illustrate an existing record before and after it has been modified.
Step 12 Repeat Steps 11 and 12 for each of the records you defined in Steps 6 and 7.
Step 13 Return to the Category Selection panel and select the Process-Id Definitions (004) option to define the name of the NCL procedure used to process the records you have added. The Process-Id Definitions panel is displayed.
Step 14 Select AL0010 (in the Proc-ID column) and press Enter.
Step 15 Typing over the existing entries, enter information in the following fields and press Enter:
Figure 5 and Figure 6 illustrate an existing record before and after it has been modified.
Step 16 Enter CNM STOP to stop the SOLVE:Netmaster interface.
Step 17 Enter CNM START to start the SOLVE:Netmaster interface.
To modify SOLVE:Operations to receive and process NMVTs generated by Cisco routers, do the following:
Step 1 Access the SOLVE:Operations Primary menu, select the Network Management (NM) option, and press Enter. The Netmaster: Primary Menu panel is displayed.
Step 2 Select the NEWS Control Functions (CF) option by typing an s to the left of the option and pressing Enter. The Control Functions panel is displayed.
Step 3 Select the Control File Maintenance (CF) option, and press Enter. The NEWS: Control File Category Maintenance panel is displayed.
This section describes changes for using NSP utilities.
To print an NSP VSAM data set, follow these steps:
Step 1 Open the NETMV1R2.NSPSAMP data set.
'Locate and open the following data set members, and change the prefix argument to point to the alias as shown below:
| Select and modify this: | To print this: |
|---|---|
| NSPPCFGA | NSPCFGA member |
| NSPPHSTC | NSPHISTC member |
| NSPPHSTH | NSPHISTH member |
| NSPPHSTI | NSPHISTI member |
| NSPPHSTR | NSPHISTR member |
Step 3 Save and submit the member.
NSPSAMP does not contain the sample JCL (NSPPCFGA) to print VSAM files. Instead, you can use the provided JCL that copies (REPROs) the VSAM files to a sequential data set, and then prints the sequential file using standard print services. Printing the VSAM records directly using the IDCAMS method is not recommended.
Use the NSPREPVS and NSPREPSV utilities to back up existing NSP VSAM data sets to sequential data sets and to restore the sequential data sets to NSP VSAM data sets.
To back up an NSP VSAM data set to a sequential data set, follow these steps:
Step 1 Open the NSPREPVS member (located in the NETMV1R2.NSPSAMP data set) and replace the prefix argument and the current member name with the appropriate alias and member name.
Step 2 Save and submit the member.
To restore the sequential data set to an NSP VSAM data set, follow these steps:
Step 1 Open the NSPREPSV member (located in the NETMV1R2.NSPSAMP data set) and replace the prefix argument and the current member name with the appropriate alias and member name.
Step 2 Save and submit the member.
This section contains miscellaneous changes to the reference information in the User Guide.
CiscoWorks Blue Native Service Point 2.0.1 adds the FIXLOG member to the NCO Procedure Library data set. FIXLOG contains a record of the service updates applied to this NSP.
On page D-6 of the User Guide, change global variable NSPINITS to NSPSINT.
The following sections list the Network Management Vector Transports (NMVTs) alerts that are generated by Cisco devices and forwarded to SOLVE:Netmaster.
This section contains a table for each of the following:
In the tables of alerts, the following terms are used:
| Alert ID | The number that identifies the alert |
| Failure Cause | Vertical list of 2-byte codes in hexadecimal number |
| Alert Description | A brief description of the alert |
| Alert ID | Failure Cause | Alert Description |
|---|---|---|
| 32A37F1B | F017 | Poll retry exhausted |
| BD84C4C9 | F01A | DM received |
| D635CA1E | F015 | SNRM received while in NRM |
| B776CA94 | F010 | FRMR received--invalid command/response |
| B3B7D723 | F011 | FRMR received--I-field not allowed |
| BEF4F1FA | F012 | FRMR received--invalid Nr |
| BA35EC4D | F013 | FRMR received--max I-field exceeded |
| 15C2CCE5 | F020 | Protocol error by remote--invalid command/response |
| 1103D152 | F021 | Protocol error by remote--I-field not allowed |
| 1C40F78B | F022 | Protocol error by remote--invalid Nr |
| EABB6A14 | F01B | Protocol error by remote--MAXIN exceeded |
| 0E2DDF11 | F019 | Inactivity timer expired (not being polled) |
| 0AECC2A6 | F018 | XID retry exhausted |
| A472BC48 | F014 | FRMR received--no reason given |
| Alert ID | Alert Description |
|---|---|
| 55BF3E1C | Open failure; 3434--Lobe fault |
| CAF3C58A | Open failure; 3703--TR Fault Domain {Beaconing} |
| D615A61E | Open failure; Install Cause 3704--Duplicate Token Ring address |
| 44D1AD86 | Open failure; User Cause 7101--Removed from Token Ring |
| 016E5F4E | Adapter Open failed |
| A676B230 | Wire fault; 3434--Lobe fault |
| EB61E14F | Auto-removal (adapter removed itself from ring) |
| 59F32622 | Remove cmd rcvd; User Cause 7101--removed from Token Ring |
| Alert ID | Failure Cause | Alert Description |
|---|---|---|
| 5B8F5BA7 | F017 | Poll retry exhausted |
| B1D9A4C5 | F01A | DM received |
| E65B0B7F | F016 | SABME received while in ABME |
| 8A5B2D2C | F010 | FRMR received--invalid cmd/rsp |
| 8E9A309B | F011 | FRMR received--I-field not allowed |
| 83D91642 | F012 | FRMR received--invalid Nr |
| 87180BF5 | F013 | FRMR received--max I-field exceeded |
| 23EF2B5D | F020 | Protocol error by remote (FRMR sent)--invalid cmd/rsp |
| 2C2E36EA | F021 | Protocol error by remote (FRMR sent)--I-field not allowed |
| 216D1033 | F022 | Protocol error by remote (FRMR sent)--invalid Nr |
| 25AC0D84 | F023 | Protocol error by remote (FRMR sent)--max I-field exceeded |
| Alert ID | Alert Description |
|---|---|
| 8B1836C5 | Open failure |
| EB1D6ABB | Remove cmd rcvd; User Cause 7107--removed from CSMA/CD ring |
| 668E036D | Lost carrier |
| A48865FD | Congestion |
| 91FDE97B | Bus inoperative failure |
| Alert ID | Failure Cause | Alert Description |
|---|---|---|
| B5B412E5 {D484ED27} | 20C1 | (DTE) Cleanup Indication Received {Clear/Reset} |
| CDA515B8 | 20C1 | (DTE) Cleanup Indication Received {Restart} |
| D3A1B295 {6A837F72} | 20C2 | (DTE) Cleanup Request Sent {Reset} |
| 056A9521 | 20C2 | (DTE) Cleanup Request Sent {Clear/Restart} |
| F50A02F0 | 20D1 | (DTE) Response timer expired |
| BA5D4659 | 20B2 | (DTE) Protocol violation by remote |
| 4C323FE5 | 20C3 | Diagnostic Packet Received from Network |
| EFF5FAAD | 20C4 | (DCE) Cleanup Indication Sent {Restart/Reset/Clear} |
| FEC0F827 | 20C5 | (DCE) Cleanup Request Received {Restart/Reset/Clear} |
| Alert ID | Failure Cause | Alert Description |
|---|---|---|
| 07B1E788 | F023 | Protocol error by remote (FRMR sent)--max I-field exceeded |
| C0E4E919 | F022 | Protocol error by remote (FRMR sent)--invalid Nr |
| A596712C {CEA222A9} | LAP-B Comms error {Poll retry exhausted} | |
| 985806E2 | LAP-B Comms error {Unexpected DISC received} | |
| 00891F75 | F010 | FRMR received--invalid cmd/rsp |
| CF6F806D | F011 | FRMR received--I-field not allowed |
| F5E40347 | F013 | FRMR received--max I-field exceeded |
| C22CA6B4 | F012 | FRMR received--invalid Nr |
| 1F9CF04A | F020 | Protocol error by remote (FRMR sent)--invalid cmd/rsp |
| 3FAE0180 | F021 | Protocol error by remote (FRMR sent)--I-field not allowed |
| Alert ID | Failure Cause | Alert Description |
|---|---|---|
| 6460D9A9 | F023 | - - |
| 3DA4F8CD | F010 | QFRMR received--invalid cmd/rsp |
| C15B15E8 {9C064C98} | F011 | QFRMR received--I-field not allowed |
| C8C9E4FF {D82E7FD3} | F013 | QFRMR received--max I-field exceeded |
| 11A865CF {21F2236D} | F020 | Protocol error by remote (QFRMR sent)--invalid cmd/rsp |
| 0283E638 {5DBB5F97} | F021 | Protocol error by remote (QFRMR sent)--I-field not allowed |
| AlertID | Fail cause | Description |
|---|---|---|
| e14a3440 | 3200,2081 | TCP/IP alert link lost alert |
| 0c16cc4c | 3200,2058 | HDLC keep alive failed |
| 3f1de404 | 3601,3401,f038 | HDLC alert signal lost |
| edfe42aa | 2055,2060 | CIP LLC connection limit exceeded |
| 13797053 | 3003,2007,1023 | CIP LLC duplicate SAP detected |
| AlertID | Fail cause | Description |
|---|---|---|
| 9e452d9c | 22a1 | TN3270 server APPN-DLUR protocol error |
| 1da682c3 | 22a1 | TN3270 server APPN-DLUR configuration error |
| 05cb2789 | 22a1 | TN3270 server APPN-DLUR configuration error |
| 017153f1 | 22a1 | SNA session setup failure |
| 85fda5f1 | 22a1 | SNA protocol error |
| d9039db7 | 22a1 | TN3270 server capacity exceeded |
| a10ee2d6 | 22a1 | TN3270 server no memory for operation |
This section describes several common problems that you might encounter while installing NSP.
Symptom: Interface data not collected.
Possible Cause 1: NSP not initialized
Reference: (User Guide, page 3-17)
Problem Isolation:
Enter NSPVARS and compare the value fields to those below. Only NSPONUM should not have a value.
| Variable | Value |
|---|---|
| NSPSINT | 07.16.53 02/21/97 NMBMON |
| NSPRINT | 07.14.17 02/21/97 NMBMON |
| NSPAPPL | YES YES YES NO |
| NSPINTI | YES YES YES YES YES YES YES YES |
| NSPMGR | NMBMON |
| NSPONUM | |
| NSPMINV | 00.15 |
| NSPMINI | 00.30 |
| NSPMTHP | 95 |
| NSPMTHM | 10 |
| NSPMOP | .YES |
| NSPRTRH | H NSPRTRM 48 |
| NSPINTH | I NSPINTM 48 |
| NSPRIFH | R NSPRIFM 5 |
| NSPCONH | C NSPCONM 99 |
Possible Cause 2: NSPSETUP does not specify interface
Reference: (User Guide page 3-13)
Problem Isolation:
Step 1 Enter NSPSETUP.
Check first panel for the monitoring status of each application.
| Application | Setting |
| Router Management | (Y :Yes| N :No): YES |
| Interface Monitoring | (Y :Yes| N :No): YES |
| Operator Management | (Y :Yes| N :No): YES |
Check the second panel for the interfaces to be monitored.
| Interface to be Monitored | Setting |
|---|---|
| TokenRing | (Y :Yes| N :No ): YES |
| Ethernet | (Y :Yes| N :No ): YES Serial ( Y :Yes| N :No ): YES |
| FDDI | ( Y :Yes| N :No ): YES Loopback ( N :No | Y :Yes): YES |
| ASYNC | (N :No | Y :Yes): YES Channel ( Y :Yes| N :No ): YES |
| HSSI | (Y :Yes| N :No ): YES |
Possible Cause 3: VSAM Data base for interface history not available. (Page 3-7 Steps 7 to 12)
Reference: (User Guide page 3-13)
Problem Isolation:
Step 1 Try writing a record to the VSAM data base. Enter the following:
nspdb i put xxx this is a test
The results should be displayed as follows:
If the response is as above, the VSAM database is open. If the response is incorrect, the procedure will write the FILERC (file return code).
Step 2 Read the record to confirm that it was written correctly. Enter the following:
nspdb i read xxx
The results should be displayed as follows:
Step 3 Delete the record to remove the test record. Enter the following:
nspdb i del xxx
The results should be displayed as follows:
The NSPDB command is described in the NSP online help. From SOLVE:Netmaster, enter NSPDB ? to obtain more information about the NSPDB NCL procedure.
Customer Problem ID: CSCdj01404 -*@AA 03/04/97
Problem: NSPAID has TRACE on.
Resolution: No- Op &CONTROL TRACE line.
Modules Changed: NSPAID
Problems:
PANEL ERROR - CURSOR LOCATION VARIABLE CHAN NOT FOUND
PROCEDURE NSPCCMDS NCLID 000567 IN ERROR,  STMT NO: LNE00109 FOLLOWS
&PANEL NSPTCIP1
Resolution: Assign CMD to INPUT for help function.
Modules Changed: NSPCCMDS
Problems:
Symptom:
N03602 INVALID SYNTAX
	N23601 PROCEDURE NSPCMDA NCLID 000674 IN ERROR, STMT NO: 07350000 FOLLOWS:
		&MXIDLEN = 16 . 1
	N23601 NSP PROCESSING TERMINATED DUE TO ERROR.  NCLID 000674
Resolutions:
Modules Changed: NSPCMDA
Problem: NSPDB does not create correct error messages.
Resolution: Add error messages to NCL procedure.
Modules Changed: NSPDB
Problem: NSPEDMON does not contain the correct NSP version level.
Resolution: Change version level.
Modules Changed: NSPEDMON
Problem: NSPIDISP incorrect: &&GOTO instead of &GOTO.
Resolution: Change &&GOTO to &GOTO.
Modules Changed: NSPIDISP
Problem: NSPIDISP return incorrect from help option.
Resolution: Correct return label after invoking help.
Modules Changed: NSPIDISP
Problem: NSPAID does not work if -START used.
Resolution: Change -START to &STARTX and make null if using NSPAID.
Modules Changed: NSPIMON
Problems:
Resolutions:
Modules Changed: NSPMGRA
Problem: PFK help (NSPHMGRP) has wrong PF title for PF7
Resolution: Change value of PFK7.
Module Changed: NSPMGRT
Problems:
Symptom: N03602 INVALID SYNTAX
     N23610 PROCEDURE NSPRGET NCLID 002519 IN ERROR, STMT NO: 0206000 FOLLOWS:
&IF 1 GT
     N23601 NSPISTAT PROCESSING TERMINATED DUE TO ERROR.
Resolutions:
Module Changed: NSPRGET
Problem: NSPRMON did not work when NSPAID was used.
Resolution: Change -START to &STARTX and make null if using NSPAID.
Module Changed: NSPRMON
Problem: NSPRVDIS changed status to ACTIV if old status INOP
Resolution: Check VTAM status and do not change if active and old = INOP.
Module Changed: NSPRVDIS
Problem: Commands 2 and 3 failed for NSPSCMDS
Symptoms:
Resolution: Correct spelling on process commands.
Module Changed: NSPSCMDS
Problem: Bad data recorded if SNA View not installed.
Resolution: Exit if bad RC on FILE OPEN or File GET.
Module Changed: NSPSRIF
Problem: Spelling error on panel NSPHDLIS.
Resolution: Change shoe to show.
Panel Changed: NSPHDLIS
Problem: Incorrect product specified on panel NSPHGP1.
Resolution: Change NetView to SOLVE:Netmaster.
Panel Changed: NSPHGP1
Problem: Incorrect instructions on panel NSPHIDSH.
Resolution: Fix instructions.
Panel Changed: NSPHIDSH
Problem: Incorrect instructions on panel NSPHIDSP.
Resolution: Fix instructions.
Panel Changed: NSPHIDSP
Problem: Incomplete title on panel NSPTDB01.
Resolution: Add PUT to title.
Panel Changed: NSPTDB01
Problem: Panel NSPVSCM2 does not have correct instructions.
Resolution: Provide correct instructions for adding new command.
Panel Changed: NSPVSCM2

|
|