|
|

Table Of Contents
Release Notes for Cisco IP Solution Center, 5.0.1
New Device and Platform Support
MPLS Diagnostics Expert (MDE) Updates
Upgrading ISC 5.0 Repository to ISC 5.0.1
Known Caveats in Cisco IP Solution Center 5.0.1
Obtaining Documentation and Submitting a Service Request
Release Notes for Cisco IP Solution Center, 5.0.1
Cisco IP Solution Center (ISC) 5.0.1 is a release with new functionality to be added to ISC 5.0.
All documentation, including this Release Notes for Cisco IP Solution Center, 5.0.1 document and any or all of the parts of the ISC 5.0 and ISC 5.0.1 documentation sets, might be upgraded over time. Therefore, we recommend you access the ISC 5.0 and ISC 5.0.1 documentation at: http://www.cisco.com/en/US/products/sw/netmgtsw/ps4748/tsd_products_support_series_home.html You can also navigate to this documentation by clicking Help on the Home Page of the ISC product.
The information in this Release Notes for Cisco IP Solution Center, 5.0.1 document gives you an overview of this release and helps you understand what has changed since ISC 5.0. Please read this document prior to reading any other manual for ISC.
Contents
The information in this document is organized into the following sections:
•
Contents
•
•
Introduction
Cisco IP Solution Center (ISC) 5.0.1 has new functionality added since ISC 5.0 (see the "New and Changed Information" section) and fixes to problems found in ISC 5.0.1 (see the "Problems Fixed in ISC 5.0.1" section). ISC 5.0.1 includes Cisco MPLS Diagnostics Expert (MDE) 2.1.1. The system recommendations for ISC 5.0.1 (see the "System Recommendations" section) are based on those for ISC 5.0. And the new devices and platforms supported in addition to those supported in ISC 5.0 are listed in the "New Device and Platform Support" section.
Steps for installing ISC 5.0.1 are found in the "Installation Notes" section, and other important information is found in the "Important Notes" section. For problems that were found and might still exist in ISC 5.0.1, see the URL in the "Known Caveats in Cisco IP Solution Center 5.0.1" section.
URLs for base information about ISC 5.0 and an overview and suggested reading order of these documents is given in the Cisco IP Solution Center Getting Started and Documentation Guide, 5.0 ( http://www.cisco.com/en/US/products/sw/netmgtsw/ps4748/
products_documentation_roadmap09186a008081dd8e.html). The ISC 5.0.1 documentation set includes ISC 5.0 documents and some updated information for ISC 5.0.1, as indicated in the "Related Documentation" section.System Recommendations
The system recommendations and requirements listed in Chapter 1, "System Recommendations" of the Cisco IP Solution Center Installation Guide, 5.0
( http://www.cisco.com/en/US/products/sw/netmgtsw/ps4748/
products_installation_guide_book09186a008081d37b.html) are also applicable to ISC 5.0.1.The recommendation is to thoroughly review all this information before even planning your installation, to be sure you have all the hardware and software needed for a successful installation.
Additionally, the new devices and platforms supported are explained in the section, New Device and Platform Support.
New Device and Platform Support
New devices and platforms supported are as follows:
•
•
•
•
L2VPN
The new versions of Cisco IOS XR supported for L2VPN operating in the N-PE device role are:
•
•
The new version of Cisco IOS software supported for L2VPN operating in the N-PE device role is Cisco IOS 12.2(33)SRC (supported on the Cisco 7600 series routers).
MPLS VPN
The new versions of Cisco IOS XR supported for MPLS VPN operating in the N-PE device role are:
•
•
The new version of Cisco IOS software supported for MPLS VPN operating in the N-PE device role is Cisco IOS 12.2(33)SRC (supported on the Cisco 7600 series routers).
MPLS Diagnostics Expert (MDE)
The new versions of Cisco IOS XR supported for MPLS Diagnostics Expert (MDE) are:
•
•
•
The new version of Cisco IOS software supported for MDE operating in the N-PE device role is Cisco IOS 12.2(33)SRC (supported on the Cisco 7600 series routers).
Traffic Engineering Management (TEM)
The new versions of Cisco IOS XR supported for Traffic Engineering Management (TEM) are:
•
•
The new version of Cisco IOS software supported for TEM operating in the N-PE device role is Cisco IOS 12.2(33)SRC (supported on the Cisco 7600 series routers).
New and Changed Information
This section lists the new and changed functionality that was added or updated since ISC 5.0 to this ISC 5.0.1 release. The problems fixed are listed in the "Problems Fixed in ISC 5.0.1" section, and the new device and platforms supported are listed in the "New Device and Platform Support" section. The categories in this section are:
•
•
•
L2VPN and MPLS Updates
The new feature that is available for both L2VPN and MPLS in this release is explained in the section, "Command Language Interface (CLI) Display of IOS XR Configlets".
Command Language Interface (CLI) Display of IOS XR Configlets
By default, service requests for IOS XR devices log the configuration sent to the device in XML format. Therefore, when configlets are viewed for IOS XR devices, they are displayed in raw XML format. ISC now allows you to view the configlet in CLI format. You can enable this feature by setting the DCPL property: DCS/getCommitCLIConfigAfterDownload to true (the default setting). When this property is enabled, you can view the configlets for IOS XR devices in XML format, CLI format, or both.
L2VPN Updates
In addition to the new platform and device support, explained in the "L2VPN" section, the ISC 5.0.1 L2VPN updates since ISC 5.0 are explained in the section "Configuring Transport Mode VLANs on IOS XR Devices".
Configuring Transport Mode VLANs on IOS XR Devices
In ISC 5.0.1, for IOS XR devices that support the TransportMode command, you can configure transport mode VLANs on IOS XR devices independent of the service. Use the new Dynamic Component Properties Library (DCPL) property: Services/Common/pseudoWireVlanMode. When this property is set to true and an IOS XR device is selected, if the device supports the TransportMode command, Transport mode VLAN is configured. (See Appendix C, Property Settings, in the Cisco IP Solution Center Infrastructure Reference, 5.0.1.)
MPLS Updates
In addition to the new platform and device support, explained in the "MPLS VPN" section, the ISC 5.0.1 MPLS updates since ISC 5.0 are as follows:
•
6VPE Updates
Internet Protocol version 6 (IPv6) VPN management (referred to as 6VPE) is supported by ISC 5.0.1 on Cisco 12000 series and CRS-1 (Carrier Routing System) routers on IOS XR. This 6VPE functionality allows an IPv6 VPN to be created on an existing IPv4 MPLS core.
The 6VPE support for IOS XR release 3.5.2 (and later) added in this release is:
•
•
•
•
•
Independent VRF Management
Independent VPN routing/forwarding instance (VRF) management provides the ability to create, deploy, and manage VRF objects independent of MPLS VPN links and service requests. This provides the following advantages:
•
•
•
•
Note
Managing VRFs independently of physical links involves the following tasks, which are covered in detail in the Cisco IP Solution Center MPLS VPN User Guide, 5.0.1:
•
•
•
•
•
Multicast Routing for IPv4 on IOS XR Devices
Multicast VRF deployments for IOS XR devices are supported only for IPv4 (not IPv6 or IPv4+IPv6 deployments). There are no changes in the Graphical User Interface (GUI) (that is, Create VPN window) to support this feature. To enable support, the IOS multicast commands are mapped to equivalent IOS XR commands. Because there are no XML configurations to support multicast routing on IOS XR devices, ISC supports the IOS XR CLIs to enable multicast routing on IOS XR devices.
Template Manager Updates
The Template Manager has been updated to include the following new capabilities:
Note
Searching
You can do the following by choosing Service Design > Templates:
•
•
•
By choosing Service Inventory > Inventory and Connection Manager > Service Request, you can do the following:
•
•
In Use Indicator
You can do the following by choosing Service Design > Templates:
•
•
•
By choosing Service Inventory > Inventory and Connection Manager > Service Request, you can do the following:
•
•
Deletion Validation
You can do the following by choosing Service Design > Templates:
•
•
RBAC Support
You can do the following by choosing Service Design > Templates:
•
•
By choosing Service Inventory > Inventory and Connection Manager > Service Request, you can do the following:
•
•
MPLS Diagnostics Expert (MDE) Updates
In addition to the new platform and device support, explained in the "MPLS Diagnostics Expert (MDE)" section, the ISC 5.0.1 MDE updates since ISC 5.0 are as follows:
•
MPLS Operation, Administration, and Maintenance (OAM) RFC
MPLS Diagnostics Expert (MDE) now diagnoses in Cisco devices and networks that use IETF RFC 4379 compliant Label Switched Path (LSP) ping and LSP traceroute. MDE continues to support the earlier draft (draft 3) available in Cisco IOS. You must use a consistent draft of LSP ping and traceroute across all devices in your network.
Loopback Name
In the MDE PE to PE core test, you can now enter the loopback IP address and you can enter the loopback name, which will be resolved to the IP address. If the entered loopback name does not exist on the router, the new Failure Scenario CF-001.002 is reported, as follows:
Summary - Interface <supplied name> does not exist on PE <PE name>.
Cause - An invalid PE interface has been specified.
Action - Return to test configuration and specify a valid interface.
New Observations
An observation is displayed when troubleshooting of the Layer 3 VPN has been unable to find the cause of the failure and MDE has determined that IP connectivity is broken causing a Label Switched Path (LSP) failure. New in this release is an addition to the observation if there is no route to the remote PE in the Interior Gateway Protocol (IGP) route table of the local PE.
Problems Fixed in ISC 5.0.1
Table 1, " Customer-found Problems Fixed in ISC 5.0.1," describes all the customer-found problems that were fixed in ISC 5.0.1.
Installation Notes
This section contains the following information:
Version Supported
ISC 5.0.1 supports upgrading from ISC 3.2.2, 3.2.2.3, 3.2.2.5, 4.0, 4.0.1, 4.1, 4.1.1, 4.1.2, 4.2, 4.2.1, 4.2.2, 4.2.3, 4.2.4, or 5.0 after ISC 5.0 is installed. If you are upgrading from a version of ISC prior to ISC 3.2.2, see Chapter 2 in the Cisco IP Solution Center Installation Guide, 5.0.
If you have an existing VPNSC 1.x or 2.x repository, you must migrate it to be able to use it with ISC 5.0. Get the migration package, including the documentation that lists limitations, from isc-mktg@cisco.com.
Installation
If you are upgrading from ISC 3.2.2, 3.2.2.3, 3.2.2.5, 4.0, 4.0.1, 4.1, 4.1.1, 4.1.2, 4.2, 4.2.1, 4.2.2, 4.2.3, or 4.2.4, you must install ISC 5.0 first, as explained in the Cisco IP Solution Center Installation Guide, 5.0. On the same server, execute the ISC5.0 Upgrade Script, which is located on the product CD. After upgrading to ISC 5.0, download and install ISC 5.0.1, which is also located at http://www.cisco.com/cgi-bin/tablebuild.pl/isc.
To add ISC to your system, either as a new ISC customer or a customer upgrading from ISC 5.0, follow these steps:
Note
In the intended install location, you need 1.2 GB free for the binaries plus an extra 250 MB for log file growth and the installation of the Cisco CNS Configuration Engine 1.3.x, 1.4, 1.5, or 2.0 software.
In the database directory, you need 1 GB free. For large systems, you should have 4 to 5 GB of space. If the directory has less than 1.2 GB free, you can still install ISC, but you might run out of space.
Step 1
Before proceeding to install ISC 5.0.1, be sure to back up your repository, as explained in Appendix C of the Cisco IP Solution Center Installation Guide, 5.0 ( http://www.cisco.com/en/US/products/sw/netmgtsw/ps4748/
products_installation_guide_book09186a008081d37b.html).Step 2
Note
Step 3
Step 4
gunzip -c isc-5.0.1.tar.gz | tar xf -Step 5
cdrom>./install.shThe ISC software is installed by default in the /opt/isc-5.0.1 directory or a directory set up as follows.
If you are upgrading ISC from ISC 5.0, make sure that ISC is shut down completely. Then do one of the following:
a.
–
tar cvf <directory_name>.tar /opt/<directory_name>
–
-or-
b.
For example, if you are upgrading from ISC 5.0 to ISC 5.0.1 and the ISC installation is under the directory /opt/isc-5.0, then install ISC 5.0.1 in the same directory and rename it to /opt/isc-5.0.1, with steps like the following:
–
tar cvf isc-5.0.tar /opt/isc-5.0
–
mv /opt/isc-5.0 /opt/isc-5.0.1
–
-or-
c.
For example, if you are upgrading from ISC 5.0 to ISC 5.0.1and the ISC 5.0 installation is under the directory /opt/isc-5.0, then install ISC 5.0.1 in a new directory /opt/isc-5.0.1, with steps like the following.
–
mkdir /opt/isc-5.0.1
–
cp -r /opt/isc-5.0/Repository /opt/isc-5.0.1
–
Step 6
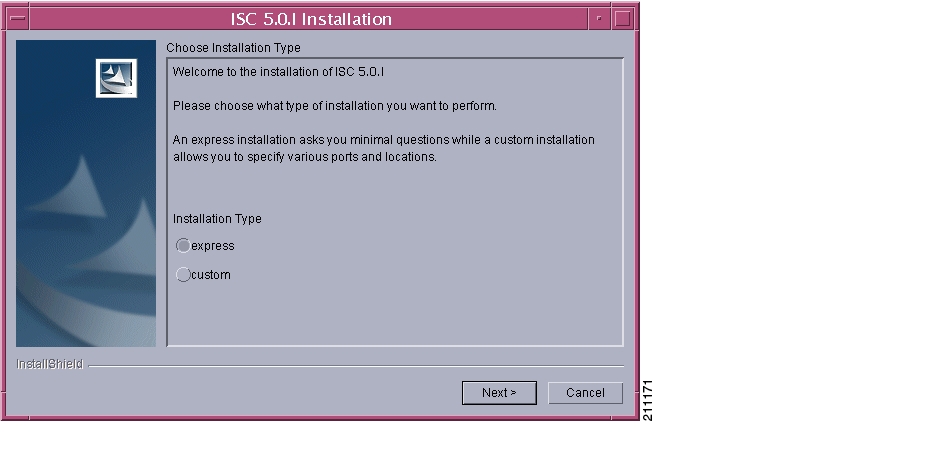
When you click express, you have a minimal number of choices to make. When you click custom, you can specify various ports and locations and you can change the watermark level for available disk space.
Figure 1 Choose Installation Type
Step 7
Note
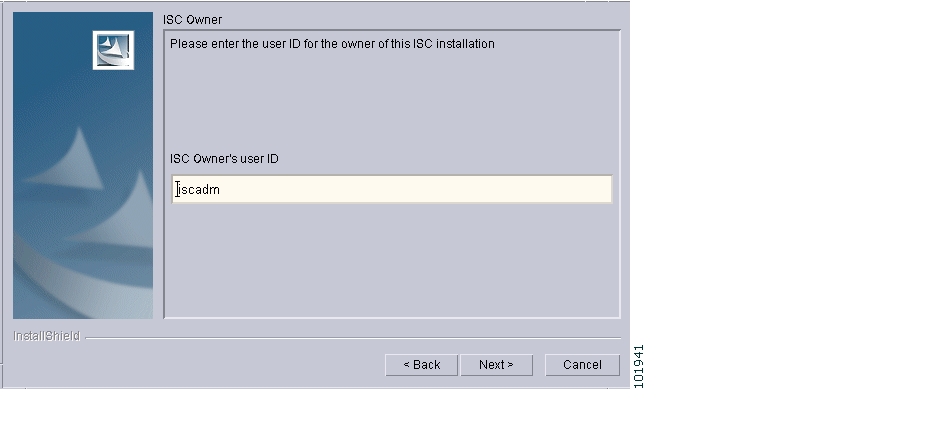
Figure 2 Choose ISC Owner
Note
Step 8
Note
Figure 3 Specify Directory Location
Step 9
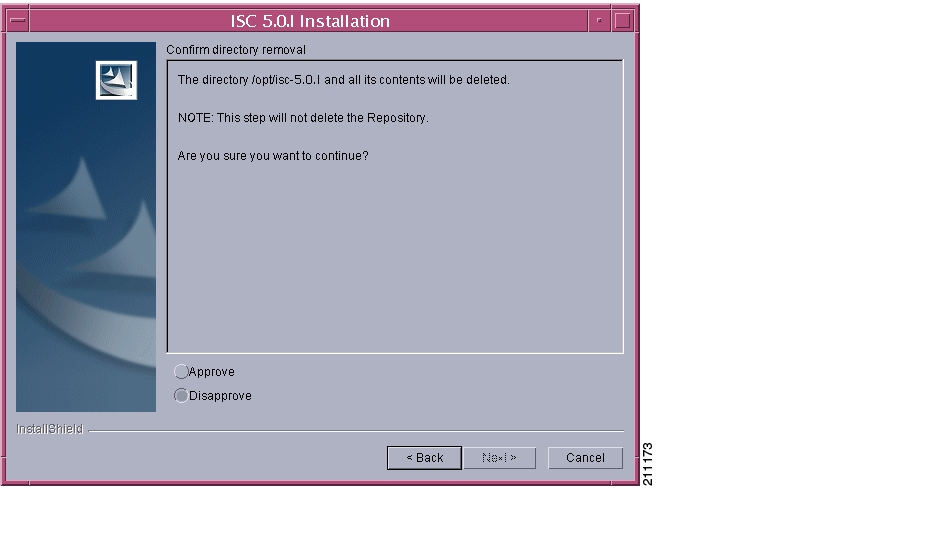
In Figure 4, " Confirm Directory Removal," if the directory you chose already exists and you must click the default radio button Disapprove, you cannot proceed. You must click Back and return to Step 8.
Be very careful. If you click the radio button Approve, you will overwrite the contents in the existing directory. Click Next.
Figure 4 Confirm Directory Removal
Step 10
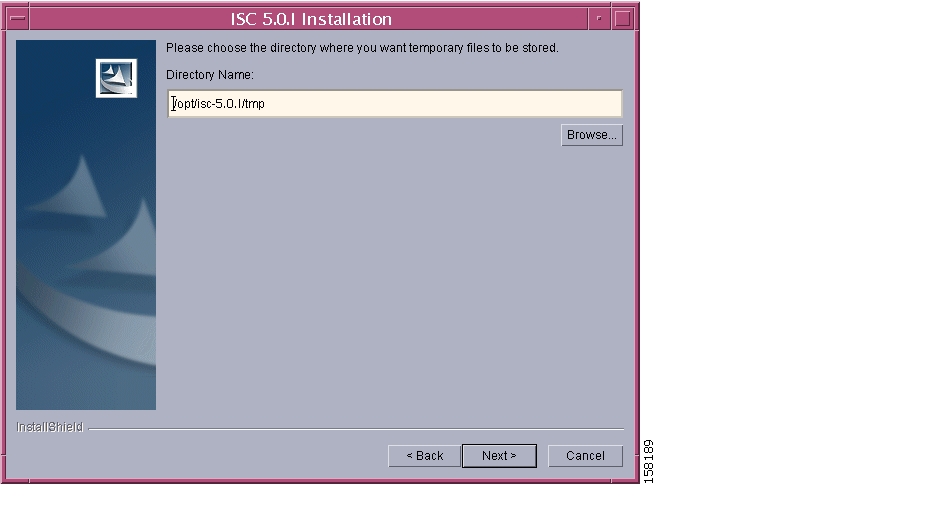
Figure 5 Choosing the Directory for Temporary Files
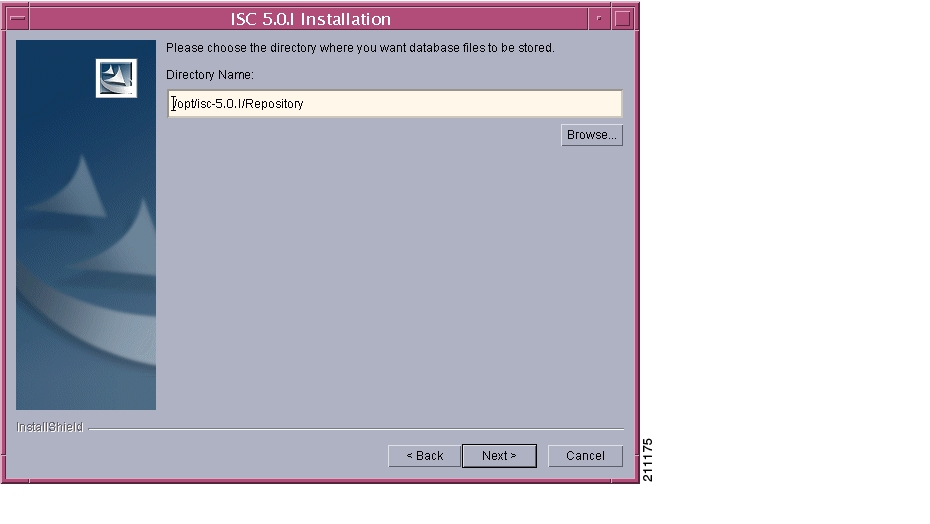
Step 11
Figure 6 Where to Store Database Files
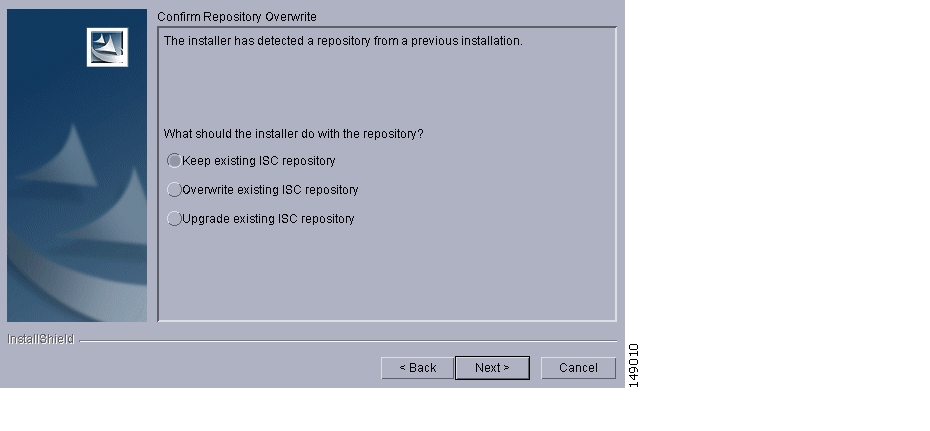
Step 12
When you click Keep existing ISC repository, proceed to Step 13.
When you click Overwrite existing ISC repository, proceed to Step 14.
When you click Upgrade existing ISC repository, proceed to Step 15.
Figure 7 Repository Choices
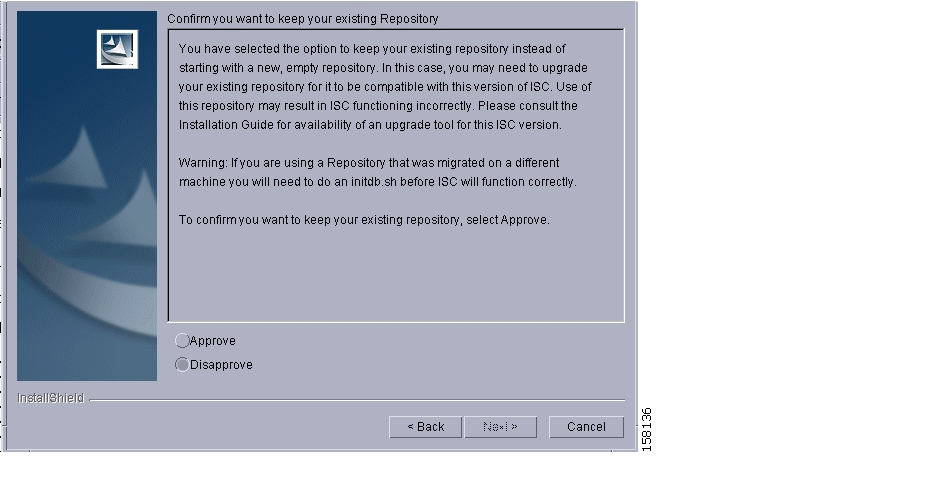
Step 13
Note
Click Next and proceed to Step 18.
Figure 8 Confirmation of Keeping Existing ISC Repository
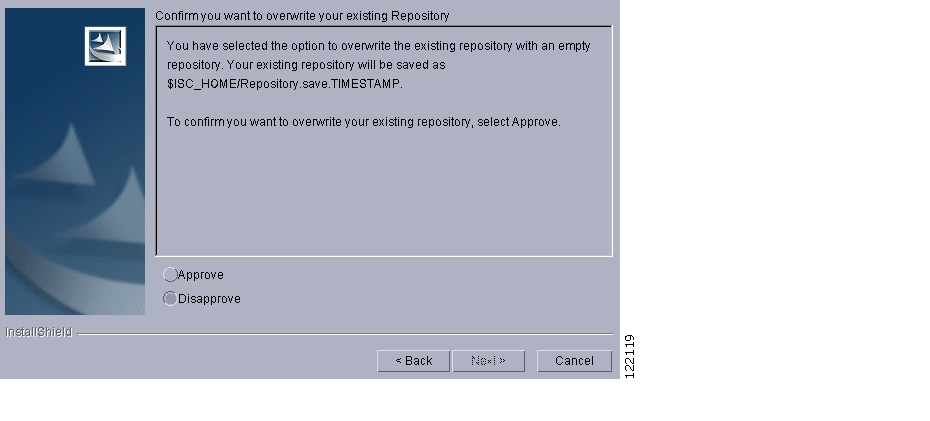
Step 14
Click Next and proceed to Step 18.
Figure 9 Confirmation of Overwriting Existing ISC Repository
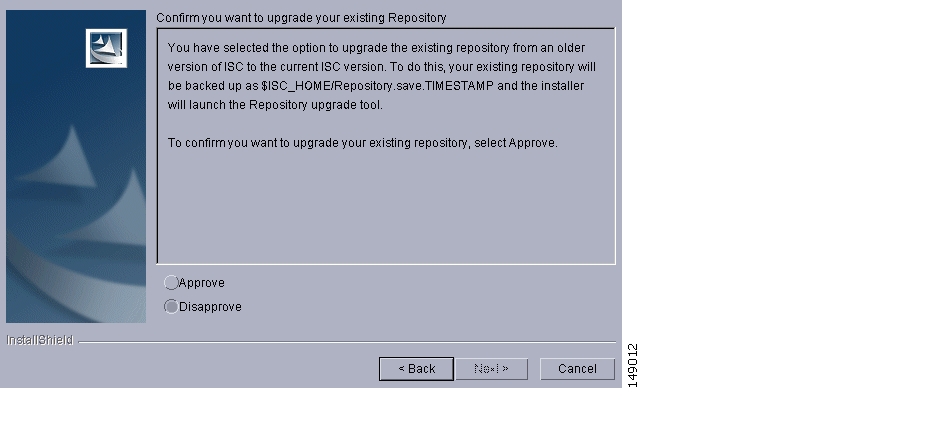
Step 15
Click Next and proceed to Step 18.
Figure 10 Confirmation of Upgrading Your ISC Repository After Installation
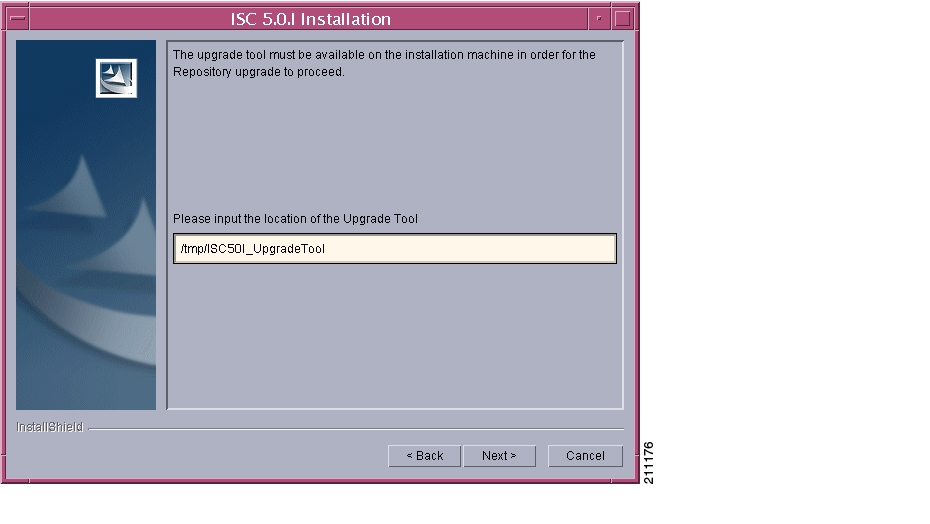
Step 16
Figure 11 Location of Upgrade Tool
Step 17
Figure 12 Invalid Location of Upgrade Tool
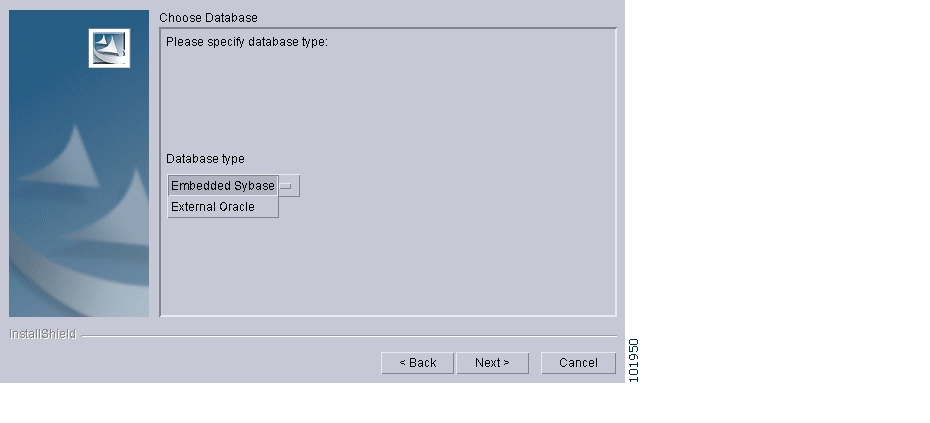
Step 18
Note
Note
Figure 13 Choosing a Database
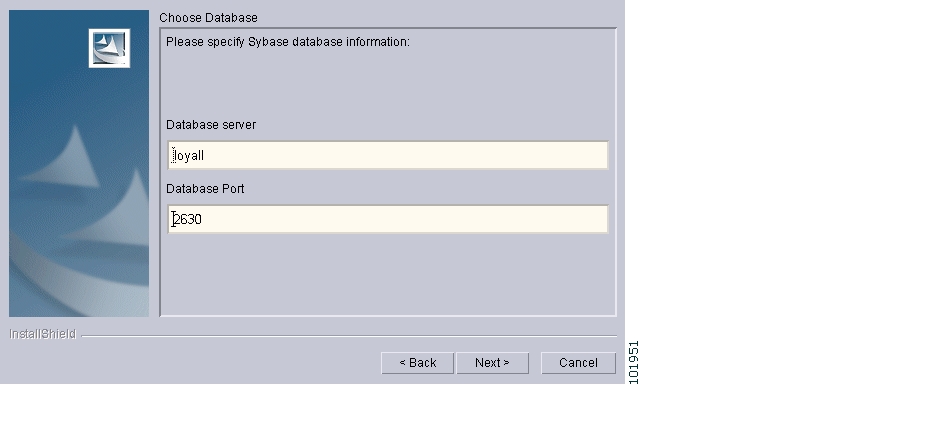
Step 19
If you chose External Oracle in Step 13, proceed to Step 20.
Figure 14 Choosing a Database—Sybase
Step 20
Note
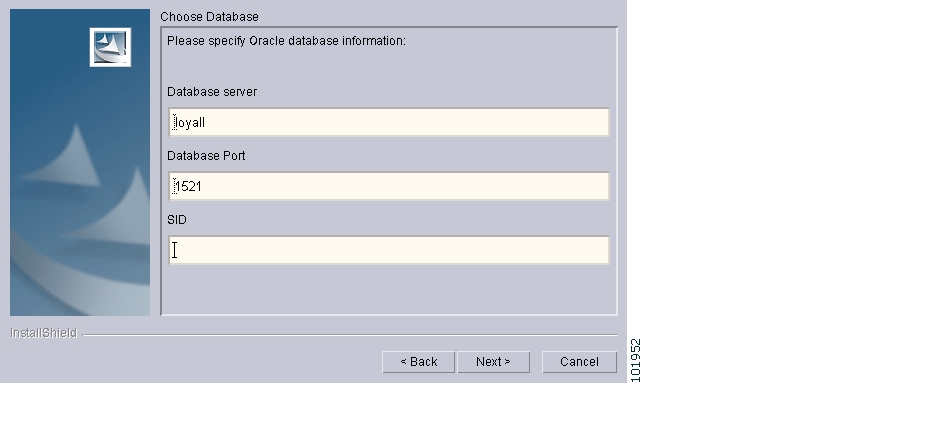
Figure 15 Choosing a Database—Oracle
Step 21
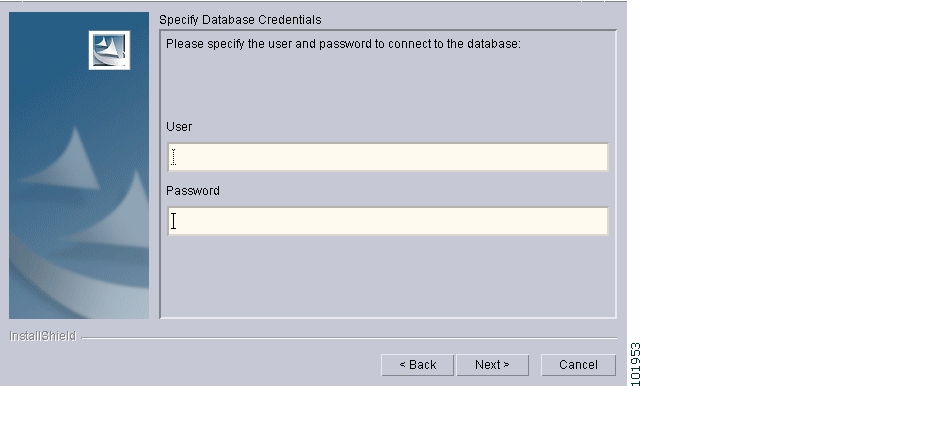
Figure 16 Specifying Database Credentials
Step 22
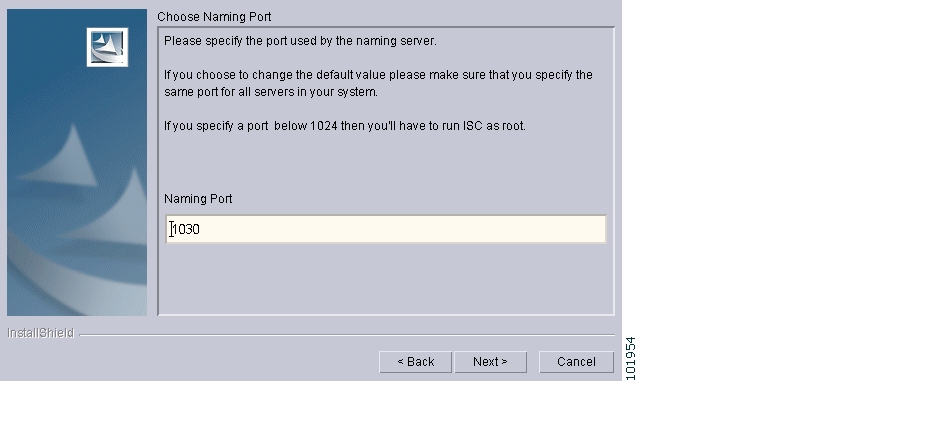
Note
Figure 17 Specify the Port Used by the Naming Server
Step 23
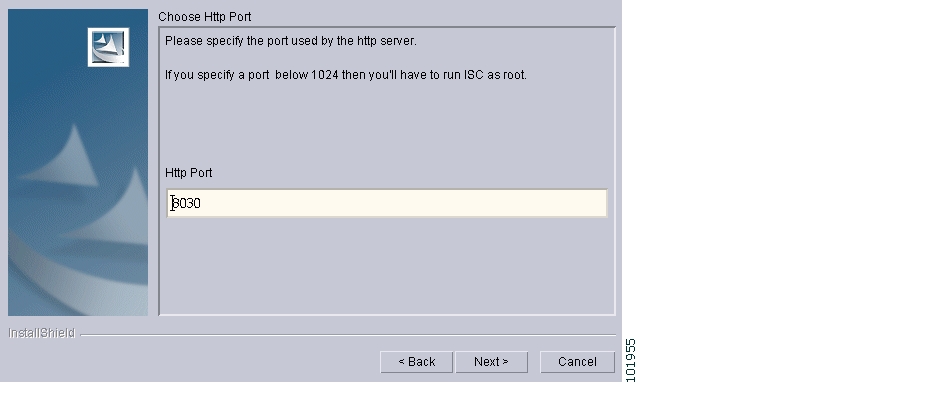
Note
Figure 18 Choose HTTP Port
Step 24
Note
Note
Figure 19 Choose HTTPS Port
Step 25
Note
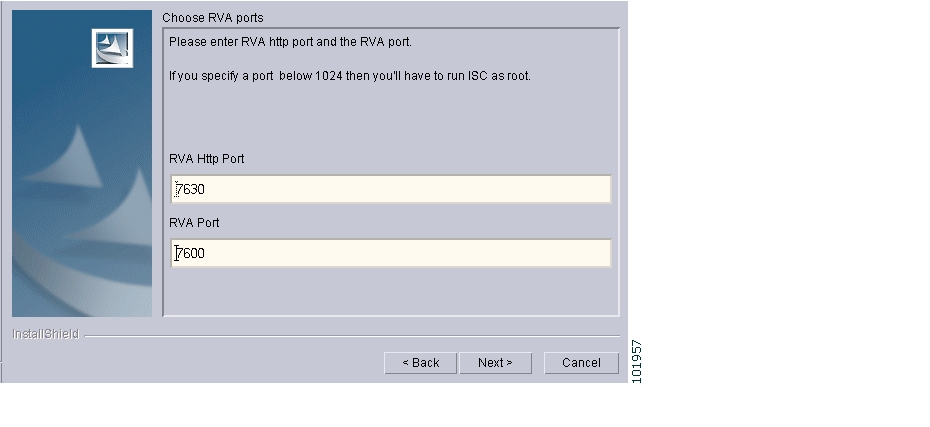
Figure 20 Choose RVA Ports
Step 26
Note
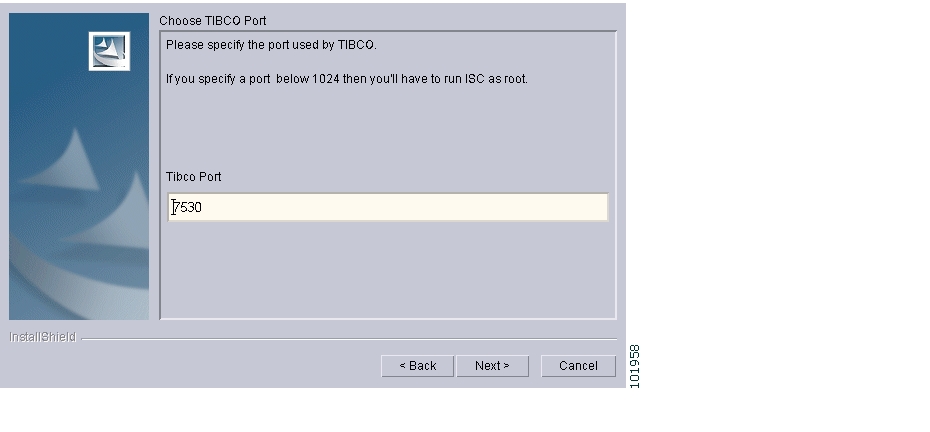
Figure 21 Choose TIBCO Port
Step 27
Step 28
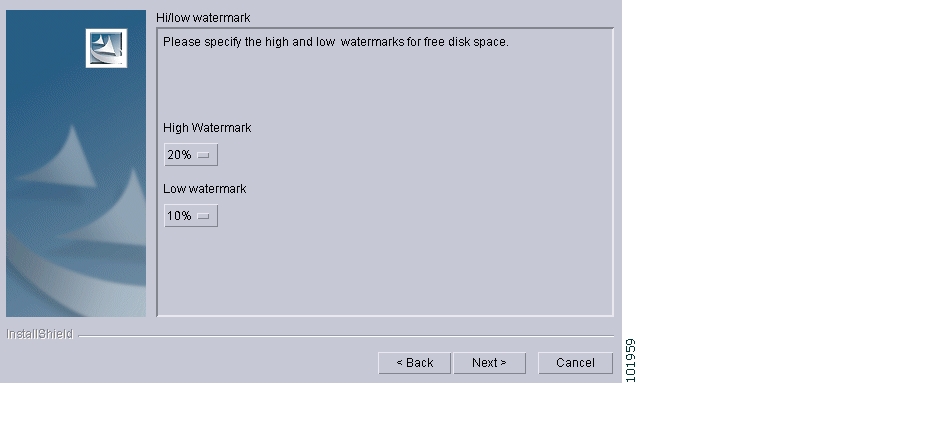
Figure 22 Setting Watermarks for Available Disk Space
Step 29
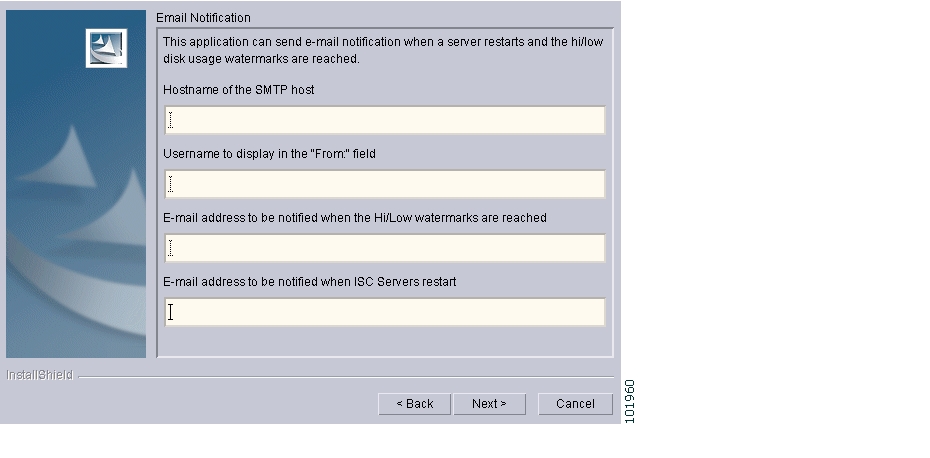
•
•
•
•
Note
Then click Next.
Figure 23 Setting E-mail Address for Receiving Watermark Information
Step 30
Step 31
To review the log message, click Back.
If there was truncation of data, reinstall and add two spaces at the end of each field for which you have modified the entry.
Step 32
Step 33
Step 34
a.
If sh or ksh shell: . $ISC_HOME/bin/vpnenv.sh
If csh shell: source $ISC_HOME/bin/vpnenv.csh
b.
wdclient status
For more information about WatchDog commands, see the Cisco IP Solution Center Infrastructure Reference, 5.0.1.
Step 35
Step 36
Step 37
Step 38
Step 39
Note
Upgrading ISC 5.0 Repository to ISC 5.0.1
If you have an ISC 5.0 Repository, you use the same upgrade procedure steps independent of whether your repository is a Sybase or Oracle repository.
Note
Upgrade your ISC 5.0 repository as follows:
Step 1
Step 2
gzip -d < ISC501_UpgradeTool.tar.gz | tar xvf -
Step 3
If sh or ksh shell: . $ISC_HOME/bin/vpnenv.sh
If csh shell: source $ISC_HOME/bin/vpnenv.csh
Step 4
stopall
Step 5
cd ISC501_UpgradeTool
./upgradeISCSchema.sh <ISC home>
where: <ISC home> is the full pathname of the ISC home directory.
Step 6
Note
Uninstall
Uninstall the server as follows:
Step 1
Step 2
Step 3
Step 4
For a sh or ksh shell:
. bin/vpnenv.shFor a csh shell:
source bin/vpnenv.cshStep 5
uninstall.shThis command removes all files from the installation directory. This command also removes the database and its contents. Database backups are not removed if they reside in a different directory from the installation directory.
Important Notes
1.
2.
3.
4.
5.
Known Caveats in Cisco IP Solution Center 5.0.1
To find known caveats in Cisco IP Solution Center, use the following URL:
http://tools.cisco.com/Support/BugToolKit
You must log in to Cisco.com.
You can search for specific bugs or search for a range by product name. This tool enables you to query for keywords, severity, range, or version.
The results display bug ID and title, found-in version, fixed-in version, and status. The bug ID is a hyperlink to detailed information for the bug ID's product, component, severity, first found-in, and release notes.
The results could be displayed in a feature matrix or spreadsheet.
Related Documentation
The entire documentation set for Cisco IP Solution Center, 5.0.1 can be accessed at:
http://www.cisco.com/en/US/products/sw/netmgtsw/ps4748/
tsd_products_support_series_home.html
Tip
The following documents comprise the ISC 5.0.1 documentation set.
General documentation (in suggested reading order)
•
•
http://www.cisco.com/en/US/products/sw/netmgtsw/ps4748/
prod_release_note09186a00809330fe.html•
•
•
Application and technology documentation (listed alphabetically)
•
http://www.cisco.com/en/US/products/sw/netmgtsw/ps4748/
products_user_guide_book09186a008081c7fb.html•
http://www.cisco.com/en/US/products/sw/netmgtsw/ps4748/
products_user_guide_book09186a0080932257.html•
http://www.cisco.com/en/US/products/sw/netmgtsw/ps4748/
products_user_guide_book09186a008081d385.html•
•
http://www.cisco.com/en/US/products/sw/netmgtsw/ps4748/
products_user_guide_book09186a008081d364.htmlAPI Documentation
•
•
Note
Obtaining Documentation and Submitting a Service Request
For information on obtaining documentation, submitting a service request, and gathering additional information, see the monthly What's New in Cisco Product Documentation, which also lists all new and revised Cisco technical documentation, at:
http://www.cisco.com/en/US/docs/general/whatsnew/whatsnew.html
Subscribe to the What's New in Cisco Product Documentation as a Really Simple Syndication (RSS) feed and set content to be delivered directly to your desktop using a reader application. The RSS feeds are a free service and Cisco currently supports RSS version 2.0.
CCDE, CCVP, Cisco Eos, Cisco StadiumVision, the Cisco logo, DCE, and Welcome to the Human Network are trademarks; Changing the Way We Work, Live, Play, and Learn is a service mark; and Access Registrar, Aironet, AsyncOS, Bringing the Meeting To You, Catalyst, CCDA, CCDP, CCIE, CCIP, CCNA, CCNP, CCSP, Cisco, the Cisco Certified Internetwork Expert logo, Cisco IOS, Cisco Press, Cisco Systems, Cisco Systems Capital, the Cisco Systems logo, Cisco Unity, Collaboration Without Limitation, Enterprise/Solver, EtherChannel, EtherFast, EtherSwitch, Event Center, Fast Step, Follow Me Browsing, FormShare, GigaDrive, HomeLink, Internet Quotient, IOS, iPhone, IP/TV, iQ Expertise, the iQ logo, iQ Net Readiness Scorecard, iQuick Study, IronPort, the IronPort logo, LightStream, Linksys, MediaTone, MeetingPlace, MGX, Networkers, Networking Academy, Network Registrar, PCNow, PIX, PowerPanels, ProConnect, ScriptShare, SenderBase, SMARTnet, Spectrum Expert, StackWise, The Fastest Way to Increase Your Internet Quotient, TransPath, WebEx, and the WebEx logo are registered trademarks of Cisco Systems, Inc. and/or its affiliates in the United States and certain other countries.
All other trademarks mentioned in this document or Website are the property of their respective owners. The use of the word partner does not imply a partnership relationship between Cisco and any other company. (0801R)
Any Internet Protocol (IP) addresses used in this document are not intended to be actual addresses. Any examples, command display output, and figures included in the document are shown for illustrative purposes only. Any use of actual IP addresses in illustrative content is unintentional and coincidental
Copyright © 2008 Cisco Systems, Inc. All rights reserved.
![]()
![]()
![]()
![]()
![]()
![]()
![]()
![]()
Posted: Thu Feb 21 10:54:09 PST 2008
All contents are Copyright © 1992--2008 Cisco Systems, Inc. All rights reserved.
Important Notices and Privacy Statement.