|
|

Table Of Contents
Configuring Cisco BTS 10200 Components
Configuring a Cisco BTS 10200 EMS Server
Adding a Component to the Cisco BTS 10200 Configuration
Editing a Component in the Cisco BTS 10200 Configuration
Deleting a Component from the Cisco BTS 10200 Configuration
Checking the Status and Controlling Components
Configuring Cisco BTS 10200 Components
This chapter contains the following topics:
•
Configuring a Cisco BTS 10200 EMS Server
•
•
•
•
Configuring a Cisco BTS 10200 EMS Server
Use this procedure after you have added a new Cisco BTS 10200 EMS server to the Cisco EPOM inventory. (See the "Adding a Cisco BTS 10200 EMS Server" section on page 3-13.)
Step 1
a.
b.
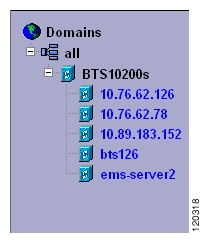
You see the Cisco BTS 10200 EMS servers currently in the inventory. In this example, there are two servers: ems server and ems server 3.
Step 2
Step 3
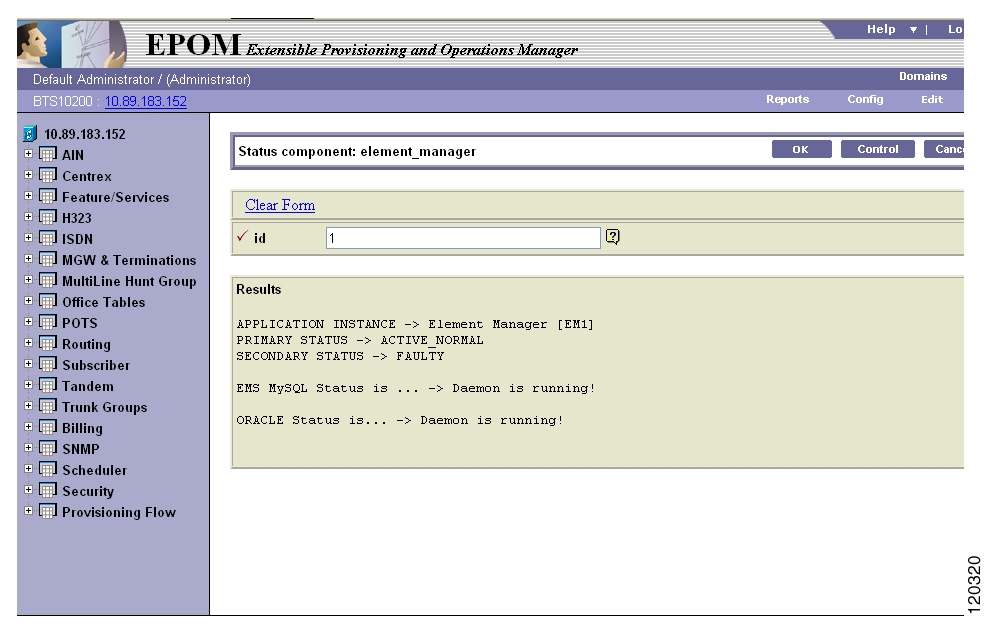
The navigation pane shows the Configuration tree, and the content area shows the status of the selected Cisco BTS 10200 EMS server.
Note
Step 4
Adding a Component to the Cisco BTS 10200 Configuration
Tip
Add components to the Cisco EPOM inventory to build a managed network. The device information includes static and dynamic selections to other parts of the configuration. Follow this example to add a dial plan.
Step 1
Step 2
The Cisco BTS 10200 Component Status window opens.
Step 3
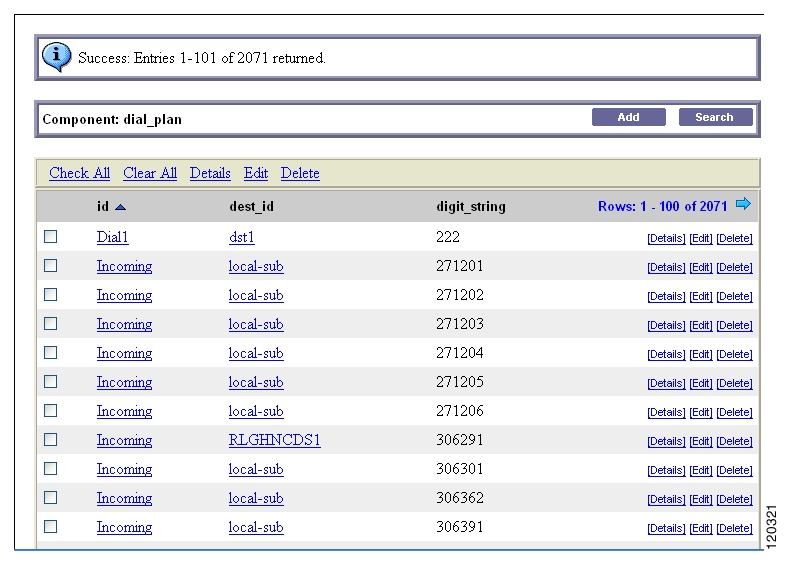
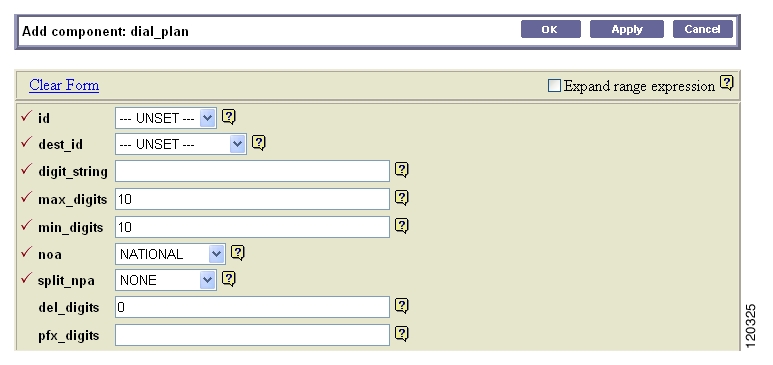
The Cisco BTS 10200 Component window opens showing a list of dial plans. If this is the first dial plan (or device of this type) that you are adding, the list is empty.
Step 4
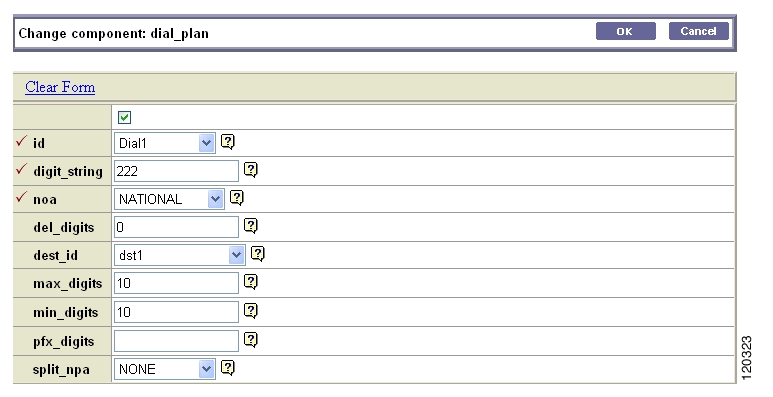
The Cisco BTS 10200 Component Add window opens.
Step 5
Step 6
•
•
You return to the Cisco BTS 10200 Component window. The new dial plan is added to the list.
To edit a single component, see the "Editing a Component in the Cisco BTS 10200 Configuration" section; to delete a single component, see the "Deleting a Component from the Cisco BTS 10200 Configuration" section.
To add, edit, or delete multiple components with a single operation, see the "Bulk Command Provisioning" section.
Editing a Component in the Cisco BTS 10200 Configuration
Step 1
Step 2
The Cisco BTS 10200 Component Status window opens.
Step 3
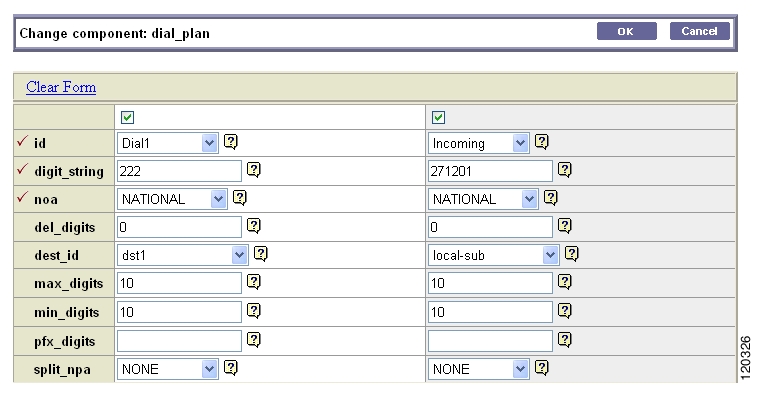
The Cisco BTS 10200 Component window shows a list of currently configured dial plans.
Step 4
Step 5
The Change component window appears.
Note
Step 6
Step 7
You return to the Cisco BTS 10200 Component window. The edited dial plan appears in the list.
To add a single component, see the "Adding a Component to the Cisco BTS 10200 Configuration" section; to delete a single component, see the "Deleting a Component from the Cisco BTS 10200 Configuration" section.
To add, edit, or delete multiple components with a single operation, see the "Bulk Command Provisioning" section.
Deleting a Component from the Cisco BTS 10200 Configuration
Step 1
Step 2
The Cisco BTS 10200 Component Status window opens.
Step 3
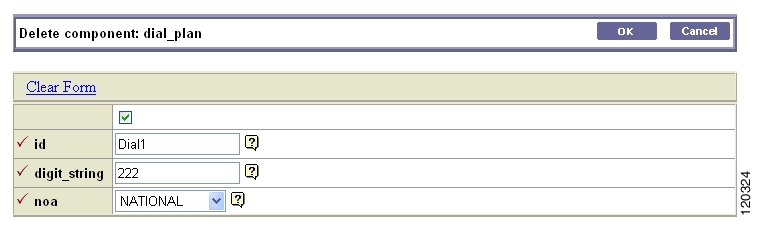
The Cisco BTS 10200 Component window shows a list of currently configured dial plans.
Step 4
Step 5
The Delete component window with the requested deletion appears.
Note
Step 6
To add a single component, see the "Adding a Component to the Cisco BTS 10200 Configuration" section; to edit a single component, see the "Editing a Component in the Cisco BTS 10200 Configuration" section.
To add, edit, or delete multiple components with a single operation, see the "Bulk Command Provisioning" section.
Bulk Command Provisioning
Cisco EPOM allows you to perform add, delete, and edit commands on multiple components with a single operation. You can only perform bulk provisioning commands on the same type of devices. For instance, if a group of subscribers use the same media gateway and subscriber profile, you can add or edit these subscribers by using a single command.
Adding Multiple Components
Step 1
The Component:name window appears.
Step 2
The Add component window appears.
Step 3
If you fail to select this check box, you get an error message when you enter a range expression.
Tip
symbol next to the Expand range expression field.
Step 4
For example, to add a group of 10 dial plans with the id prefix dp001_new, enter dp001_new[01-10]. Doing so adds dial plans dp001_new01, dp001_new02, through dp001_new10.
Step 5
Step 6
•
•
You have now added multiple components to the Cisco BTS 10200 EMS network.
Editing Multiple Components
Step 1
The Component:name window appears.
Step 2
Step 3
The Change component window appears.
Note
Step 4
Step 5
You have now edited multiple components in the Cisco BTS 10200 EMS network.
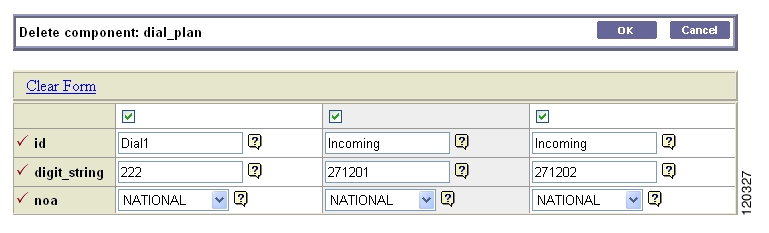
Deleting Multiple Components
Step 1
The Component:name window appears.
Step 2
Step 3
The Delete component window appears with the requested deletions.
Note
Step 4
You have now deleted multiple components in the Cisco BTS 10200 EMS network.
Checking the Status and Controlling Components
You can check the status of a component and you can control its status. For example, you can change status of a Cisco BTS 10200 EMS server from Normal to Forced Active Standby.
Note
Step 1
Step 2
Step 3
Step 4
Step 5
Step 6
Step 7
![]()
![]()
![]()
![]()
![]()
![]()
![]()
![]()
Posted: Wed Sep 22 02:29:57 PDT 2004
All contents are Copyright © 1992--2004 Cisco Systems, Inc. All rights reserved.
Important Notices and Privacy Statement.