|
|

Table Of Contents
Quick Start Guide for Cisco Monitor Director 1.1
Supplemental License Agreement
Cisco Monitor Director Overview
Installing Cisco Monitor Director
Backing Up the Cisco Monitor Director Database
Restoring the Cisco Monitor Director Database
Launching Cisco Monitor Director from an RDP Client
Quick Start
Quick Start Guide for Cisco Monitor Director 1.1
1 Supplemental License Agreement
SUPPLEMENTAL LICENSE AGREEMENT FOR CISCO SYSTEMS NETWORK MANAGEMENT SOFTWARE: CISCO MONITOR DIRECTOR
IMPORTANT-READ CAREFULLY: This Supplemental License Agreement ("SLA") contains additional limitations on the license to the Software provided to Customer under the End User License Agreement between Customer and Cisco. Capitalized terms used in this SLA and not otherwise defined herein shall have the meanings assigned to them in the End User License Agreement. To the extent that there is a conflict among any of these terms and conditions applicable to the Software, the terms and conditions in this SLA shall take precedence.
By installing, allowing to be installed, downloading, accessing or otherwise using the Software or using the equipment that contains this Software, Customer agrees to be bound by the terms of this SLA. If Customer does not agree to the terms of this SLA, Customer may not install, download, access or otherwise use the Software. When used below, the term "server" refers to a central processor unit owned or leased by Customer or otherwise embedded in equipment provided by Cisco.
1.
ADDITIONAL LICENSE RESTRICTIONS
•
•
–
–
•
•
•
2.
•
•
•
3.
Please refer to the Cisco Systems, Inc. End User License Agreement.
2 Cisco Monitor Director Overview
Cisco Monitor Director is a remote network monitoring and management application that works with one or more instances of Cisco Monitor Manager to provide seamless, centralized network management across multiple customer sites. Cisco Monitor Director stores network fault data received from associated Cisco Monitor Manager instances and uses this data (which can be selectively filtered) to create monthly reports that summarize a network's health. It also provides the capability to specify that only issues of a certain severity or type generate notification messages, ensuring that the network administrator is notified of issues as quickly as possible.
The following list summarizes the features that Cisco Monitor Director provides:
•
•
•
•
•
•
•
In this document you will find:
•
•
•
3 System Requirements
To ensure the proper installation and operation of Cisco Monitor Director on your machine, verify that all of the requirements listed in the following table are met before proceeding.
Note the following:
•
•
•
•
•
•
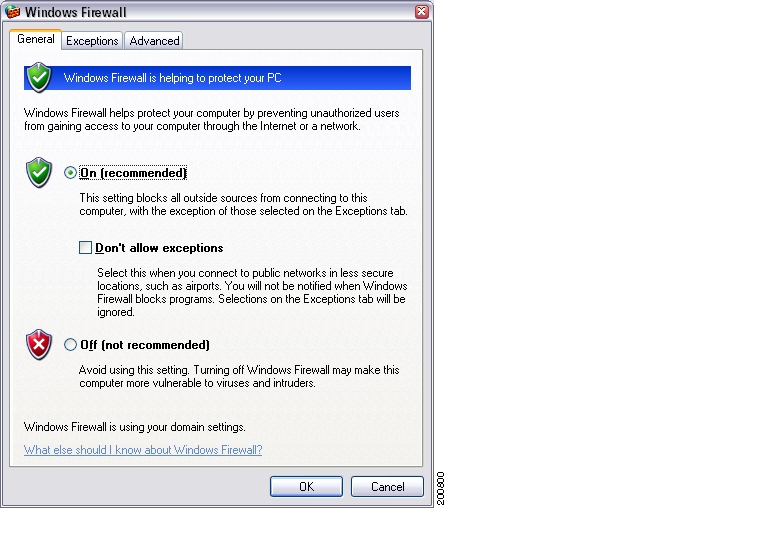
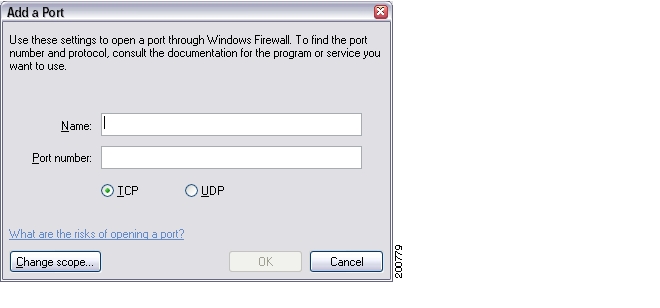
To open the port through the firewall:
Step 1
Step 2
Step 3
Step 4
Note
•
a.
b.
c.
d.
4 Installing Cisco Monitor Director
Step 1
a.
The value displayed in the Physical Address field is the MAC address of your machine.
Note
b.
c.
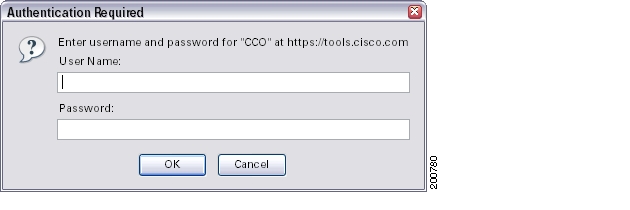
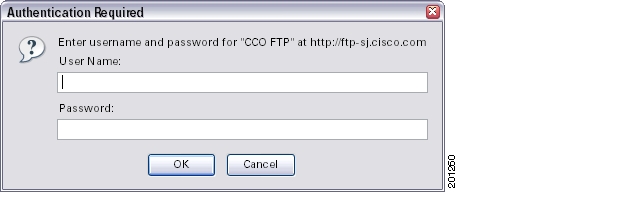
The Authentication Required dialog box appears.
d.
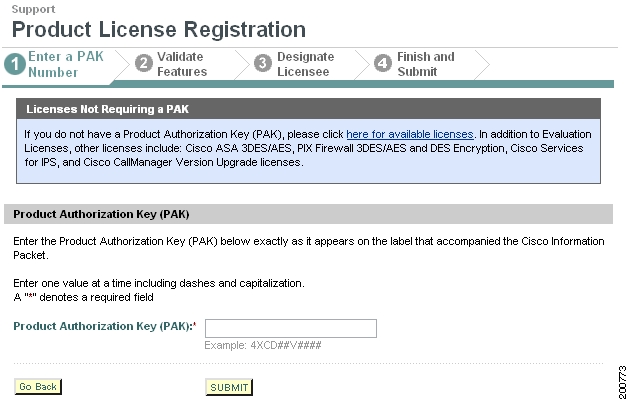
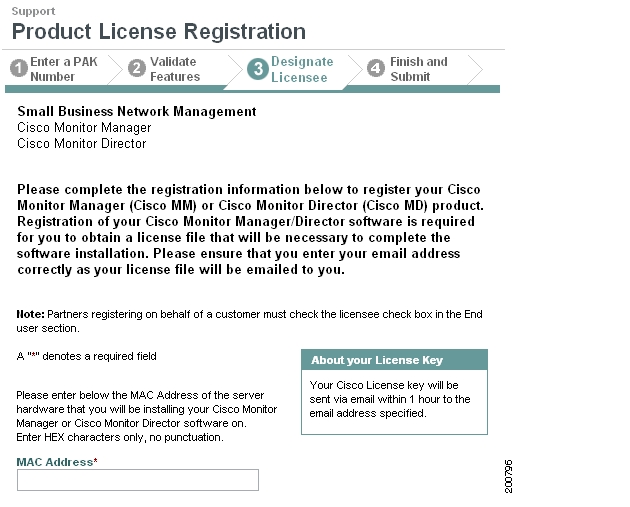
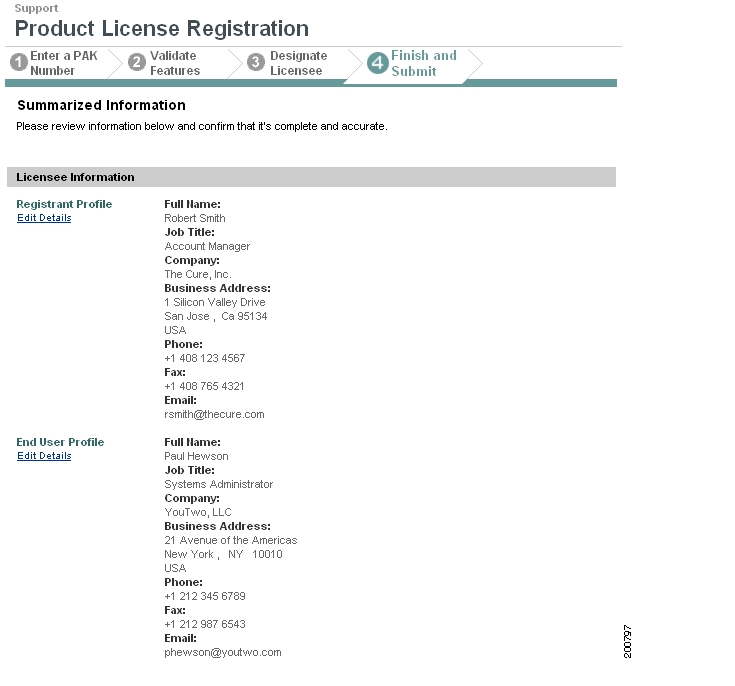
The Product License Registration wizard launches.
e.
f.
g.
–
–
–
–
h.
The wizard page will indicate when registration is complete. Your runtime license will be sent to the e-mail address specified during the registration process. If you do not receive your license within one hour, open a service request using the TAC Service Request Tool.
i.
Step 2
Note
a.
http://www.cisco.com/cgi-bin/tablebuild.pl/CiscoMDThe Authentication Required dialog box appears.
b.
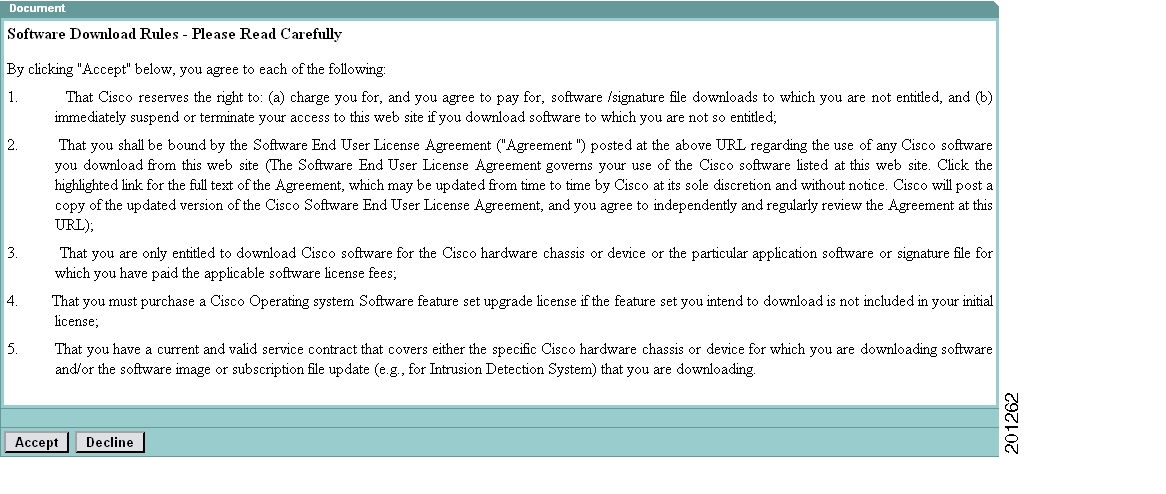
The Software Download page appears.
c.
The Software Download page updates, displaying details for the software you will download.
d.
The rules that apply to the download are displayed.
e.
The Authentication Required dialog box appears.
f.
g.
Step 3
•
•
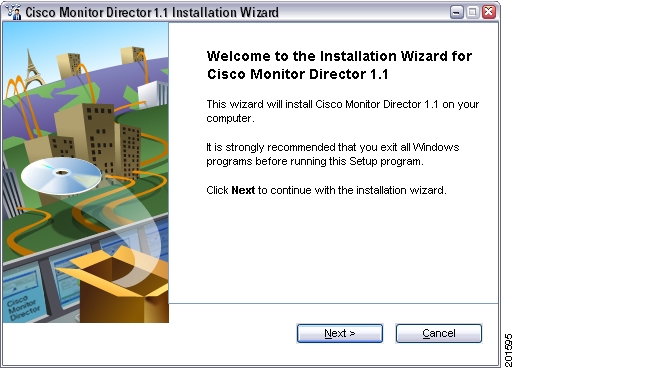
The first wizard screen appears.
Step 4
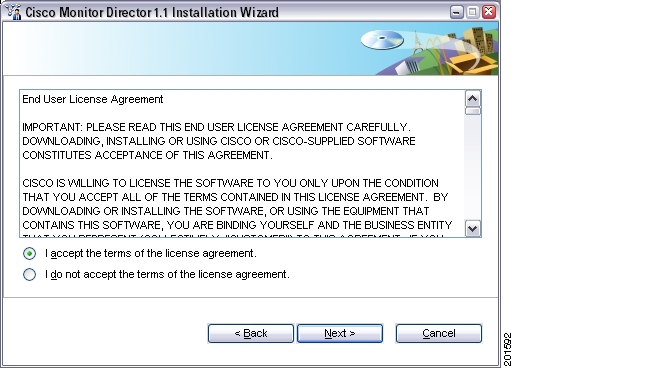
The second wizard screen appears, displaying the End User License Agreement.
Step 5
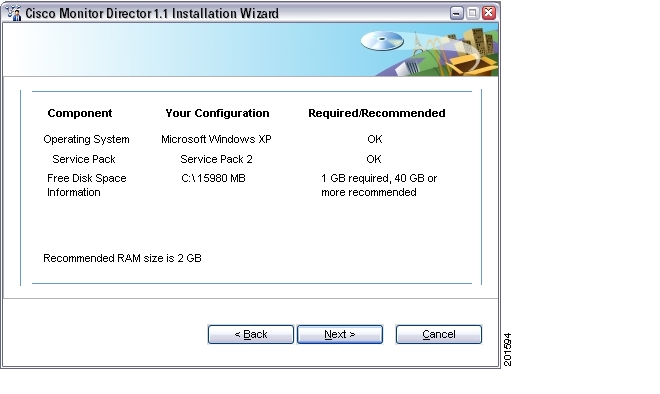
The third wizard screen appears, indicating the minimum amount of disk space and RAM required to proceed with the installation.
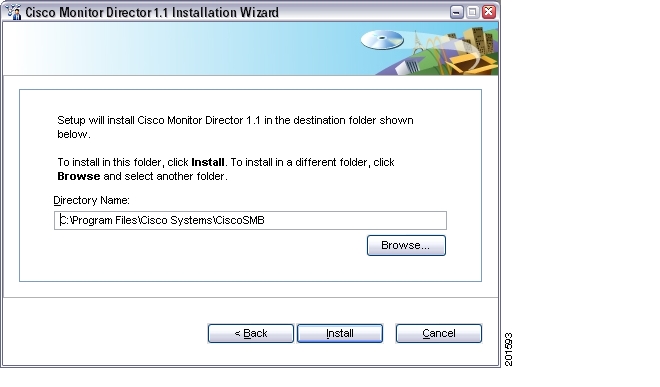
Step 6
The fourth wizard screen appears.
Step 7
–
–
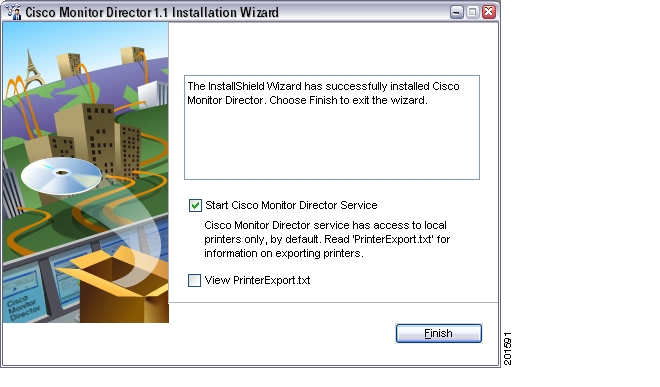
Step 8
Cisco Monitor Director is installed on your machine.
By default, Cisco Monitor Director has access to local printers only. Select the View PrinterExport.txt check box to open a text file that describes how to export printers.
Step 9
5 Post-Installation Tasks
After you have installed Cisco Monitor Director, you must complete the following tasks before using the application for the first time:
1.
Note
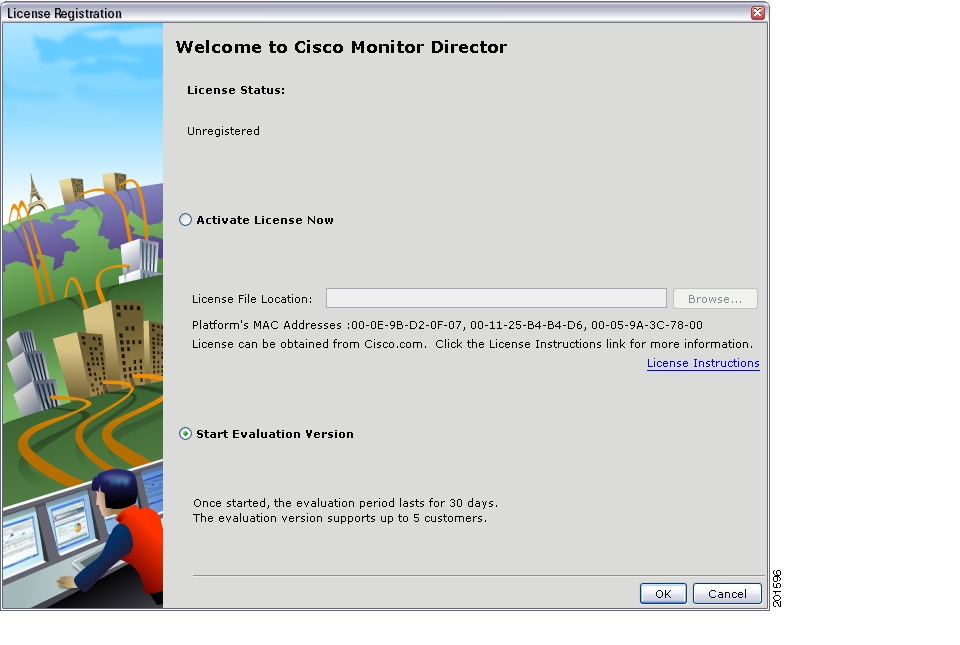
Register Your Runtime License
Since this is the first time you have launched the application, the License Registration page appears.
Step 1
Step 2
A message appears, indicating that because Cisco Monitor Director runs as a service, the license browser initially starts at your machine's top-level directory instead of your home directory (C:\Documents and Settings\username\My Documents, for example).
Step 3
Step 4
A message appears, indicating that you have successfully registered your license.
Step 5
Note
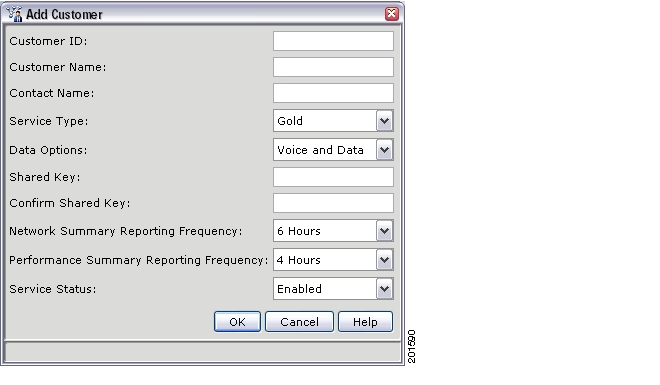
Add Customers
After registering your runtime license, a message prompts you to add a new customer to your customer database.
When you see this message, do the following:
Step 1
The Add Customer dialog box appears.
Step 2
Step 3
If you want to set up additional customers, repeat steps 2 through 4.
6 Additional Information
The following section describes how to complete the following tasks:
•
•
•
Backing Up the Cisco Monitor Director Database
Step 1
Step 2
a.
b.
Step 3
cd C:\Program Files\Cisco Systems\CiscoSMB\Cisco Monitor Director\Database\DataStep 4
backup_CiscoMD.cmd <backup directory>
For example, if you want to back up your database information in a folder named "10082006" on your D: drive, you would enter:
backup_CiscoMD.cmd D:\10082006
The files CiscoPNM.db and CiscoPNM.log, which contain your network's database information, are now available in the backup directory you specified.
Note
Step 5
Restoring the Cisco Monitor Director Database
Step 1
Step 2
a.
b.
Step 3
cd C:\Program Files\Cisco Systems\CiscoSMB\Cisco Monitor Director\Database\DataStep 4
restore_CiscoMD.cmd <backup directory>
For example, if you backed up your network's database information in a folder named "10082006" on your D: drive, you would enter the following to restore that information: restore_CiscoMD.cmd D:\10082006
After you enter this command, two things happen:•
•
Step 5
Launching Cisco Monitor Director from an RDP Client
To launch a Cisco Monitor Director instance that is installed on a Windows 2003 server from an RDP client, do the following:
Step 1
Step 2
MSTSC /V terminal-server /CONSOLEwhere terminal-server is either the hostname or IP address of the terminal server.
7 Where to Go Next
For more information on Cisco Monitor Director, see the following documentation:
•
•
Note
![]()
![]()
![]()
![]()
![]()
![]()
![]()
![]()
Posted: Wed May 16 15:52:02 PDT 2007
All contents are Copyright © 1992--2007 Cisco Systems, Inc. All rights reserved.
Important Notices and Privacy Statement.