|
|

Table Of Contents
1.1 Install Cisco Edge Craft Using the Install Wizard
1.2 Un-install Cisco Edge Craft
1.3 Commission IP Address via the VT100 Interface
1.3.2 Configure Community-Handler
1.4 Connect to a Network Element
1.5 Configure the VT100 Terminal
Installing Cisco Edge Craft
This chapter describes how to install the Cisco Edge Craft and how to start the VT100 terminal.
1.1 Install Cisco Edge Craft Using the Install Wizard
Step 1
Insert the Cisco Edge Craft SW CD in desired drive on target PC.
Note
Step 2
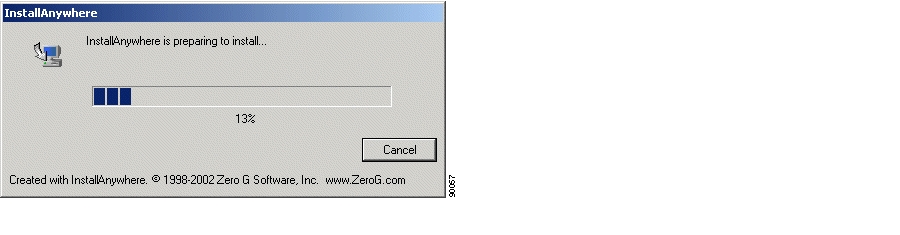
Figure 1-1 Install Shield preparing Installation Wizard
.
Step 3
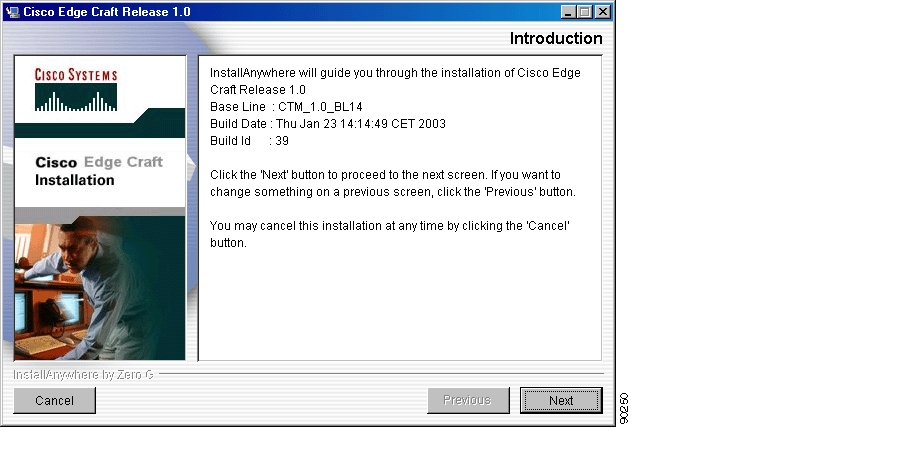
Figure 1-2 Install Wizard - Introduction
1.2 Un-install Cisco Edge Craft
Step 1
or
Step 2
1.3 Commission IP Address via the VT100 Interface
A local terminal with VT100 emulation is required during the first commission of the network element to set up the necessary communications parameters enabling access to the NE via Cisco Edge Craft over the management port. After the first commission, the VT100 interface can be used for modifying the communications parameters and to perform status checks of the network element. The VT100 interface is password protected.
ONSCLI is a line-oriented ASCII-based management interface embedded in the Cisco network element. The ONSCLI is accessed via the VT100-port. The serial connection communications parameters are fixed:
•
•
•
•
•
VT100 terminal codes are used.
The VT100-port (Console port) for the Cisco network element is provided using a RJ-45 connector. A cable for connecting the VT100-port to the serial-port on the PC is available. Table 1-1 provides the pinouts.
Table 1-1 CLI Connector Pinout (RJ-45 to DS-9)
Pin 1
GND
Pin 5
NC
Pin 2
Tx
Pin 2
Rx
Pin 3
Rx
Pin 3
Tx
Pin 4
NC
Pin 5
NC
Pin 6
CTS
Pin 8
CTS
Pin 7
NC
Pin 8
RTS
Pin7
RTS
Note
1.3.1 Invoke ONSCLI
Step 1
Step 2
Step 3
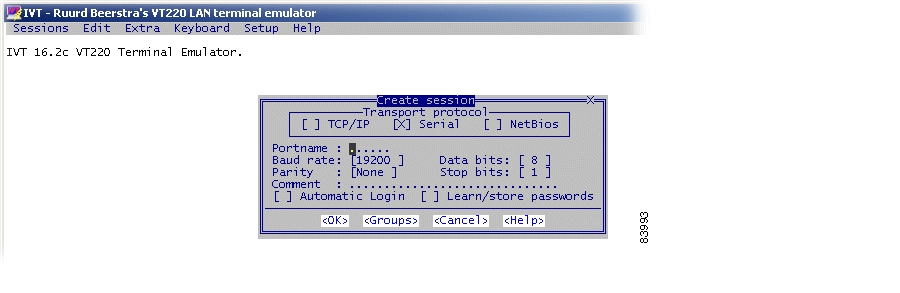
Figure 1-3 Logon Window
.
The terminal application launches ( Figure 1-4).
Figure 1-4 Start Window
Step 4
Step 5
>ONSCLI--------------------------------------------------ONS 15305 Command Line Interface--------------------------------------------------Enter ONSCLI password: ******ONSCLI>Step 6
IP-Configuration(Management-Port):Show-Current-Alarms:Community-handler:Exit:It is sufficient to type leading characters of the command name to avoid ambiguity - the same applies to keywords.
Note
The management port IP address is a compulsory parameter, and must be specified by the user. All the other parameters (except default gateway) default to pre-defined values if they are not specified.
1.3.2 Configure Community-Handler
The following parameters settings are shown for both the Cisco ONS 15305 and the Cisco ONS 15302.
The following example shows how to set the community handler for a default user. When setting community handler for a specific user, the corresponding IP address must be entered instead of 0.0.0.0.
1.3.2.1 ONS 15305
Step 1
ONSCLI>com
Step 2
Step 3
ONSCLI>Community-handler\ll
Step 4
Add: Add Community entryEdit: Edit Community entryRemove: Remove Community entryShow: Show Community entryExit:ONSCLI>Community-handler\Step 5
ONSCLI>Community-handler\add man=0.0.0.0 com=public acc=super traps=disable
Step 6
MANAGER: 0.0.0.0COMMUNITY: publicACCESS: superTRAPS: disableONSCLI>Community-handler\1.3.2.2 ONS 15302
The pre-configured factory community appears as follows:
Manager: 0.0.0.0Community: publicAccess: SuperTraps: DisabledThis is an insecure community, meaning it enables all managers, regardless of the IP-address, to access the device with the public community string.
Step 1
Step 2
1.3.3 Assign an IP Address
This section explains how to assign an IP address to an ONS 15305 or ONS 15302.
1.3.3.1 ONS 15305
ONSCLI>ip ?
Usage:
IP-Configuration(Management-Port)
[IP-ADDRESS=<IP address>][SUBNET-MASK=<IP address>][DEFAULT-GATEWAY=<IP address>]Available independent of router license
[MODE=<notUsed|ip|clnp|ipAndClnp>]Management mode for the management port
|clnp|ipAndClnp| only with OSI license
ONSCLI>ipIP-ADDRESS: 10.20.47.131SUBNET-MASK: 255.255.254.0DEFAULT-GATEWAY: 10.20.47.254MODE: ipSTATUS: upManagement port Status
ONSCLI>
To configure the device by setting the IP address to the management port, complete the following steps.
Step 1
--- Change IP address, are you sure (y/n)? YIP-ADDRESS: 192.168.2.2SUBNET-MASK: 255.255.255.252DEFAULT-GATEWAY: 192.168.2.1Step 2
1.3.3.2 ONS 15302
Step 1
ONSCLI>Device\Management-Configuration\Custom\Management-Port\IP-Configuration
ip-address=10.0.0.1 subnet-mask=255.255.255.0 default-gateway=10.0.0.254
Step 2
Step 3
IP-ADDRESS: 10.0.0.1SUBNET-MASK: 255.255.255.0DEFAULT-GATEWAY: 10.0.0.254Step 4
1.3.4 Change Passwords
This section explains how to change passwords for the ONS 15305 or ONS 15302.
1.3.4.1 ONS 15305
Step 1
ONSCLI>ch ?
The following text appears.
[ONSCLI -PASSWORD=<string[6:12]>][TELNET-PASSWORD=<string[6:12]>]Step 2
1.3.4.2 ONS 15302
Step 1
ONSCLI>Security\Community-Table>ch ?
The following text appears:
[ONSCLI -PASSWORD=<string[6:12]>][TELNET-PASSWORD=<string[6:12]>]Step 2
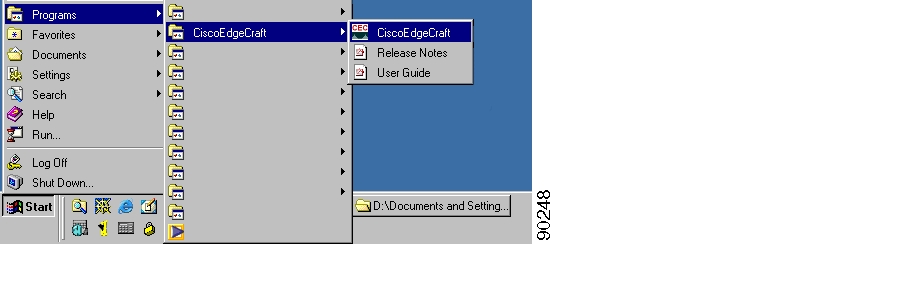
1.4 Connect to a Network Element
The purpose of this section is to describe the tasks involved in setting up a connection between the craft terminal and any Cisco network element. See also the "Commission IP Address via the VT100 Interface" section.
Step 1
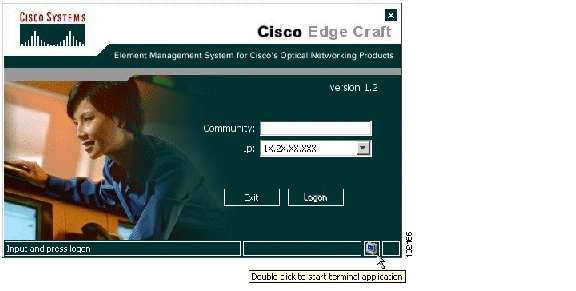
Figure 1-5 Starting Cisco Edge Craft
A logon window appears.
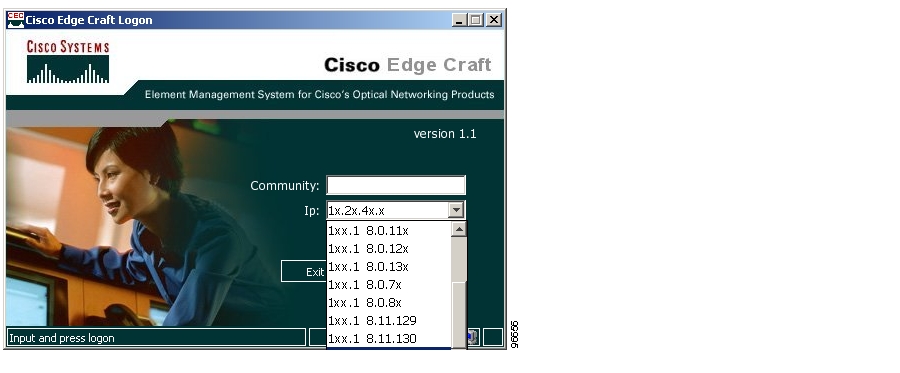
Step 2
Step 3
Figure 1-6 Selection of IP Address - Logon Window
.
The system adds the selected IP address to the logon window.You can also fill in the IP address manually ( Figure 1-7).
Step 4
The network element supports three community access levels
•
•
•
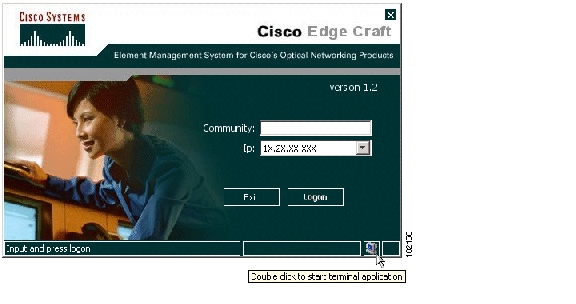
Figure 1-7 Cisco Edge Craft Logon Window
Step 5
You can now browse the network element topology and perform the required management tasks.
If the community string is invalid, access to the network element is not granted and an error message is presented.
If the IP address you entered manually or selected in the list is not reachable/non-existent or does not belong to an Cisco network elemen, the system generates an error message and asks for a new IP address.
1.5 Configure the VT100 Terminal
The VT100 terminal can be launched from the Cisco Edge Craft desktop ( Figure 1-8) or the logon window ( Figure 1-7).
Figure 1-8 VT 100 available from Cisco Edge Craft Desktop
You can change the terminal software that will be launched by editing the VT 100 path description in the ExternalApplications.xml file, found in the installdir\CISCOEDGECRAFT\res\config\folder:.
The following is an example of the ExternalApplications.xml file:
<?xml version="1.0" encoding="ISO-8859-1" ?>- <ExternalApplications><vt100 file="../external/IVT VT220 Telnet/ivt.exe" /><exec file="rundll32 url.dll,FileProtocolHandler" /><editor file="notepad.exe" /><fileexplorer file="explorer.exe" /><web file="rundll32 url.dll,FileProtocolHandler" /><ciscoweb file="rundll32 url.dll,FileProtocolHandler" params="http://www.cisco.com" /><help file="rundll32 url.dll,FileProtocolHandler" params="../res/help/CEC1-0.pdf" /><releasenotes file="rundll32 url.dll,FileProtocolHandler" params="../res/help/CECRN10.pdf" /></ExternalApplications>
![]()
![]()
![]()
![]()
![]()
![]()
![]()
![]()
Posted: Fri Sep 14 11:31:26 PDT 2007
All contents are Copyright © 1992--2007 Cisco Systems, Inc. All rights reserved.
Important Notices and Privacy Statement.