|
|

Table Of Contents
Removing and Replacing Interface Boards
Removing and Replacing Interface Boards
Follow this procedure to remove and replace an interface board in LocalDirector:
•
Power down the unit and remover the power cord and cabling
•
•
•
•
Follow this procedure to remove and replace interface boards in a LocalDirector 430/416:
Step 1
Step 2
Step 3
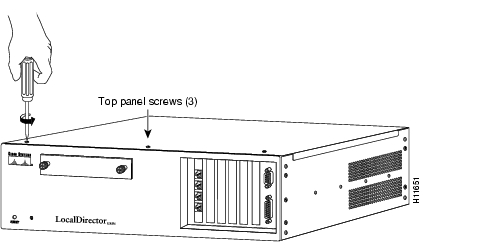
Step 4
Figure C-1 Opening the LocalDirector 430/416 Chassis
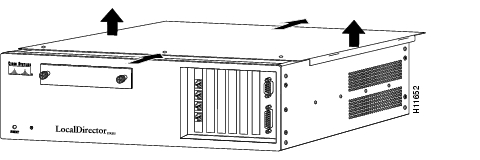
Step 5
Figure C-2 Removing the Top Panel
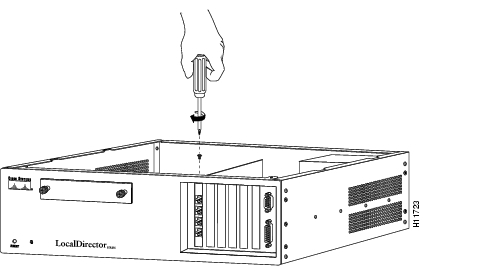
Step 6
Figure C-3 Removing an Interface Board
Step 7
Step 8
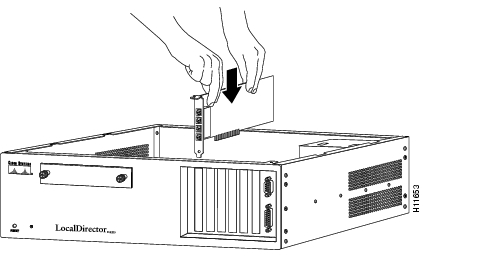
Step 9
Figure C-4 Insert the New Interface Board into the Chassis
Step 10
Step 11
Step 12
![]()
![]()
![]()
![]()
![]()
![]()
![]()
![]()
Posted: Wed Nov 10 22:43:21 PST 2004
All contents are Copyright © 1992--2004 Cisco Systems, Inc. All rights reserved.
Important Notices and Privacy Statement.