|
|

This chapter provides instructions for installing the Element Management System (EMS) software on a user workstation.
The following sections list the minimum system requirements for each supported operating system: Windows 95/98, Windows NT, and UNIX.
This section contains instructions for the following procedures:
Use the following procedures to install EMS on a Windows NT workstation.
EMS users must shut down the EMS alarm server before installing a new version of EMS.
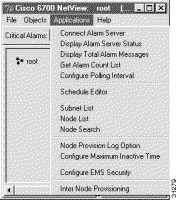
Step 1 Select Applications > Display Alarm Server Status from the net view. (See Figure 2-1.)
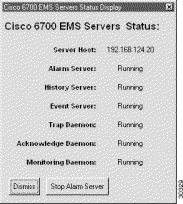
Step 2 EMS launches the alarm server status display. (See Figure 2-2.)
Step 3 Click the Stop Alarm Server button. EMS displays the following dialog box. (See Figure 2-3.)
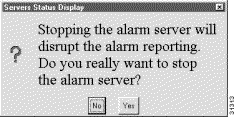
Step 4 Click Yes to shut down the alarm server and return to the net view.
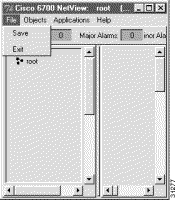
You must exit EMS on the workstation before installing a new version of EMS. To exit EMS, select File > Exit from the net view. (See Figure 2-4.)
Step 1 Launch the Cisco 6700 EMS setup file (see Figure 2-5). The EMS setup file can be found on the included software CD-ROM, or it can be downloaded from Cisco Connection Online (see the "About This Guide" section for more information).

The Cisco 6700 Element Management System installation window appears. (See Figure 2-6.)
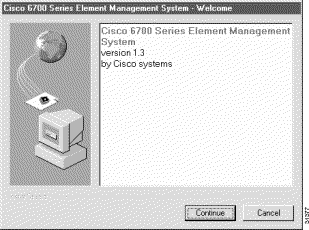
Step 2 Click Continue to begin the installation. Cisco recommends that you close all other applications before proceeding. (See Figure 2-7.)
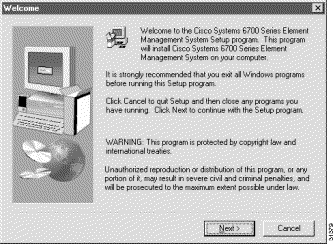
Step 3 Click Next to proceed.
Step 4 Select the directory in which EMS will be installed. (See Figure 2-8.)

Step 5 If you are performing a first-time installation of EMS on your workstation, a folder called EMS will be created on the root directory (C:\EMS). You can accept this directory by clicking on the Next button, or you can change the directory with the Browse button.
If you are upgrading your EMS software from a previous version, the installation program will replace the old version with the new version.
Step 6 When prompted for the alarm server IP address, enter the IP address of the EMS alarm server. (See Figure 2-9.) Contact your EMS administrator for the correct IP address.
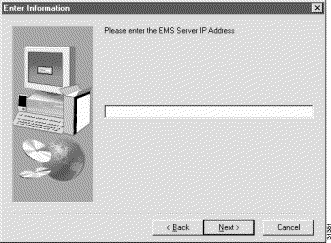
Step 7 Click Next to proceed.
Step 8 When prompted for the network configuration server IP address, enter the IP address of the EMS network configuration server. (See Figure 2-10.) Contact your EMS administrator for the correct IP address.

Step 9 Click Next to proceed.
Step 10 You will be prompted to verify the installation information you have supplied. (See Figure 2-11.)
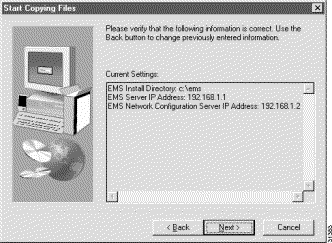
Step 11 If you wish to change this information, use the Back button to make changes.
Step 12 Click Next to proceed with the installation of EMS program and data files.
Step 13 When the installation file transfer is complete, click Finish to end EMS installation and reboot the workstation. (See Figure 2-12.)
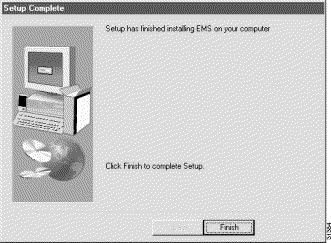
When the installation is complete, EMS will place the EMS net view and EMS alarm server icons on your desktop. (See Figure 2-13 and Figure 2-14.)


Use the following procedures to install EMS on a Windows 95/98 workstation.
You must exit EMS on the workstation before installing a new version of EMS. To exit EMS, select File > Exit from the net view. (See Figure 2-15.)

Step 1 Launch the Cisco 6700 EMS Lite installation file. (See Figure 2-16.) The EMS installation file can be found on the included software CD-ROM, or it can be downloaded from Cisco Connection Online (see the "About This Guide" section for more information).

The Cisco 6700 Element Management System Lite installation window appears. (See Figure 2-17.)
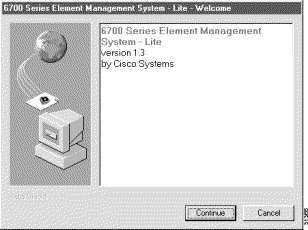
Step 2 Click Continue to begin the installation. Cisco recommends that you close all other applications before proceeding. (See Figure 2-18.)

Step 3 Click Next to proceed.
Step 4 Select the directory in which EMS Lite will be installed. (See Figure 2-19.)

If you are performing a first-time installation of EMS on your workstation, a folder called EMS will be created on the root directory (C:\EMS). You can accept this directory by clicking Next, or you can change the directory with the Browse button.
If you are upgrading your EMS software from a previous version, the installation program will replace the old version with the new version.
You will be prompted to verify the installation information you have supplied. (See Figure 2-20.)

Step 5 If you wish to change this information, use the Back button to make changes.
Step 6 Click Next to proceed with the installation of EMS program and data files.
Step 7 During the installation, EMS updates the AUTOEXEC.BAT file on the workstation. (See Figure 2-21.)

Step 8 Click OK to proceed.
 | Caution During the installation, you may see a window with the message "Warning: Batch file update failed. Please update file by hand." This message indicates that the EMS install application was unable to edit the AUTOEXEC.BAT file on your workstation. Complete the following steps, then proceed to the "Editing AUTOEXEC.BAT" section for further instructions. |
Step 9 When the installation file transfer is complete, click Finish to end EMS installation and reboot the workstation. (See Figure 2-22.)
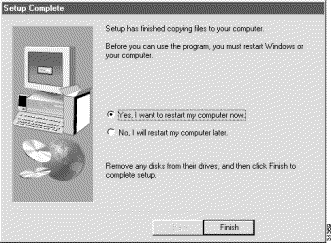
Step 10 After the workstation has been rebooted, EMS will place the net view icon on your desktop. (See Figure 2-23.)

The following procedure shows how to enter EMS system variables into the AUTOEXEC.BAT file for your workstation.
Step 1 From the Start menu on your workstation, select Run.
Step 2 Type edit autoexec.bat in the text window, and click OK to launch the MS-DOS editor. (See Figure 2-24.)
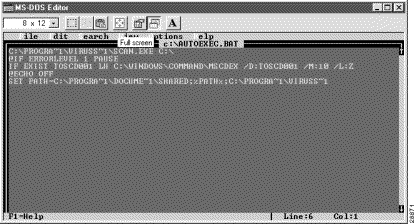
Step 3 Use the down arrow key to scroll down past the last line of existing text, and enter the following lines of text exactly as shown (see Figure 2-25):
SET B10EMS_HOME=C:/EMS
SET TCL_LIBRARY=C:/EMS/LIB/TCL
SET TK_LIBRARY=C:/EMS/LIB/TK
SET TNM_LIBRARY=C:/EMS/LIB/TNM
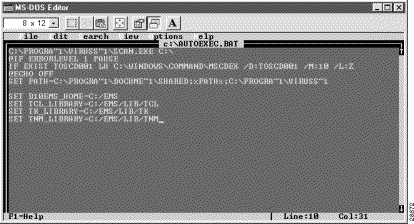
Step 4 Select File > Save to save this configuration.
Step 5 Select File > Exit to close the editor.
Step 6 Close all applications and reboot the workstation to load the EMS system variables.
EMS can be installed in any directory in which the user has write privileges. The EMS distribution package for UNIX contains two files:
To install EMS:
Step 1 Choose whether you want to install directly from the CD-ROM or first copy the distribution into a user account. If installing directly from the CD-ROM, skip to the third step. Otherwise:
Step 2 Add execute rights to the emsinstall script:
Step 3 Execute the installation script:
Step 4 The script will prompt for the following information:
The emsinstall file creates two scripts---ems.csh and ems.ksh---in the EMS installation directory. If the files exist from a previous invocation of eminstall, they will NOT be overwritten. Also, if an existing EMS installation is being upgraded with emsinstall, the EMS installation directory/data directory will NOT be overwritten. This preserves network configuration and alarm information.
The environment variables in Table 2-1 are specified in the ems.csh and ems.ksh files.
B10EMS_HOME | The EMS installation directory |
B10EMS_SERVER | IP address of the computer running the EMS Alarm Server |
LD_LIBRARY_PATH | EMS installation directory/lib |
TCL_LIBRARY | EMS installation directory/lib/tcl |
TK_LIBRARY | EMS installation directory/lib/tk |
TNM_LIBRARY | EMS installation directory/lib/tnm |
TNM_NMTRAPD | EMS installation directory/bin/nmtrapd |
The generated ems.csh and ems.ksh files leave the value of B10EMS_SERVER blank. Please edit the appropriate file and fill in the IP value of the alarm server. Contact your EMS administrator for the alarm server IP address if needed.
To update the environment, complete one of the following steps:
The nmtrapd program needs to be installed with root privileges (this program is required by the EMS alarm server). To make the necessary changes, complete the following steps after obtaining the root password:
Step 1 Set user to root:
% su
Step 2 Execute the emsinstall script with root privileges:
% ./emsinstall root
Again, the script will prompt for the FULLY QUALIFIED path name of the EMS installation directory unless it is already defined in the environment.
Step 3 Exit from the root login:
% exit
![]()
![]()
![]()
![]()
![]()
![]()
![]()
![]()
Posted: Fri Mar 3 15:36:00 PST 2000
Copyright 1989 - 2000©Cisco Systems Inc.