|
|

The Cisco 8110 Broadband Network Termination Unit is a multiservice IP+ATM CPE device which enables service providers worldwide to cost effectively offer carrier class managed services to enterprise customers with high bandwidth needs and stringent service level agreements. The Cisco 8110 is optimized to enable a wide range of services including IP, ATM, Private Line, Voice and Video services over a single high-speed access link.
There are two methods of determining the 8110 Software Version:
In order to determine the Software Version, the system needs to be booted up. Following the boot up, the system will perform a serious of self tests . The Software Version is displayed at the end of the tests just before the Login prompt as shown in figure 1.
Self Test...
test serial passed
test PPI passed
test Timer passed..
.
.
.
..Warm Start Self Tests - OK
Version v5.2
Login :
To determine the Software Version of the 8110 Broadband Network Termination Unit, from the Configuration Menu type the SHOW command and press RETURN.
Cisco 8110:host:configuration~ show
EPROM version       : 1.6 1998/02/19 13:53:33
Created on          : Tue Feb 24 07:34:23 IST 1998
Software version    : v5.2b
Created on          : Thu Mar 15 17:01:38 IST 2001
XILINX QLAN version : Sun Mar  8 13:50:33 IST 1998
Kernel version      : WIND version 2.4
OS version          : 5.2
MAC Address         : 00:40:0d:fa:af:01
 |
Note After booting up the system, it is required to input passwords for both User and Supervisor. only after the passwords are inputted into the system, the user can begin working. It is also necessary to input read and write password for Community. |
This section assume you are familiar with the software release already installed, and download procedure in particular.
1. Verify that version 3.3g3 is loaded into Flash A, If not please download version 3.3g3 first.
2. type "op init" to initialize the configuration NVRAM.
3. Set the download configuration (file, server access)
4. Type the command " configuration boot from B" (Change boot parameter to run from Flash B )
5. Type "op load" which result in version 5.2 loaded into Flash A
1. Set the download configuration (file, server access)
2. Type the command " configuration boot from B" (Change boot parameter to run from Flash B )
3. Type "op load" which result in version 5.2 loaded into Flash A
Cisco Software Release Version 5.2 supports the following Broadband Network Termination Unit products:
| LIM Model | Revision |
|---|---|
LIM-155MM | A0 |
LIM-155MM-SH | A0 |
LIM-155SM-I | A0 |
LIM-155SM-I-SH | A0 |
LIM-T3-BNC | A0 |
LIM-T3-BNC-SH | A0 |
LIM-E3-BNC | A0 |
LIM-E3-BNC-SH | A0 |
LIM-E3-1.6/5.6 | A0 |
LIM-E3-1.6/5.6-SH | A0 |
LIM-E1T1 | A0 |
LIM-E1T1-SH | A0 |
CSM-4E1T1 | A0 |
8110-PS-110 | A0 |
8110-PS-220 | A0 |
8110-PS-DC | A0 |
|
Note Software Version 5.2 is based on Version 5.1c and supports all the features included in Version 5.1c |
Secure Log-on procedure, to protect and ensure confidentiality, integrity and availability of the Cisco 8110 configuration, control and maintenance.
Support ATM forum UBR (Unspecified bit rate) with minimum cell rate for ATM network. Normally used for non real time application.
Frame base traffic control discard the reminder of a packet that is known to be incomplete due to cell loss. This feature enable packet base traffic to be more efficient.
Support VLAN Tagging Per 802.1q.
Support Fractional E1 per AF-Phy-0130.00
AAL5 And Ethernet statistics of 15 minutes intervals, which can be accessed via SNMP or user interface.
Enables Cookie format support, in line with Cisco standards.
This feature supports level three static IP forwarding which enables specific IP packets to be forwarded to a pre defined PVC.
QOS mapping establishes an association between a Behavior Class and a dedicated ATM VC - where a bundle of such VCs to the same IP destination will provide a full transport packet service with different QoS. Each VC is configured with different ATM QoS parameters.
This feature enables automatic traffic transfer to a n Alternate PVC in case of failure on the active or primary PVC.
1. Cisco 8110 LIC - FE - Transparent LAN License for Ethernet/Fast Ethernet for the Cisco 8110
The Ethernet interface is either used as an Ethernet to ATM uplink or as Ethernet access to Management. The Ethernet supports auto negotiation 10/100 baseTx standards. There is no forwarding between the ports. The Ethernet interfaces support the relay layer of the IEEE 802.1 MAC Layer Bridge. Ethernet packets are bridged over ATM using RFC 1483, LLC for Bridging encapsulation. The bridge learns MAC addresses and forwards the required MAC addresses. Using Traffic Shaping, Per-Class-Queuing and Performance Monitoring, each LAN interconnection is assigned with required QoS and the performance of each connection is constantly monitored and measured End-to-End. Early Packet Discard mechanism yield an excellent goodput on the Ethernet uplink VCs.
|
Note Cisco 8110 LIC - FE - Transparent LAN License for Ethernet/Fast Ethernet for the Cisco 8110 can be ordered through Cisco.com |
The SNMP Cisco 8110 MIB is being provided with the delivery of Release 5.2 of the Cisco 8110 software on CCO. The MIB is in standard ASN.1 format and is located in the same directory within CCO. These files may be compiled with most standards-based MIB compilers. The following files are required:
Bug ID from 5.1c 82824 and 72383
Plus:
Workaround :
Fix - It will be fix in release 6.0
Workaround: non.
Fix - It will be fixed in release 6.0
Deployment of the 8110 system involves a configuration and installation process. Please refer to the User Guide (78-11666-01) for guidance. Updating software version from older version should be done according to the software download procedure. Updating not according to the procedure will result in unexpected behavior.
Secure log-on feature protects and ensures the confidentiality, integrity, and availability of the Cisco 8110 critical information and corporate production networks computing assets, while minimizing the impact of security procedures and policies on business productivity.
All user/management access interfaces to the 8110 application program, directly via the serial console port or remotely over the LAN or the ATM, requires user ID and password.
Two levels of interactive access shall be implemented: - Administrator and User.
After booting up the system, it is required to input passwords for both User and Supervisor. only after the passwords are inputted into the system, the user can begin working.
It is also necessary to input read and write password for SNMP.
To access the passwords feature, from the Root menu type Operational Password? and press return. the Password sub menu is displayed:
supervisor      user            up              top
   exit            ?


 supervisor
 change supervisor password

 user
 change user password
The Unspecified Bit Rate service is intended for non real-time applications i.e. those not requiring tightly constrained delay and delay variation. Examples of such applications are traditional computer communications applications, such as file transfer and e-mail.
UBR service does not specify traffic related service guarantees. No numerical commitments are made with connection. (See Table 2).

To access the UBR+ feature:
Usage: type <vpi 0..255> <vci 0..65535> (user|network) (ubr|cbr|vbr1|vbr2|vbr3|pubr|aal5cbr|aal5abr)
vpi 0..255 | input the correct VPI value |
vci 0..65535 | input the correct VCI value |
user | network | User or Network side interface |
ubr|cbr|vbr1|vbr2|vbr3|pubr|aal5cbr|aal5abr | select service, pubr for ubr+ |
The 8110 connects LAn segments over ATM using either PVCs or P_SVCs . The VLAN Tagging feature enables the allocation of different PVC's , hence different QOS per VLAN. The VLAN Tagging feature also provides traffic restriction between VLANs which results in a reductioj in congestion on each LAn segment.
VLAN Tagging also enables internet working between two different LAN environments: tagged and non tagged.
The VLAN Tagging feature can be accessed from the Configuration sub menu
To access the VLAN Tagging feature:
new             delete          show            operation_mode
   up              top             exit            ?
new - Define a new VLAN. Type the command and press return. The following prompt is displayed:
Usage:    new  < ethernet port 1..2>  < vlan id 2..4095>


 ethernet port 1..2
 select Ethernet port

 vlan id 2..4095
 input the required value for VLAN ID
|
Note A maximum of 32 VLANs can be defined (created) for both Ethernet ports |
delete - This commands enables users to delete VLANs. Type the command and press return. The following prompt is displayed:
Usage:    delete  < ethernet port 1..2>  < vlan id 2..4095>


 ethernet port 1..2
 select Ethernet port

 vlan id 2..4095
 input the required value for VLAN ID
show - This command displays VLAN Configuration information, as displayed in figure 3.
VLAN CONFIGURATION
------------------

Tag Operation mode: TAG_AWARE  (Status: Active)
 VLAN TABLE
Port VLAN_ID
   1       1
   2       1
   2     100
   2     200
operation_mode - This command enables users to enable / disable the VLAN Tagging feature.
Usage:    operation_mode  (aware_tag|ignorant_tag)


 aware_tag
 select to enable VLAN Tagging

 ignorant_tag
 select to disable VLAN Tagging
In order to complete the procedure, the VLAN id needs to be assigned to a VCI and VPI.
From the Configuration menu type pvc vlan? and press return. The following usage is displayed:
Usage:    vlan  <vpi 0..7>  <vci 1..1023>  <vid 0..4095>  (transparent|add_tag)


 vpi 0..7
 input the required value for VPI

 vci 1..1023
 input the required value for VCI

 vid 0..4095
 input the value for VLAN ID

 transparent|add_tag
 select either transparent or add tag
AAL5 And Ethernet statistics of 15 minutes intervals, which can be accessed via SNMP or user interface.
In order to view Ethernet and AAL5 Statistics, the Configuration History parameters must be enabled.
To enable Ethernet and AAL5 History:
Usage: write_enable (vc|lim1|lim2|lim3|logging|shaper1|shaper2|shaper3|ces3|ces1|aal5|ethr1|ethr2|svc0|svc1|svc2|svc3|all)
aal5 | select to enable aal5 history |
ethr1|ethr2 | select to enable either Ethernet port 1 or port 2 history |
Viewing Ethernet and AAL5 history
To view AAL5 history statistics, from the Root menu type History aal5 ? and press return. The following prompt is displayed:
Usage:    aal5  < interval 1..96>


 interval 1..96
 select an interval to view history statistics
Figure 4 displays the selected interval history statistics.
Aal5 Packets History for interval 1
------------------------------------
Aal5 In Octets                        : 0
Aal5 In Unicast Packets               : 0
Aal5 In Non Unicast Packets           : 0
Aal5 In Discards                      : 0
Aal5 In Errors                        : 0
Aal5 Out Octets                       : 0
Aal5 Out Unicast Packets              : 0
Aal5 Out Non Unicast Packets          : 0
Aal5 Out Discards                     : 0
Aal5 Out Errors                       : 0

Aal5 Errors History for interval 1
-----------------------------------
Vpi   Vci   CRCErrors SarTimeOuts  OverSizSDUs
  1    32           0           0           0
  1   100           0           0           0
  2   200           0           0           0
To view Ethernet history statistics, from the Root menu type History Ethernet ? and press return. The following prompt is displayed:
Usage:    ethernet  (1|2)  < interval 1..96>


 ethernet  (1|2)
 select port 1 or 2

 interval 1..96
 select an interval
Figure 5 displayes the selected port and interval history statistics.
ethernet History for port 1 interval 1
------------------------------------------
Ether In Octets                        : 10558140
Ether In Unicast Packets               : 17556
Ether In Non Unicast Packets           : 14326
Ether In Discards                      : 17479
Ether In Errors                        : 0
Ether Out Octets                       : 2441
Ether Out Unicast Packets              : 27
Ether Out Non Unicast Packets          : 0
Ether Out Discards                     : 0
Ether Out Errors                       : 0
Ether Alignment Errors                 : 0
Ether FCS Errors                       : 0
Ether Single Collision Frames          : 0
Ether Multiple Collision Frames        : 0
Ether Deferred Transmissions           : 0
Ether Late Collisions                  : 0
Ether Excessive Collisions             : 0
Ether Internal Mac Transmit Errors     : 0
Ether Carrier Sense Errors             : 0
Ether Frame Too Longs                  : 0
Ether Mac Receive Errors               : 0
Rfc1483 In Octets                      : 0
Rfc1483 In Unicast Packets             : 0
Rfc1483 In Non Unicast Packets         : 0
Rfc1483 In Discards                    : 0
Rfc1483 In Errors                      : 0
Rfc1483 Out Octets                     : 0
Rfc1483 Out Unicast Packets            : 48
Rfc1483 Out Non Unicast Packets        : 14326
Rfc1483 Out Discards                   : 0
Rfc1483 Out Errors                     : 15641
This feature enables users to configure several PVCs per IP, providing differentiated services across the ATM network, end to end.
The mapping between the IP QOS and the ATM VC will use the TOS field of the IP header in order to differentiate between the IP flows, and forward each flow to the assigned QoS class.
To access the TOS to QOS feature:
from the root menu type Configuration PVC Bundle? and press return. The TOS to QOS sub menu is displayed:
add             remove          show            up
   top             exit            ?
add - add new Bundle. Type the command and press return. The following prompt is displayed:
Usage: add <basevpi 0..7> <basevci 1..1023> <vpi 0..7> <vci 1..1023>
basevpi 0..7 | select a base vpi |
basevci 1..1023 | select a base vci |
vpi 0..7 | select a vpi |
vci 1..1023 | select a vci |
remove - remove a Bundle. Type the command and press return. The following prompt is displayed:
remove  <vpi 0..7>  <vci 1..1023>


 vpi 0..7
 select vpi

 vci 1..1023
 select vci
show - This command displays the Bundles table. Type the command and press return. The following information is displayed:
BUNDLES TABLE
Peer Network      MASK   |PVC MASK   |vpi|vci |staus|alter.|alter.|alter.
                         |           |   | |vpi   |vci   |status
The following procedure explains how to create bundles.
Step 1 Configure a new PVC. From the root menu type Configuration PVC New ? and press return. The following prompt is displayed:
Usage:    new  <vpi 0..7>  <vci 1..1023>  (ethernet|ipmng)  (bridgeencaps|routeencaps)  <serviceid 1..8>  {<peakrate 1..8>}


 vpi 0..7
 select vpi (e.g. 5)

 vci 1..1023
 select vci (e.g.10)

 ethernet|ipmng
 select between ethernet or ip management

 bridgeencaps|routeencaps
 select bridge or route encapsulation (the pvc bundle feature is supported only in route encapsulation - mode)

 serviceid 1..8
 for ip management select 1 - 8
 for pvc mapping , 100 or 200 corresponds to ethernet ports 1 and 2. a pvc with service id 100/200 is considered the base vc, and used as a key to bundle operations. (a base pvc identifies a bundle)

 peakrate 1..8
 select a peak rate
Step 2 Set a Peer Network and Mask while creating a link between the IP net address, the TOS Mask for the net flow, and a base PVC. The VC which is given as a parameter, should be pre-defined in step 1 (base PVC). From the root menu type Configuration PVC peer_arp ?and press return. The following prompt is displayed:
Usage: peer_arp <vpi 0..7> <vci 1..1023> <peer network address> <peer network mask> {< tos bit mask>}
vpi 0..7 | select vpi |
vci 1..1023 | select vci |
peer network address | enter network address (e.g.10.52.20.0) |
peer network mask | enter mask for ip address class: A,B or C |
tos bit mask | enter the tos bit mask string e.g. xxx111 |
The Cisco 8110 is now configured to transmit each packet received from the Ethernet and distend to 10.52.20.0 on the VC identified by 5 (vpi) 10 (vci). This VC is consider to be the base VC of the peer, and should always be defined.
Step 3 Configure additional Primary/Alternate PVC's for a bundle, and link them to a specific TOS value. From the root menu type Configuration pvc bundle add? and press return. The following prompt is displayed:
Usage:    add  <basevpi 0..7>  <basevci 1..1023>  <vpi 0..7>  <vci 1..1023>  < tos bit string>  (primary|alternate)  {<peakrate 1..8>}


 basevpi 0..7
 enter the base vpi defined in step 1. e.g. 5

 basevci 1..1023
 enter the base vci defined in step 1. e.g.10

 vpi 0..7
 select a new vpi

 vci 1..1023
 select a new vci

 tos bit string
 enter the tos bit string e.g. xxx101

 primary|alternate
 define if the pvc is primary or alternate

 peakrate 1..8
 select a peak rate
|
Note Please ensure that the base VC is linked to a Peer (step 2) otherwise this command will fail. |
 |
Tip The user is responsible for configuring QOS parameters for each VC using the shaping mechanism. |
This feature supports unrestricted information transfer rates at multiples of 64 kbit/s up to the maximum rate of the interface. The physical interface may typically be E1.
To access the E1 Fractional feature:
From the root menu type Configuration dsx1 Fraction? and press return. The following prompt is displayed:
Usage: fraction <lim 1..3> <channels 1..30 n-m,l,all>
fraction -
lim 1..3 | select lim |
channels 1..30 | select channel |
n-m,l,all | time slot to be assigned |
Example:

Usage:  new <limid 3>  <port 1>  <channels 2-3, 4, 6-7, 8>

<n-m,l,all>
The Cisco 8110 has the capability to define an alternate PVC for each active PVC. The alternate PVC will be used in case of failure. In case of an active or primary PVC failure, its traffic will be transmitted automatically on its alternate PVC if defined. It is the user's responsibility to set the alternate PVC QoS parameters in order to match the primary PVC parameters. In addition, the Group Shaping mechanism is useful to take additional advantage of the Cisco 8110 capabilities.
The Alternate PVC feature can be used through Bridging or Routing.
In order to access the Alternate PVC Bridge feature, from the root menu type: Configuration PVC Alternate? and press return.
The PVC Alternate sub menu is displayed:
add             remove          show            up
   top             exit            ?


 add
 add alternate PVC

 remove
 remove alternate PVC

 show
 show status
add -add an alternate PVC. Type the command and press return. The following prompt is displayed:
Usage:    add  <primaryvpi 0..7>  <primaryvci 1..1023>  <alternatevpi 0..7>  <alternatevci 1..1023>


 primaryvpi 0..7
 select a primary VPI

 primaryvci 1..1023
 select a primary VCI

 alternatevpi 0..7
 select an alternate VPI

 alternatevci 1..1023
 select an alternate VCI
remove - remove an alternate PVC. Type the command and press return. The following prompt is displayed:
Usage:    remove  <vpi 0..7>  <vci 1..1023>


 vpi 0..7
 select a VPI

 vci 1..1023
 select a VCI
show - displays the Alternate PVC status. Type the command and press return. The following prompt is displayed:
primary vpi primary vci primary status alter vpi alter vci alter status
2 200 Up 3 200 Down
In order to access the Alternate PVC Route feature, from the root menu type: Configuration PVC Bundle? and press return.
The PVC Bundle sub menu is displayed:
add             remove          show            up
top             exit            ?


 add
 add alternate PVC

 remove
 remove alternate PVC

 show
 show status
add -add an alternate PVC. Type the command and press return. The following prompt is displayed:
Usage:    add  <basevpi 0..7>  <basevci 1..1023>  <vpi 0..7>  <vci 1..1023>  < tos bit string>  (primary|alternate)  {<peakrate 1..8>}


 basevpi 0..7
 select a base VPI

 basevci 1..1023
 select a base VCI

 vpi 0..7
 select VPI

 vci 1..1023
 select VCI

 tos bit string
 enter the 6 digit string

 primary|alternate
 define if the pvc is primary or alternate

 peakrate 1..8
 select a peak rate
remove - remove an alternate PVC. Type the command and press return. The following prompt is displayed:
Usage:    remove  <vpi 0..7>  <vci 1..1023>


 vpi 0..7
 select VPI

 vci 1..1023
 select VCI
show - displays the Alternate PVC status. Type the command and press return. The following prompt is displayed:
BUNDLES TABLE
Peer Network      MASK   |PVC MASK   |vpi|vci |status|alter.vpi|alter.vci|alter.status
1.1.1.1           111111 |000000 BASE|1  |100 |Down  |      |      |
This feature enables the 8110 to act as a static Router. IP packets that carry the 8110 MAC address will undergo a regular IP forwarding process - mapping each destination IP to it's associate PVC. In this case the 8110 also responds to ARP requests for the configured IP in the LAN side.
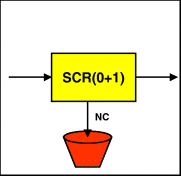
This feature enables users to define a connection which supports AAL5 PPD ( Partial Packet Discaed), enabling packet discard in case of cell loss.
In PPD mode, the VC connection is defined as a AAL5 connection that enables packet discard / tagging.
In this case the policer is assigned to police either the PCR or SCR, and the connection type as CBR/VBR or ABR.

OR
To access the PPD feature, from the root menu type Configuration VC policing Type ? and press return.
The following prompt is displayed:
Usage:    type  <vpi 0..255>  <vci 0..65535>  (user|network)  (ubr|cbr|vbr1|vbr2|vbr3|pubr|aal5cbr|aal5abr)


 vpi 0..255
 select vpi

 vci 0..65535
 select vci

 user|network
 select User or Network side interface

 ubr|cbr|vbr1|vbr2|vbr3|pubr|aal5cbr|aal5abr
 select service
The following sections provide sources for obtaining documentation from Cisco Systems.
You can access the most current Cisco documentation on the World Wide Web at the following sites:
Cisco documentation and additional literature are available in a CD-ROM package, which ships with your product. The Documentation CD-ROM is updated monthly and may be more current than printed documentation. The CD-ROM package is available as a single unit or as an annual subscription.
Cisco documentation is available in the following ways:
If you are reading Cisco product documentation on the World Wide Web, you can submit technical comments electronically. Click Feedback in the toolbar and select Documentation. After you complete the form, click Submit to send it to Cisco.
You can e-mail your comments to bug-doc@cisco.com.
To submit your comments by mail, use the response card behind the front cover of your document, or write to the following address:
Attn Document Resource Connection
Cisco Systems, Inc.
170 West Tasman Drive
San Jose, CA 95134-9883
We appreciate your comments.
Cisco provides Cisco.com as a starting point for all technical assistance. Customers and partners can obtain documentation, troubleshooting tips, and sample configurations from online tools. For Cisco.com registered users, additional troubleshooting tools are available from the TAC website.
Cisco.com is the foundation of a suite of interactive, networked services that provides immediate, open access to Cisco information and resources at anytime, from anywhere in the world. This highly integrated Internet application is a powerful, easy-to-use tool for doing business with Cisco.
Cisco.com provides a broad range of features and services to help customers and partners streamline business processes and improve productivity. Through Cisco.com, you can find information about Cisco and our networking solutions, services, and programs. In addition, you can resolve technical issues with online technical support, download and test software packages, and order Cisco learning materials and merchandise. Valuable online skill assessment, training, and certification programs are also available.
Customers and partners can self-register on Cisco.com to obtain additional personalized information and services. Registered users can order products, check on the status of an order, access technical support, and view benefits specific to their relationships with Cisco.
To access Cisco.com, go to the following website:
The Cisco TAC website is available to all customers who need technical assistance with a Cisco product or technology that is under warranty or covered by a maintenance contract.
If you have a priority level 3 (P3) or priority level 4 (P4) problem, contact TAC by going to the TAC website:
P3 and P4 level problems are defined as follows:
In each of the above cases, use the Cisco TAC website to quickly find answers to your questions.
To register for Cisco.com, go to the following website:
http://www.cisco.com/register/
If you cannot resolve your technical issue by using the TAC online resources, Cisco.com registered users can open a case online by using the TAC Case Open tool at the following website:
http://www.cisco.com/tac/caseopen
If you have a priority level 1(P1) or priority level 2 (P2) problem, contact TAC by telephone and immediately open a case. To obtain a directory of toll-free numbers for your country, go to the following website:
http://www.cisco.com/warp/public/687/Directory/DirTAC.shtml
P1 and P2 level problems are defined as follows:
Copyright © 2001, Cisco Systems, Inc.
All rights reserved.
![]()
![]()
![]()
![]()
![]()
![]()
![]()
![]()
Posted: Wed Oct 2 00:27:20 PDT 2002
All contents are Copyright © 1992--2002 Cisco Systems, Inc. All rights reserved.
Important Notices and Privacy Statement.