|
|

This appendix describes how to install a Secure Sockets Layer (SSL) certificate. When you install an SSL certificate on a BBSM server, it enables visitors to verify the site's authenticity and communicate with it securely through SSL encryption, which protects confidential information, such as credit card numbers, online forms, and financial data from interception and hacking.
This protection is accomplished by using "HTTPS" when coding the page sets. SSL comes in two strengths, 40 bit and 128 bit, which refer to the length of the "session key" that every encrypted transaction generates. The longer the key, the more difficult it is to break the encryption code.
If you are using RADIUS or credit card page sets, you must install an SSL certificate for end users to gain access to the Internet.
 |
Caution If you use Netscape for your web browser, because of known compatibility issues with Netscape 4.7x and earlier, you must use Netscape 4.8 or higher for BBSM to work properly. |
Secure Server IDs can only be issued to registered owners of a domain name.
 |
Note You can skip this section if you already have a fully qualified domain name. |
Use the following procedure to purchase a domain name.
|
Note Domain names can be purchased from other companies. Cisco Systems does not endorse any particular company. |
Step 2 Click the link for Business Domain Names.
Step 3 Enter the domain name you want to purchase.
Step 4 Select the desired extension, such as .com.
Step 5 Click Go.
|
Note If the domain name you chose is already taken, select a name from the suggested list, and click Search Again to search for a different name. |
Step 6 Once you find a domain name that you like, click Continue.
Step 7 Select an option, such as Domain Name Only, and click Select.
Step 8 Choose the length of time you would like to purchase the domain name, and then click Place Your Order.
Step 9 Proceed with Registration and Payment to complete your order. Be sure to print your receipt before closing your browser.
Use the following procedure to generate a Certificate Signing Request (CSR) for your web server certificate. This procedure should be performed by the BBSM administrator. Instructions for other supported servers can be found using this link: http://www.verisign.com/support/csr/index.html
|
Note BBSM servers use Microsoft IIS 5.0. |
Step 2 In the tree in the left pane, click the server name. The server description information appears in the right pane.
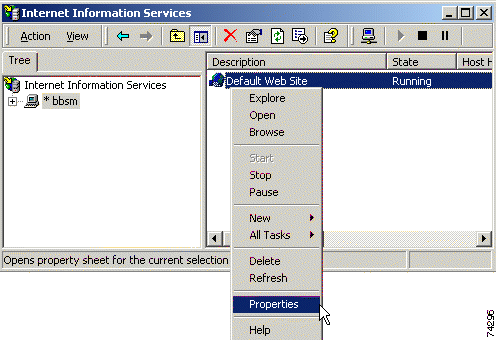
Step 3 In the right pane, right-click Default Web Site. The popup menu appears. (See Figure C-2.)
Step 4 From the pop-up menu, select Properties. The Default Web Site Properties window appears. (See Figure C-3.)
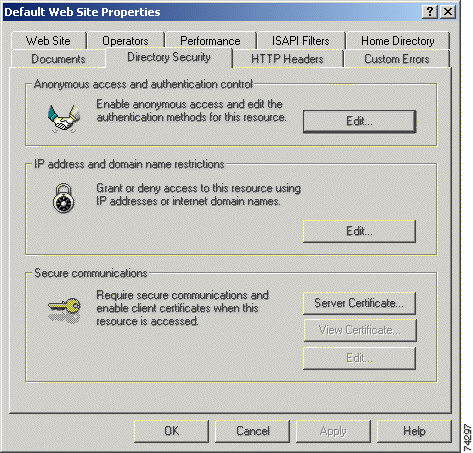
Step 5 Click the Directory Security tab.
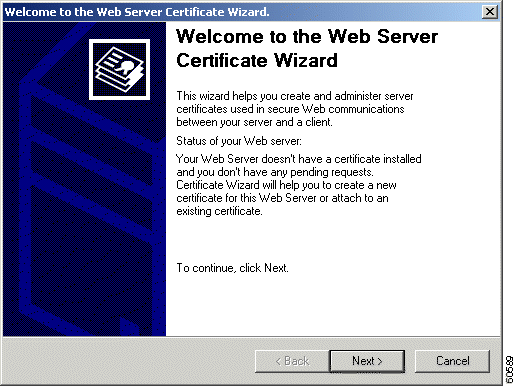
Step 6 In the Secure communications pane, click Server Certificate... The IIS Certificate Wizard, Welcome to the Web Server Certificate Wizard dialog box appears. (See Figure C-4.)
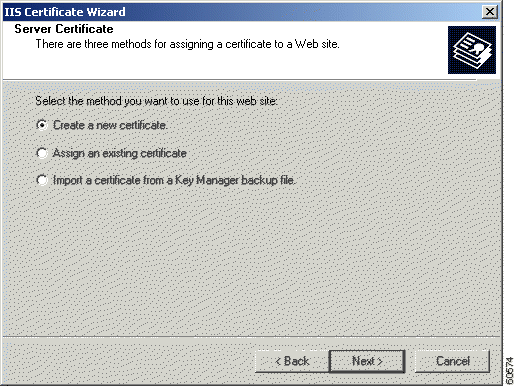
Step 7 Click Next. The IIS Certificate Wizard, Server Certificate dialog box appears. (See Figure C-5.)
Step 8 Verify that the Create a new certificate radio button is selected. If it is not selected, click it. Then click Next. The IIS Certificate Wizard, Delayed or Immediate Request dialog box appears. (See Figure C-6.)
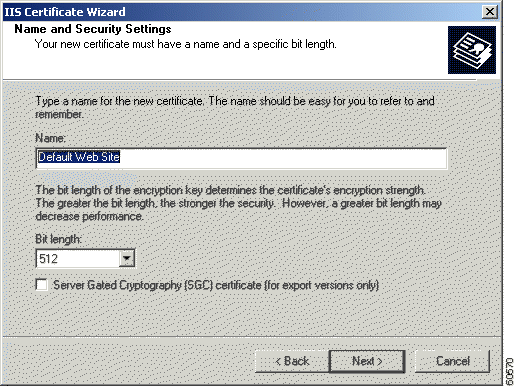
Step 9 Verify that the Prepare the request now, but send it later radio button is selected. If it is not, click it, and then click Next. The IIS Certificate Wizard, Name and Security Settings dialog box appears. (See Figure C-7.)
Step 10 Type a name for the new certificate.
Step 11 Click the Bit length drop-down arrow to select the bit length.
|
Note The greater the bit length, the stronger the security. However, a greater bit length may decrease performance. |
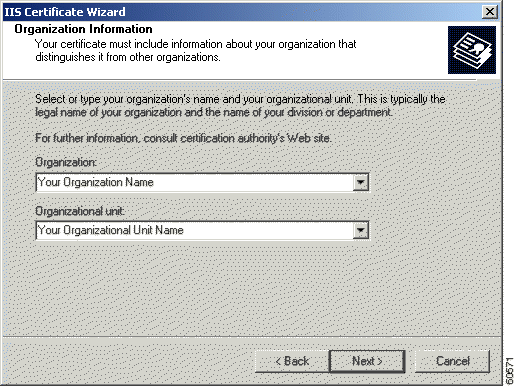
Step 12 Click Next. The IIS Certificate Wizard, Organization Information dialog box appears. (See Figure C-8.)
Step 13 In the Organization and Organizational unit fields, type your organization and organizational unit names.
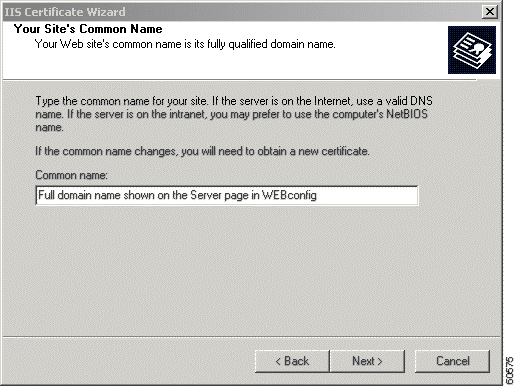
Step 14 Click Next. The IIS Certificate Wizard, Your Site's Common Name dialog box appears. (See Figure C-9.)
Step 15 In the Common name field, type in your website's common name, and then click Next. The IIS Certificate Wizard, Geographical Information dialog box appears. (See Figure C-10.)
|
Note Your website's common name is its fully qualified domain name. If the common name changes, you will need to obtain a new certificate. |
Step 16 On the Server web page in WEBconfig, verify that the Enable Domain Name for SSL Page Sets check box is checked.
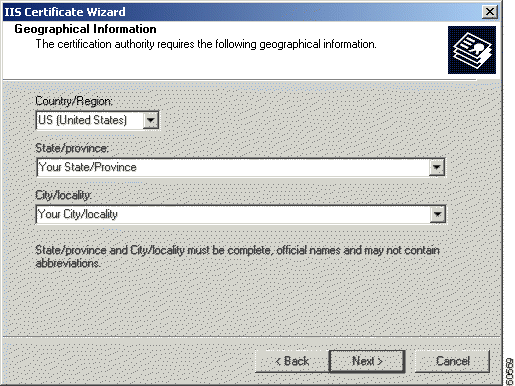
Step 17 In the geographical fields, type the requested information, and then click Next.
|
Note In the State/province field, you must use the full name, not the two-letter abbreviation; for example, California, not CA. You cannot use commas in any of these fields. |
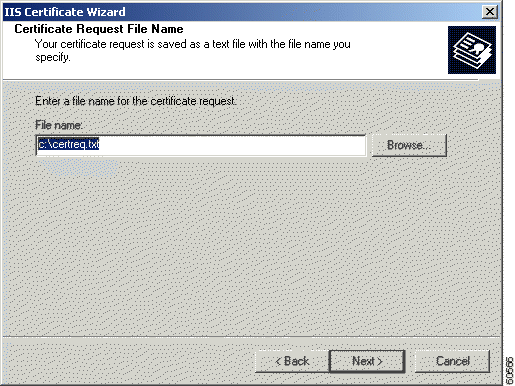
The IIS Certificate Wizard, Certificate Request File Name dialog box appears. (See Figure C-11.)
Step 18 Enter a file name for the certificate request.
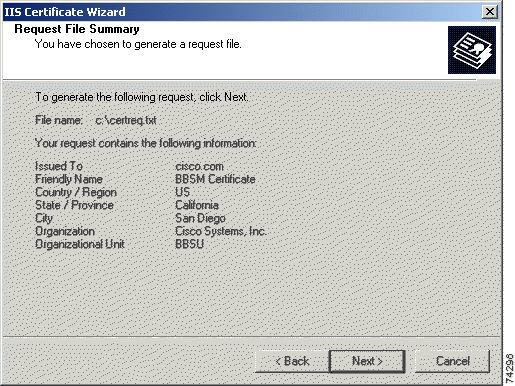
Step 19 Click Next. The wizard displays a summary. (See Figure C-12.)
Step 20 Verify that information is correct, and click Next. The IIS Certificate Wizard, Completing the Web Server Certificate Wizard dialog box appears. (See Figure C-13.)
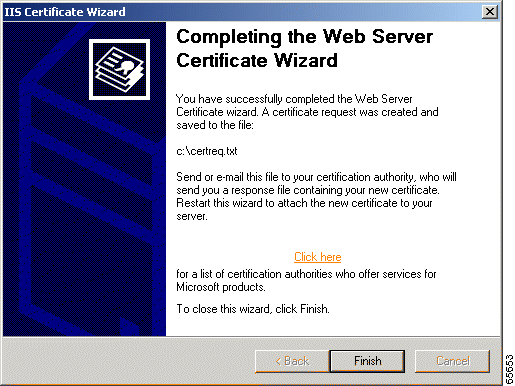
Step 21 Click Finish to close the dialog box.
Step 22 Click OK to close the Default Web Site Properties, Directory Security tab window.
Step 23 Close the Internet Information Services window.
You have completed the Web Server Certificate Wizard. A certificate is now installed on the BBSM server. If you need to renew, replace, or delete the certificate in the future, you can use the wizard again.
After generating the CSR on your BBSM server, you must purchase a Secure Server Digital ID from a Certificate Authority (CA), such as VeriSign, Inc. This will authenticate your website and enable SSL encryption technology.
|
Note Cisco Systems does not endorse any particular company. |
Use the following procedure to purchase a Secure Server Digital ID:
Step 2 Follow the online instructions.
|
Note During the enrollment process, you must purchase 128-bit encryption. CA's need to verify that your organization is legitimate and registered with the proper government authorities. The easiest and fastest way to do this is by providing the CA with your company's Dun & Bradstreet DUNS number during the enrollment process. You are not required to have a DUNS number. |
Step 3 At some point during enrollment, you will be asked to open the CSR text file (c:\certreq.txt) that you created in the previous section using a text editor, such as Windows Notepad.
Step 4 When asked, copy and paste the CSR into the appropriate text area of the CA's online enrollment form. A CSR looks like this:
Step 5 Complete the rest of the application, making sure that the information you enter is correct.
After submitting your completed application, your domain's Technical and Organizational Contacts will receive an e-mail message confirming enrollment within 2 hours of submitting the order. It usually takes at least 3 to 5 working days to issue your Secure Server ID.
Use the following procedure to install the granted certificate received from a CA onto your BBSM server.
Step 2 In the tree in the left pane, click the server name.
Step 3 In the right pane, right-click Default Web Site. The popup menu appears.
Step 4 Select Properties. The Default Web Site Properties window appears.
Step 5 Click the Directory Security tab. The Directory Security window appears.
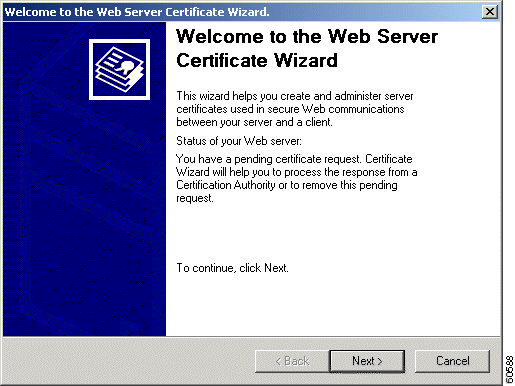
Step 6 In the Secure Communications pane, click Server Certificate... The Welcome to the Web Server Certificate Wizard window appears. (See Figure C-14.)
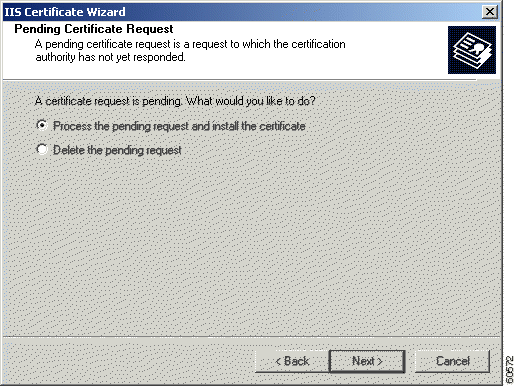
Step 7 Click Next. The IIS Certificate Wizard, Pending Certificate Request window appears. (See Figure C-15.)
Step 8 Verify that the Process the pending request and install the certificate radio button is selected. If it is not, click it, and then click Next. The IIS Certificate Wizard, Process a Pending Request window appears. (See Figure C-16.)
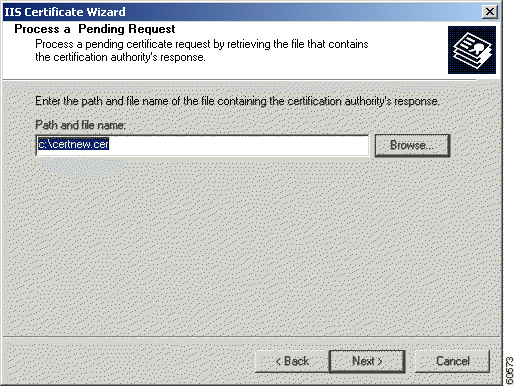
Step 9 In the Path and file name field, type the path and file name of the signed certificate (such as c:\certnew.cer) or use the file received from your certificate authority. Then click Next. The IIS Certificate Wizard, Certificate Summary window appears. (See Figure C-17.)
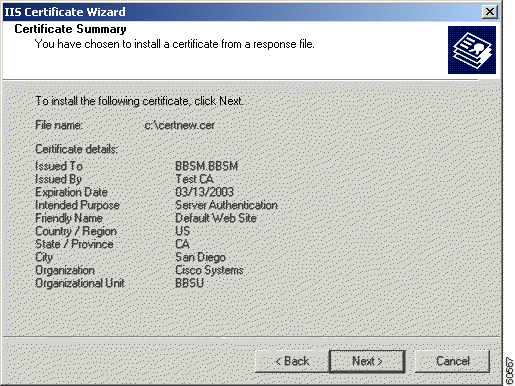
Step 10 Click Next. The Completing the Web Server Certificate Wizard window appears, indicating that the installation is complete. (See Figure C-18.)
Step 11 Click Finish to close the window. You return to the Default Web Site Properties window.
Step 12 Click OK to close the Default Web Site Properties window.
Step 13 Click OK to close the Internet Information Services window.
You now have a server certificate installed. You may want to test the Web site to ensure that everything is working correctly. Be sure to use https:// when you test connectivity to the site.
The Microsoft Management Console (MMC) is an application that provides a graphical-user interface and a programming framework in which consoles (collections of administrative tools) can be created, saved, and opened.
Some overview text is needed here.
To perform the backup, you must first create a new MMC and add the Certificates snap-in. You can also add the snap-in to another MMC as long as it is opened in Author mode.
Use the following procedure to create a new MMC and add the Certificates snap-in:
Step 2 Type MMC.EXE and then click OK.
Step 3 In the new MMC you created, click Console.
Step 4 Click Add/Remove Snap-in.
Step 5 In the new window that appears, click Add.
Step 6 Highlight Certificates, and click Add.
Step 7 Select the Computer account option, and click Next.
Step 8 Select Local Computer, and click OK.
Step 9 Click Close, and then click OK.
You have now added the Certificates snap-in, which will allow you to work with any certificates in your computer's certificate store. You may want to save this MMC for later use.
Now that you have added the Certificates snap-in, you can export the key pair that your Web server is using. To do so, follow this procedure:
|
Note You will see your Web server certificate denoted by the Common Name (CN), which is found in the Subject field of the certificate. |
Step 2 Right-click on the server certificate, select All Tasks, and click Export.
Step 3 After the wizard starts, click Next.
Step 4 Choose to export the private key, and click Next.
|
Caution Do not select Require Strong Encryption. This option causes a password prompt every time an application attempts to access the private key and causes IIS to fail. |
Step 5 Choose the file format Personal Information Exchange. This will create a PFX file.
Step 6 Click Next.
Step 7 Choose a password to protect the PFX file, and click Next.
Step 8 Choose a file name that you want to save this as. Do not include an extension in your file name; the wizard adds it automatically.
Step 9 Click Next.
Step 10 Read the summary. Pay special attention to where the file is being saved to. If you are sure the information is correct, click Finish.
You now have a PFX file containing your server certificate and its corresponding private key. Be sure to move this file to a floppy disk and store it somewhere safe to protect this file.
To complete this operation, you must have a backup of the server certificate contained in a PFX file.
Use the following procedure to view the Certificates store on the local computer:
Step 2 Type in MMC.EXE, and click OK.
Step 3 Click Console in the new MMC that you created.
Step 4 Click Add/Remove Snap-in.
Step 5 In the new window that appears, click Add.
Step 6 Highlight Certificates, and click Add.
Step 7 Choose the Computer account option, and then click Next.
Step 8 Select Local Computer, and click OK.
Step 9 Click Close, and then click OK.
You have now added the Certificates snap-in, which will allow you to work with any certificates in your computer's certificate store. You may want to save this MMC for later use.
Now that you have added the Certificates snap-in, you can import the server certificate into your computer's certificate store by following these steps:
Step 2 Right-click Certificates, (or Personal, if that option does not exist) and select All Tasks.
Step 3 Click Import.
Step 4 When the wizard starts, click Next.
Step 5 Browse to the PFX file you created containing your server certificate, and click Next.
Step 6 Enter the password you gave the PFX file when you created it.
|
Note Verify that the Mark the key as exportable option is selected if you want to be able to export the key pair again from this computer. |
Step 7 Click Next, and then choose the Certificate Store Personal to save the certificate to.
Step 8 Click Next. You should see a summary screen showing what the wizard is about to do. If this information is correct, click Finish.
You will now see the server certificate for your Web server in the list of Personal Certificates.
Now that you have the certificate backup imported into the certificate store, you can enable IIS 5.0 to use that certificate. To do this, perform the following steps:
Step 2 Right-click Default Web Site (the website where you want to enable secure communications), and select Properties.
Step 3 Click the Directory Security tab.
Step 4 In the Secure communications section, click Server Certificate.
Step 5 When the Web Site Certificate Wizard starts, click Next.
Step 6 Choose the Assign an existing certificate option, and click Next.
Step 7 You will now see a screen showing that contents of your computer's personal certificate store. Highlight your web server certificate, and then click Next.
Step 8 You will now see a summary screen showing you all the details about the certificate you are installing. Be sure that this information is correct or you may have problems using SSL in HTTP communications. Click Next.
Step 9 Click OK to exit the wizard.
You should now have an SSL-enabled Web server. Be sure to protect your PFX files from any unwanted personnel.
![]()
![]()
![]()
![]()
![]()
![]()
![]()
![]()
Posted: Fri Mar 7 15:01:15 PST 2003
All contents are Copyright © 1992--2002 Cisco Systems, Inc. All rights reserved.
Important Notices and Privacy Statement.