|
|

Table Of Contents
Cisco CRM Communications Connector for Cisco CallManager Express
Prerequisites for Cisco CCC for Cisco CME
Restrictions for Cisco CCC for Cisco CME
Information About Cisco CCC for Cisco CME
Installing Cisco CCC for Cisco CME
Prerequisites for Installing Cisco CCC
Installing Cisco CCC Server Software
Installing and Maintaining Cisco IOS TSP on the Client
Installing Cisco CCC Client Software
Setting Parameters for Cisco CCC for Cisco CME
Setting Dial String Patterns and Dial Prefixes on the Server
Setting Cisco CCC Parameters on the Client
Using Cisco CCC with Microsoft CRM
Troubleshooting and Technical Issues
How Cisco CCC Works with Microsoft CRM
Cisco CRM Communications Connector for Cisco CallManager Express
Cisco CRM Communications Connector (Cisco CCC) integrates Microsoft Customer Relationship Management (CRM) with Cisco CallManager Express (Cisco CME) 3.0 or later versions to provide customer-service functionality for small- and medium-sized businesses.
Feature History for Cisco CCC for Cisco CME
Contents
•
Prerequisites for Cisco CCC for Cisco CME
•
•
•
•
•
•
•
Prerequisites for Cisco CCC for Cisco CME
Cisco CCC software consists of a client component and a server component. This section describes the requirements for the client and server platforms.
Cisco CCC Client Requirements
•
•
•
•
•
Cisco CCC Server Requirements
•
•
•
•
•
Restrictions for Cisco CCC for Cisco CME
•
•
Information About Cisco CCC for Cisco CME
Cisco CCC for Cisco CME is an application that integrates Microsoft CRM (a customer relationship management database and application) with Cisco CallManager Express systems. Cisco CCC for Cisco CME improves customer service by providing the following functionality for Cisco CME systems:
•
•
•
Cisco CCC uses the standard Microsoft telephony API (TAPI), which in turn utilizes the underlying Cisco IOS TAPI service provider (TSP) to communicate with the call routing server.
Cisco CCC uses a client/server model. The client provides an interface for TAPI and for the user. The server provides an interface to the Microsoft CRM server. When the Cisco CCC client requests interaction with the Microsoft CRM server, Cisco CCC server components perform the interaction. The client has no direct knowledge of Microsoft CRM objects. The system architecture is shown in Figure 1.
Figure 1 Cisco CCC System Architecture
The user interface for the Cisco CCC components are .NET form windows. The client also contains an embedded Microsoft Internet Explorer window, which makes requests from the client to the server. The Cisco CCC server components do all the work and present HTML to the embedded Internet Explorer client for user interaction. Selections made in a Cisco CCC window automatically launch CRM and Internet Explorer if they are not already open.
The user interface for the CRM components can be either a web browser (Microsoft Internet Explorer 5.5 or later only) or a Microsoft Outlook window (in online mode or offline mode).
During Cisco IOS TSP installation, a system administrator associates phones with the Cisco IOS TSP software that is installed on the Cisco CCC client. When a call is made or received from a phone that is associated with Cisco CCC, the client passes the call information (ANI or DNIS) to the Cisco CCC server components, which perform a lookup in the Microsoft CRM database and return an HTML page for the client to display. The HTML is formatted so that the appropriate actions are taken by the browser when the user clicks any of the items contained in the response.
When the Cisco CCC client detects a new incoming or outgoing call, the client presents a Create New Record window to the user ( Figure 2). This window contains an embedded Microsoft Internet Explorer window that makes requests to the Cisco CCC server components, which do all the work and present HTML to the embedded Internet Explorer client for user interaction. Cisco CCC lists in this window the customer records in the CRM database that potentially match the phone number that was detected in the call. The user can click the icon next to a name to be presented with a new CRM Phone Call Activity window to be associated with that name (see Figure 34). The user can also click the name itself to see the CRM customer record associated with that individual (see Figure 32). See the "Using Cisco CCC for Cisco CME" section for more information about how to use Cisco CCC windows.
Figure 2 Cisco CCC Create New Record Window
Installing Cisco CCC for Cisco CME
Prior to installing Cisco CCC for Cisco CME software, complete the tasks in the "Prerequisites for Installing Cisco CCC" section.
Once the prerequisite tasks are complete, perform the software installation tasks in the following order:
1.
2.
3.
Note
Prerequisites for Installing Cisco CCC
•
–
–
–
•
•
•
Figure 3 File Contents of CiscoIOSTSP1.2.zip
Installing Cisco CCC Server Software
This task uses a setup wizard to install software on the Cisco CCC server. Be sure to complete the items listed in the "Prerequisites for Installing Cisco CCC" section before starting this task.
SUMMARY STEPS
1.
2.
3.
4.
5.
6.
7.
8.
9.
DETAILED STEPS
Step 1
This file is used to create the Call This Person button on the customer contact window in the Outlook client GUI interface. The filename is not case-sensitive. Note that if you are installing the software on a Microsoft Small Business Server, this file may be found in a different directory, \inetpub\wwwroot\CRM\_Resources.
Step 2
Step 3
Step 4
Step 5
If you are prompted with a browser window that prompts you to "Please locate the file:_Resources\OutlookClient.xml," browse to C:\Inetpub\wwwroot\_Resources and select the OutlookClient.xml file. This action creates the Call This Person customization on the customer contact window. The filename is not case-sensitive. Note that if you are installing the software on a Microsoft Small Business Server, this file may be found in a different directory, such as \inetpub\wwwroot\CRM\_Resources.
If you are prompted with a browser window that prompts you to "Please locate the file:isv.config," browse to C:\inetpub\wwwroot\_resources\ and select the isv.config file. Note that if you are installing the software on a Microsoft Small Business Server, this file may be found in a different directory, such as \inetpub\wwwroot\CRM\_Resources.
To confirm, click OK.
Step 6
Step 7
a.
b.
c.
d.
e.
f.
Figure 4 Administrative Configuration Wizard
Step 8
Figure 5 Administrative Configuration Advanced Tab
Step 9
Installing and Maintaining Cisco IOS TSP on the Client
Cisco CME provides an interface that enables simple one-to-one remote control of a Cisco IP phone by an associated PC that is running Cisco IOS TAPI service provider (TSP). Cisco IOS TSP is a dynamic-link library (DLL) that provides device-specific controls for communications processing and an abstraction layer between TAPI applications and the underlying hardware and transport protocols, which supports the placing of outbound calls from an application such as Cisco CCC. The TSP interface supports basic TAPI services to enable caller-ID-based window popups for incoming calls and simple outgoing call placement using one-click address-book-style speed dialing from the PC application.
Note
Cisco IOS TSP provides the following functionality:
•
•
•
This section explains the following tasks that are related to applications integration with Cisco IOS TSP:
•
•
•
Installing Cisco IOS TSP
This task prepares Cisco IOS TSP for use. Be sure to complete the items listed in the "Prerequisites for Installing Cisco CCC" section before starting this task.
SUMMARY STEPS
1.
2.
3.
4.
DETAILED STEPS
Step 1
Step 2
a.
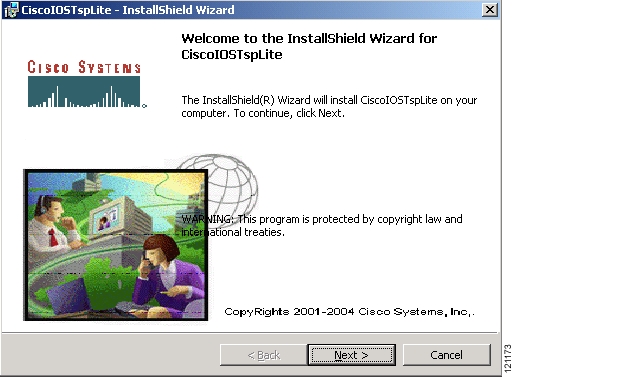
Figure 6 Cisco IOS TSP InstallShield Wizard Window
b.
Figure 7 Cisco IOS TSP License Agreement Window
c.
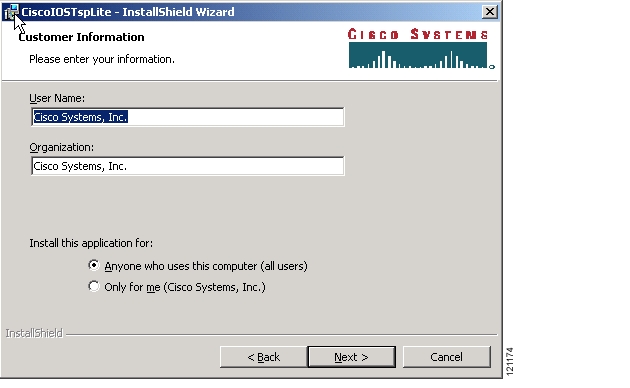
Figure 8 Cisco IOS TSP Customer Information Window
d.
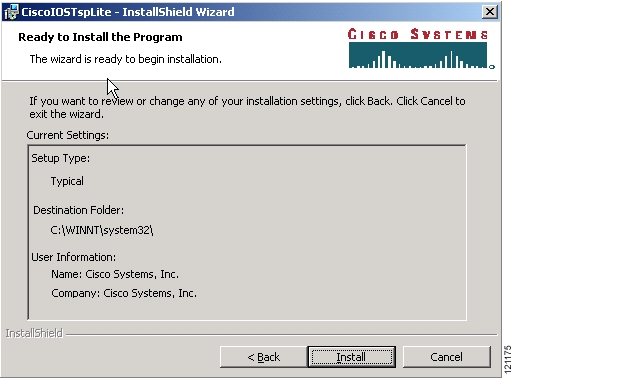
Figure 9 Cisco IOS TSP Ready to Install Window
e.
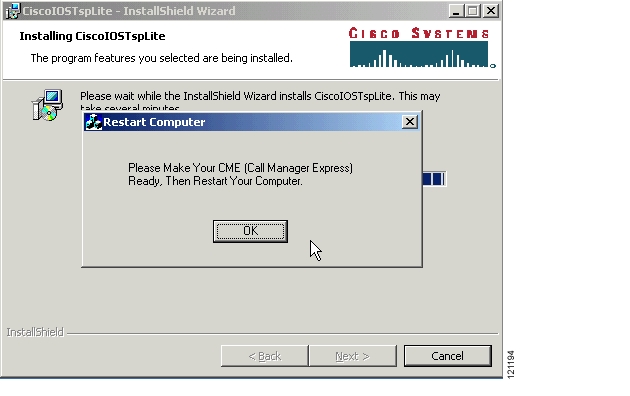
Figure 10 Restart Computer Window
f.
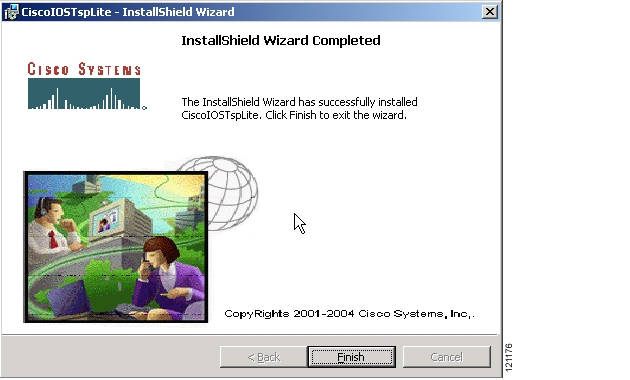
Figure 11 Cisco IOS TSP Wizard Completed Window
Step 3
•
•
•
Step 4
Modifying a Cisco IOS TSP Configuration
The following task allows you to change Cisco IOS TSP parameters on your PC.
SUMMARY STEPS
1.
2.
3.
4.
5.
DETAILED STEPS
Step 1
Step 2
Figure 12 Phone And Modem Options Dialog Box
Step 3
The Cisco IOS Telephony Service Provider dialog box appears, as shown in Figure 13.
If Cisco IOS Telephony Service Provider does not appear in the Providers list, click Add to bring up a window that allows you to add Cisco IOS Telephony Service Provider to the Providers list.
Figure 13 Cisco IOS TSP Configuration Dialog Box
Step 4
a.
b.
c.
d.
e.
Step 5
Exit the Cisco CCC application if it was running, and restart it for your changes to take effect. If any services that depend on the telephony service are running, restart the system also.
Removing Cisco IOS TSP
This section explains how to remove Cisco IOS TSP from your computer.
SUMMARY STEPS
1.
2.
3.
DETAILED STEPS
Step 1
Step 2
Step 3
Verifying Basic TAPI Operation
This section explains how to verify that TAPI is working.
SUMMARY STEPS
1.
2.
DETAILED STEPS
Step 1
Step 2
Troubleshooting Cisco IOS TSP
If you have problems with Cisco IOS TSP, perform the following tasks:
•
•
•
•
•
–
–
–
•
Note
•
Installing Cisco CCC Client Software
This task uses a setup wizard to install software on the Cisco CCC client. Be sure to complete the items listed in the "Prerequisites for Installing Cisco CCC" section before starting this task.
SUMMARY STEPS
1.
2.
3.
4.
5.
6.
7.
8.
9.
10.
DETAILED STEPS
Step 1
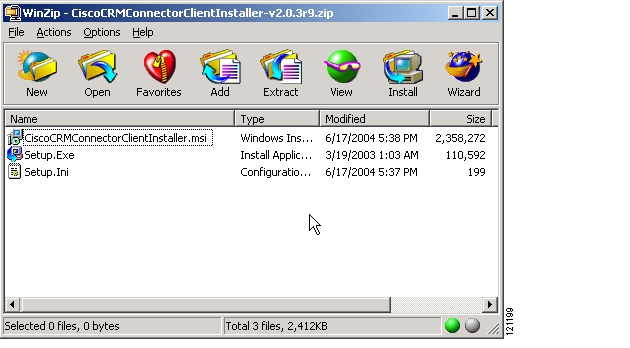
Figure 14 Cisco CCC Client Installer Files
Step 2
Figure 15 Cisco CCC Client Setup Wizard
Step 3
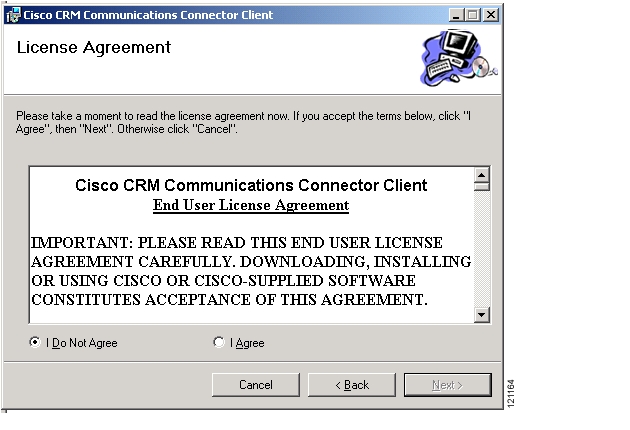
Figure 16 Cisco CCC Client Setup Wizard License Agreement Window
Step 4
Figure 17 Cisco CCC Client Setup Wizard Select Installation Folder Window
Step 5
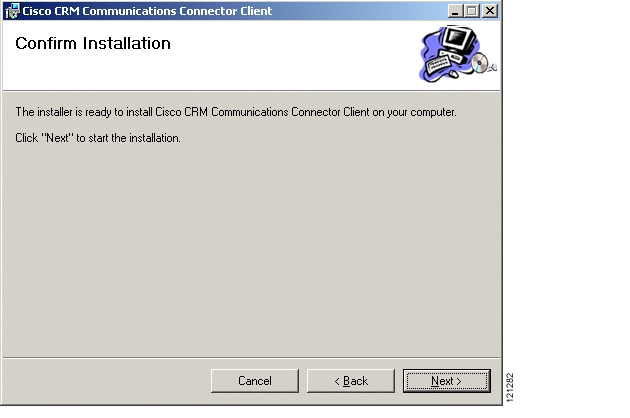
Figure 18 Cisco CCC Client Setup Wizard Confirm Installation Window
Step 6
a.
Figure 19 Cisco CCC Client Configuration TAPI Tab
Step 7
a.
b.
c.
Figure 20 Cisco CCC Client Configuration CRM Tab
Step 8
a.
b.
Figure 21 Cisco CCC Client Configuration Other Tab
Step 9
a.
b.
Figure 22 Cisco CCC Client Configuration Debugging Tab
Step 10
Note
Setting Parameters for Cisco CCC for Cisco CME
After installing the Cisco CCC software and the Cisco IOS TSP software, you need to set dial string patterns and dial prefixes on the server. Optionally, you can adjust certain Cisco CCC parameters on the client as well. This section describes the following topics:
•
•
Setting Dial String Patterns and Dial Prefixes on the Server
Cisco CCC is able to dial numbers and interpret incoming numbers because of the dial string patterns and dial prefixes that you enter into the configuration wizard on the server. An interactive GUI window is provided for easy editing of the configuration file.
This section discusses the following topics:
•
•
About Dial String Patterns and Dial Prefixes
Dial string patterns are regular expressions in .NET format that represent the ways that telephone numbers are entered in the CRM database. Cisco CCC uses dial string patterns to match against numbers in the database and in the telephony application. Once a number is matched to a pattern, Cisco CCC can parse it into its components and make use of those components. One example is a number from the CRM database that can be used in a click-to-dial application. Another example is a number that is received from caller ID that can be used to bring up the appropriate customer record from the CRM database. In both these examples, Cisco CCC needs to be able to separate a number into components that can be matched against other values. Dial string patterns tell Cisco CCC how to do that, and by having a number of dial string patterns, you will be able to match numbers that have been entered in the database in different formats.
A dial string pattern tells Cisco CCC how to parse a number into components such as area code, exchange, station, and extension. These are the components that are exchanged between phones to set up phone calls. For example, the following dial string pattern defines the area code, exchange, and station for a number written in this format: 805-555-1076:
(\d{3})-(\d{3})-(\d{4})A dial prefix is a regular expression in .NET format that Cisco CCC attempts to match against a number that you want to dial. Dial prefixes contain dialing instructions for numbers that they match. For example, the following dial prefix instructs the Cisco CCC dialer to dial a 9 before any number with an 805 area code.
<Match areacode="805" dialstring="9{ac}{ex}{st}" />When a phone number is passed to Cisco CCC from the click-to-dial function, it is processed in the following order:
1.
2.
Although phone numbers must be in a recognizable format in CRM records, you are not limited to a single format. The exact formats that are required are the decision of the administrator at each site. Cisco CCC has no requirement for the format in which phone numbers are stored other than that those formats must match one of the dial string patterns, which will subsequently match one of the dial prefixes. So, for example, an administrator can define dial string patterns that match both 10-digit and 7-digit dialing as well as patterns for matching phone numbers that simply represent internal extensions.
You can define any number of dial string patterns and dial prefixes for Cisco CCC to match. Dial string patterns and dial prefixes are evaluated in the order in which they are listed in the configuration file, which is also their order in the interactive configuration window. If a phone number does not match any dial string pattern or dial prefix, Cisco CCC cannot dial the number.
.NET Regular Expression Matching
The following characters are used in .NET regular expression syntax in dial string patterns and dial prefixes:
•
•
•
•
•
•
The following character class is used in .NET regular expression syntax in dial string patterns and dial prefixes:
•
The following character groups are used in .NET regular expression syntax in dial string patterns and dial prefixes:
•
•
The following quantifiers are used in .NET regular expression syntax in dial string patterns and dial prefixes:
•
•
•
•
•
For more information on .NET regular expression syntax, see " Regular Expression Language Elements" on the Microsoft website (MSDN Home > MSDN Library > .NET Development > .NET Framework SDK > .NET Framework > Reference) at the following URL:
http://msdn.microsoft.com/library/en-us/cpgenref/html/cpconRegularExpressionsLanguageElements.asp
The examples in Table 1 demonstrate how to use .NET regular expression syntax to build dial pattern definitions.
Using the Configuration Window to Set Dial String Patterns and Dial Prefixes
The configuration window on the server is used to define dial string patterns and dial prefixes for Cisco CCC ( Figure 23).
The Administrative Configuration wizard on the CRM server helps you to create a primary configuration that will be used for most cases. You can then add additional dial prefixes and dial string patterns manually using the Advanced tab, which provides a configuration window for dial prefixes and dial string patterns.
Note
Figure 23 Dial Prefixes and Dial String Patterns Configuration Window
The configuration window has a pane that displays the dial string patterns that you have defined and a pane that displays the dial prefixes that you have defined. The following buttons are available in the configuration window to manipulate dial strings or dial prefixes in either pane:
•
•
•
•
Below the display panes, the following areas provide fields for entering data:
Dial String Pattern Area
For each of the following fields, the area to enter data becomes active when the check box next to it is checked; otherwise the area remains dimmed and disabled.
•
•
•
•
•
•
•
•
The minimum value for the Area Code, Exchange, Station, and Extension fields is 1 when those fields are enabled with check marks in their check boxes. The maximum value for these fields is the value in the Expected # of Matches field. If a field is not enabled with a check mark, the field is left blank.
Dial Prefixes Area
All fields in the Dial Prefixes area except dial pattern are optional. You must have one or more of the optional fields and a dial pattern field in every pattern that you create.
For each of the following fields, the area to enter data becomes active when the check box next to it is checked; otherwise the area remains dimmed and disabled.
•
•
•
•
•
•
For example, if a user lives in the 407 area code and needs to dial 10-digits for local numbers, there will likely be a Dial Prefix entry for AreaCode = 407. The Re-write Number As pattern will be 9{ac}{ex}{st}, because the user also needs to dial 9 to get an outside line. The {ac} code is replaced with the actual area code being dialed, {ex} with the actual exchange, and {st} with the actual station. There are two more codes that may be used: {ext}, which will be replaced with the extension (if there is one) and {}, which will be replaced with all the digits that were recognized as a field in the Dial String Pattern. The next rule might be a Pattern rule, such as \d{10}, which is translated as a number with ten digits that is requested to be dialed. In this case, because this rule did not match the 407 area code rule, it is assumed to be a long-distance rule. The Re-write Number As pattern is 91{}, which indicates that the system should dial 9, then 1, then the digits, because 91 is needed to get an outside long-distance line.
Setting Cisco CCC Parameters on the Client
Parameters on the Cisco CCC client are determined by the values that you set in the Configuration window. The Configuration window is opened when you right-click the Cisco CCC tray icon ( Figure 28) and choose Configure from the control menu. For more information on the control menu, see the "Using Cisco CCC Windows" section.
The Configuration window contains the following tabs for setting parameters:
•
•
Any changes that you make in the Configuration window become effective when you click OK. Clicking Cancel reverts all values to the values that they had when the configuration window was opened.
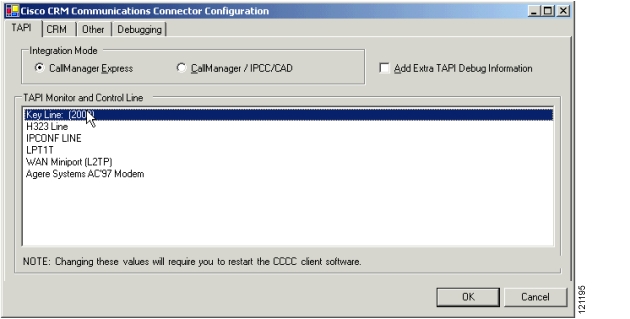
TAPI Tab
The TAPI tab ( Figure 24) includes the following parameters:
•
•
•
Figure 24 TAPI General Configuration Tab
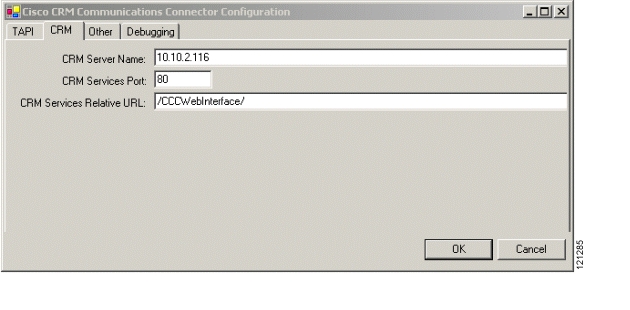
CRM Tab
The CRM tab allows you to configure the server, port, and URL for CRM service ( Figure 25).
Figure 25 CRM Configuration Tab
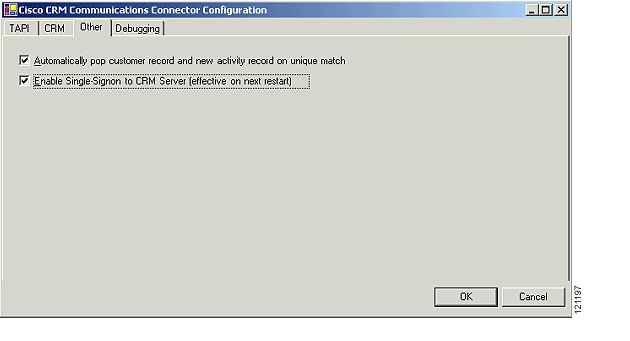
Other Tab
The Other tab allows you to set the following user preferences ( Figure 26).
•
•
Figure 26 Other Configuration Tab
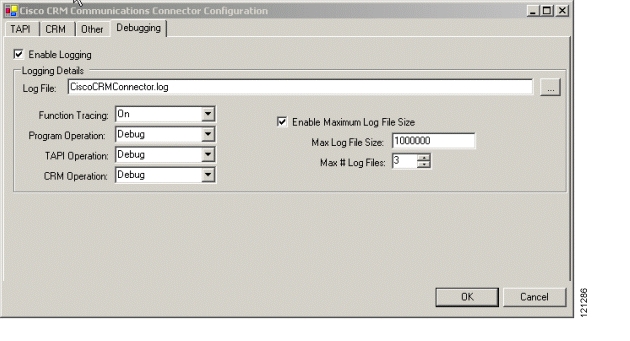
Debugging Tab
Logging is configured in the Debugging tab ( Figure 27). You can set the logging levels in four different categories to Off, On, CriticalErrors, Errors, Warnings, Info, or Debug. (On applies only to the Function Tracing category.) Each successive logging level generates more verbose diagnostic output than the last. Off generates virtually no output and provides only the initialization of a logging file with the date and time. Info and Debug generate the most output and should be used only when extensive debugging is being performed. The recommended logging level is Warnings, except for the Function Tracing category, which can be set only to On or Off.
The following are recommended logging levels for each of the four categories:
•
•
•
•
Figure 27 Debugging Configuration Tab
Using Cisco CCC for Cisco CME
After installation of Cisco CCC software and Cisco IOS TSP software is complete, start Cisco CCC by choosing Start > Programs > Cisco CRM Connector > Cisco CRM Connector Client.
Note
As Cisco CCC is loading, it provides a message stating that it is initializing. During initialization, cached CRM objects are created on the server.
Note
This section discusses the following topics:
•
Using Cisco CCC Windows
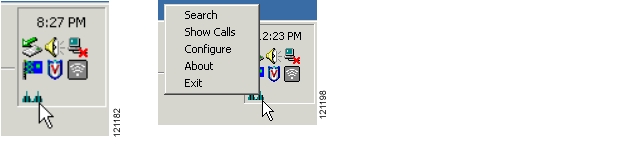
After Cisco CCC finishes initializing, it installs itself in the icon tray as an icon that looks like a bridge ( Figure 28). The bridge icon by the PC clock is your indication that Cisco CCC is running.
Tip
Right-click the Cisco CCC icon to display the application configuration and control menu ( Figure 28), which has choices that open the following windows:
•
In addition to these windows, The Create New Record Window is triggered whenever a phone call is placed using click-to-dial or is received.
Figure 28 Cisco CCC Icon and Icon with Control Menu Exposed
Search Window
The Search menu choice opens the Search window, which allows you to perform a text search without having an active phone call or TAPI event.
The Search window can also be activated by typing a contact name in the search field after clicking Search in a Create New Record window that was generated from a TAPI event (a call that was placed or received). If the search was initiated in this way, you can associate the current phone call with any object that is returned to you in the search results. This capability allows, for example, a phone call activity to be attached to a person calling from a phone number that does not yet exist in the person's customer record.
The search functionality is configured on the server with the CRM Search Entities file.
Show Calls Window
The Show Calls menu choice opens the Show Calls window ( Figure 29), which displays a list of the phone calls that have been made or received since the program started and allows you to look up an entry again.
The Show Calls window displays a list of incoming and outgoing calls. Right-click any item and choose Lookup to search again for that phone number. Clicking the `X' (Close) button does not close the application; it simply hides the window. This window should usually be hidden, because it is not needed for the main functionality of Cisco CCC.
Figure 29 Show Calls Window
Configure Window
The Configure menu choice opens the Configuration window, which is described in the "Setting Cisco CCC Parameters on the Client" section.
About Window
The About menu choice provides a window with version information for Cisco CCC.
Exit
The Exit menu choice exits the program.
Create New Record Window
Once you have started Cisco CCC, the Create New Record window ( Figure 30) is triggered whenever a phone call is placed using click-to-dial or is received. The window has three sections: phone number display, possible matches, and other options.
When a Create New Record window appears, take one of the following actions:
•
•
•
•
Figure 30 Create New Record Window
Using Cisco CCC with Microsoft CRM
Cisco CCC uses a small subset of the information and capability available in Microsoft CRM, primarily the data storage of accounts, contacts, and leads.
Microsoft CRM has two user interfaces: a web browser interface and a Microsoft Outlook interface. The Outlook interface gives you the option of working online or offline.
Note
If you are using the web browser interface, you need only to start Cisco CCC, which will automatically launch CRM and Internet Explorer as needed. It is recommended that you start the Cisco CCC software and the CRM web browser interface or the Microsoft Outlook client before taking calls.
You can also manually start CRM using the Start > Programs menu. If you do, you see the home window shown in Figure 31. You can create new CRM objects by clicking Quick Create, Sales, or Service. Complete instructions for using CRM are available in online help.
If you are using the Outlook interface, use the Start > Programs menu to start Outlook. You can use Cisco CCC and CRM with Outlook in online mode while connected to your home network or you can use CRM alone in offline mode.
Note
Figure 31 Microsoft CRM Home Window
A Microsoft CRM customer record window ( Figure 32) allows quick access to each of the types of data that can be stored with the current object. There are different windows for accounts and for individual customers. Refer to the CRM online help for more information about CRM windows.
Figure 32 Microsoft CRM Customer Record Window
Click-to-Dial
The menu bar at the top of the Microsoft CRM customer record window ( Figure 32) provides quick access to certain commonly used functions. Cisco CCC uses a customization that adds a Call This Person button in the menu bar to provide a click-to-dial function.
To dial the person listed in the window, click the Call This Person button in the menu bar. If there is more than one phone number in the record, a dialog box asks you which phone number to dial. Otherwise, the call is placed immediately using the Cisco CME phone that is associated with Cisco CCC.
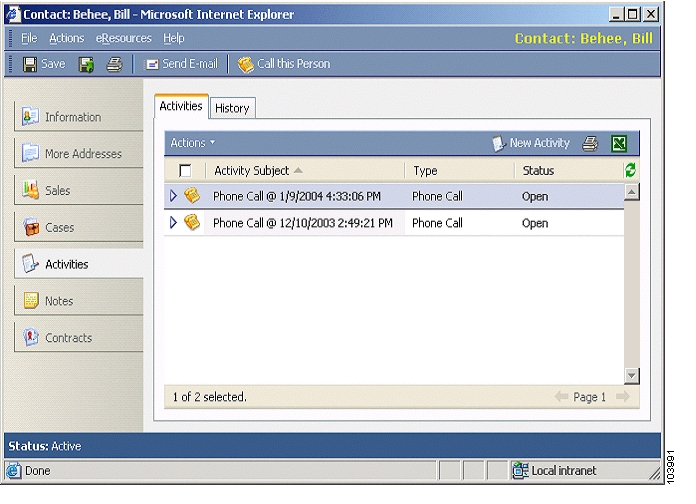
Activities
Cisco CCC stores knowledge of phone calls to and from customers under the Activities tab ( Figure 33). When you click the Activities button on a customer record window, CRM provides the following standard activity types: Phone Call, FAX, Email, Task, Letter, and Appointment. Of these, Cisco CCC uses only the Phone Call task, automatically creating and populating appropriate fields when you want to record details of a phone call.
Activities are considered current or historical. When a phone call is created, it is current, and it is listed under the Activities tab, as shown in Figure 33. When a phone call activity is closed, it is moved to the History tab.
Figure 33 Microsoft CRM Activities Tab
Phone Call Activity
Figure 34 shows an activity window for an incoming phone call. If this were an outgoing phone call, the initiator and the recipient data would be switched, and the direction would be Outgoing.
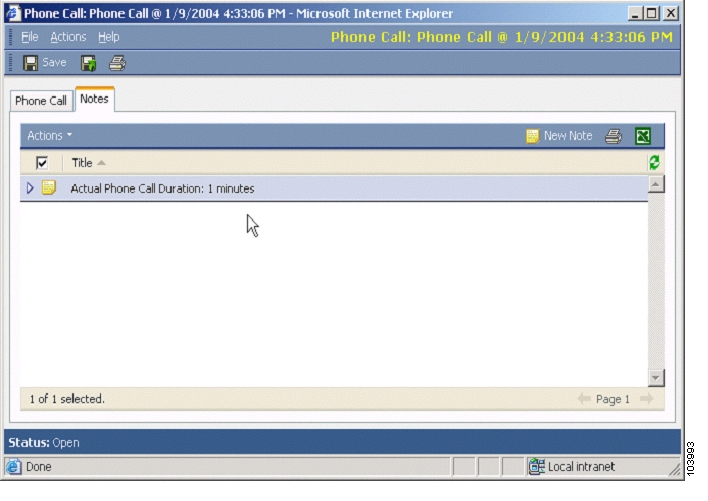
The Duration field is left empty for you to complete; the actual call duration as recorded by Cisco CCC is stored under the Notes tab. Cisco CCC leaves the Duration field in the phone call activity area empty to allow you to use that field to include additional time spent not on the phone call itself but on issues related to the phone call.
Figure 34 Microsoft CRM Phone Call Activity Window
When a call is completed and a phone call activity is created, Cisco CCC automatically adds a note that contains the actual call duration, as shown in Figure 35.
Figure 35 Microsoft CRM Notes Area
Troubleshooting and Technical Issues
This section contains the following topics:
•
•
Troubleshooting Cisco CCC
Some issues may occur during initialization. The Cisco CCC client performs a basic test of connectivity to the CRM server by connecting to the CRM HTTP server port. If the CRM server is unavailable, the initialization window displays the message "CRM Server Unavailable." Sometimes, even though this connection succeeds, other problems with the server may prevent the actual initialization request from completing. In this case, the initialization window remains displayed indefinitely. When the initialization window is displayed indefinitely, it can be closed by pressing Alt-F4. To aid in determining whether the initialization process is unable to complete, double-click anywhere in the gray portion of the window to display the underlying embedded Internet Explorer object. If the initialization request cannot complete, the familiar Internet Explorer "Action cannot be completed" error message will be visible. At this point, you should refer the problem to an administrator.
Other problems can be diagnosed by following one or more of the steps in this task.
SUMMARY STEPS
1.
2.
3.
4.
5.
DETAILED STEPS
Step 1
Step 2
Step 3
The default log file location on the client is the directory that contains the Cisco CCC executable.
The default log file location on the server is %WINDIR%\system32, which is the default directory for IIS in general.
Use the Debugging Configuration window to set logging levels to Off, On, CriticalErrors, Errors, Warnings, Info, or Debug. Each successive level generates more verbose diagnostic output than the last. Off generates virtually no output, only the initialization of a logging file with the date and time. Info and Debug generate the most output and should be used only when debugging is being performed. The recommended setting for normal operation is Warnings.
On the client, logging levels can be set separately for each of the following categories:
•
•
•
•
On the server, logging levels can be set separately for each of the following categories:
•
•
Step 4
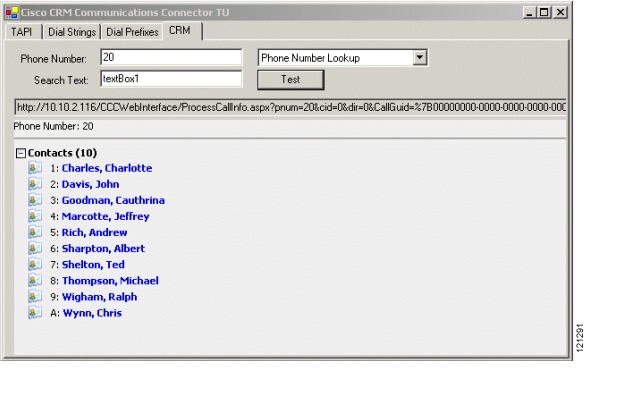
The Cisco CCC troubleshooting utility is a tool that is included with the Cisco CCC client to assist in troubleshooting. The utility filename is CiscoCRMConnectorTU.exe, and the file is located in the same directory as the Cisco CCC client executable. The utility obtains its configuration from the same file that the Cisco CCC client uses.
The Cisco CCC troubleshooting utility uses a window with the following four tabs:
•
•
•
•
Figure 36 Cisco CCC Troubleshooting Utility—TAPI Tab
Figure 37 Cisco CCC Troubleshooting Utility—Dial Strings Tab
Figure 38 Cisco CCC Troubleshooting Utility—Dial Prefixes Tab
Figure 39 Cisco CCC Troubleshooting Utility—CRM Tab
Step 5
If there are concerns that TAPI is not operating correctly, the dialer program can be used as a baseline test for TAPI.
How Cisco CCC Works with TAPI
Whenever a TAPI message becomes available, it is passed to the Cisco CCC application, which logs the message if the appropriate logging levels have been set. The only messages that are processed are the ones necessary for maintaining call information details such as the call duration. Once a call is placed or received, TAPI messages are monitored to trigger specific events such as starting the call duration timer and performing caller ID lookup.
The following TAPI messages are monitored:
•
•
•
•
•
All other TAPI messages are left unprocessed.
In addition, the following LINE_CALLSTATE TAPI messages are monitored:
•
•
•
•
How Cisco CCC Works with Microsoft CRM
This section describes the following topics:
Cisco CCC Server Components
Cisco CCC server components communicate with the Microsoft CRM server to perform lookups, create objects, and so forth. These components are made up of IIS ASP.NET pages and associated code in dynamic linking library (DLL) form that has been installed on the Cisco CCC server.
Cisco CCC server components include the following:
•
Each call that the server makes to the Microsoft CRM APIs requires that at least two objects be present: the User Authorization object and the target object (Contact, Account, Lead, and so forth). Creating the User Authorization object also requires that a BizUser object be created (this is the object that actually creates the User Authorization object). These objects are created whenever necessary by the Cisco CCC server components. To improve performance, InitializeWebInterface.aspx creates the objects ahead of time and stores them in the Microsoft CRM HTTP Server Session object for that user. These cached objects are used when available and are recreated if the session is timed out.
•
When the Cisco CCC client receives caller ID information on an incoming or outgoing call, the number is passed to ProcessCallInfo.aspx, which invokes the Microsoft CRM API Search object to locate records associated with that phone number. The results are processed and returned to the client as HTML in groups, grouped by object type, as each group is made available by the search. Each link in the HTML output either calls CreateCallRecord.aspx or opens a CRM window to display the item detail.
•
After you click Accept or Create Call in the client window, this page utilizes Microsoft CRM APIs to create a phone call activity record corresponding to the record that was selected. An instruction is then returned to the client to close the search window.
•
If you created a phone call activity record by clicking Accept or Create Call, the Cisco CCC client transparently calls this page when the call is disconnected. CloseCall.aspx then determines the length of the call and uses the Microsoft CRM APIs to create a note indicating the duration of the call.
•
When the Click-to-Dial function is used and there is more than one phone number stored in the target record, this page is called to present a small dialog asking which phone number you wish to call. The information is relayed back to the Cisco CCC client application's built-in HTTP server on port 49499, which initiates the dial sequence. If there is only one number stored in the target record, the dialog is skipped and the number is passed directly to the Cisco CCC client to begin dialing.
•
This DLL provides the common interface functions that call the Microsoft CRM APIs. Each of the previously mentioned ASPX pages actually calls this DLL, which calls CRM and returns the results. This DLL is dependent on the Microsoft.Crm.Platform.Proxy.dll, which is the Microsoft CRM v1.2 API, that was installed by the .NET Global Assembly Cache (GAC).
Cisco CCC Message Flows
In general, the message flow between Cisco CCC and CRM is as follows:
1.
2.
3.
Specific message flows include the following:
•
•
Incoming or Outgoing Call Originated Message Flow
1.
2.
3.
4.
5.
Call-Terminated Message Flow
1.
2.
3.
Note
Click-to-Dial Message Flow
1.
2.
3.
4.
5.
6.
CRM Customization
Microsoft provides independent software vendor (ISV) integration as a method for third parties to produce add-on products. ISV integration allows administrators to customize various aspects of the CRM user interface in both the web interface and the Outlook interface, so that they can add menu items, navigation bar entries, and menu bar items to most of the object types that are supported. This customization is achieved through the use of XML files located in the Inetpub\wwwroot\_Resources directory on the CRM server.
Additional References
The following sections provide references related to Cisco CCC for Cisco CME.
Related Documents
Cisco CallManager Express
Microsoft CRM Version 1.2 SDK
http://msdn.microsoft.com/library/en-us/CrmSdk1_2/htm/v1d2microsoftcrmversion12sdk.asp
.NET regular expression syntax
http://msdn.microsoft.com/library/en-us/cpgenref/html/cpconRegularExpressionsLanguageElements.asp
MIBs
Technical Assistance
Glossary
area code—Regional identifier that precedes a telephone number.
Cisco CCC—Cisco CRM Communications Connector. Application that integrates Microsoft Customer Relationship Management (CRM) with Cisco CallManager Express 3.0 or a later version to provide customer-service functionality for small- and medium-sized businesses.
Cisco CME—Cisco CallManager Express. Telephony service for small- to medium-sized businesses.
click-to-dial—Ability to click a button in a PC application to initiate the dialing of a particular number on an associated phone.
CRM—Customer Relationship Management. Software that provides customer-service functionality. Microsoft CRM is the application that works with Cisco CCC.
dial prefix—A a regular expression in .NET format that Cisco CCC attempts to match against a number that you want to dial. The matched dial prefix contains dialing instructions for the number.
dial string pattern—A regular expression in .NET format that Cisco CCC attempts to match against a number that you want to dial or that is received from an incoming call. The matched dial string pattern tells Cisco CCC how to parse the number to identify its individual components, such as area code, exchange, station, and extension.
exchange—The first group of digits in a telephone number; this group of digits identifies a local area within a region identified by an area code.
extension—A group of digits that is supplementary to a telephone number and usually follows that number; this group of digits identifies a particular phone at a location identified by a station.
IIS—Internet Information Services. Enterprise web services that run under Microsoft operating systems.
MDAC—Microsoft Data Access Components. Server service that supports Cisco CCC.
MSMQ—Microsoft Message Queuing. Server service that supports Cisco CCC.
station—The second group of digits in a telephone number; this group of digits identifies a particular location within a local area identified by an exchange.
TAPI—Telephony Application Programming Interface. Microsoft API for telephony applications.
TSP—TAPI (or telephony) service provider. A dynamic-link library (DLL) that provides device-specific controls for communications processing. TSP provides an abstraction layer between TAPI applications and the underlying hardware and transport protocols.
Note
Copyright © 2004 Cisco Systems, Inc. All rights reserved.
![]()
![]()
![]()
![]()
![]()
![]()
![]()
![]()
Posted: Tue Aug 3 15:39:36 PDT 2004
All contents are Copyright © 1992--2004 Cisco Systems, Inc. All rights reserved.
Important Notices and Privacy Statement.