
7.6. Floating and Clearing
You are almost certainly acquainted with the concept of floated elements. Ever since Netscape 1.0, it has been possible to float images by declaring, for instance, <IMG SRC="b5.gif" align="right">. This causes an image to float to the right, and allows other content (text or other images) to "flow around" the image. In the past, this was only possible with images and, in some browsers, tables. CSS, on the other hand, allows any element to float, from images to paragraphs to lists. In CSS, this behavior is accomplished using the property float.
float
- Values
left | right | none
- Initial value
none
- Inherited
no
- Applies to
all elements
For example, to float an image to the right, you could use this markup:
<IMG SRC="b5.gif" style="float: right;" alt="section b5">
As Figure 7-63 makes clear, the image "floats" to the right side of the browser window. This is just what we expect. However, some interesting issues are raised in the course of floating elements in CSS.

Figure 7-63. A floating image
7.6.1. Floated Elements
There are a few things to keep in mind with regard to floating elements. In the first place, a floated element is in some respects removed from the normal flow of the document, although it still affects the layout. In a manner utterly unique to CSS, floated elements exist almost on their own plane, yet they still have major influence over the rest of the document.
Of course, when an element is floated, other content "flows around" it. This is familiar behavior with floated images, but the same is true if you float a paragraph, for example. In Figure 7-64, we can see this effect (a margin has been added to make the situation more clear):
P.aside {float: left; width: 5em; margin: 1em;}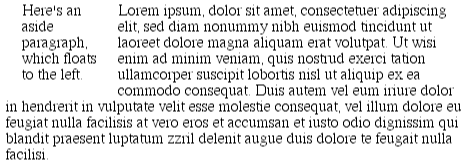
Figure 7-64. A floating paragraph
One of the first interesting things to notice about floated elements is that margins around floated elements do not collapse. If you float an image with 20-pixel margins, there will be at least 20 pixels of space around that image. If other elements adjacent to the image -- and that means adjacent horizontally and vertically -- also have margins, those margins will not collapse with the margins on the floated image, as we can see in Figure 7-65:
P IMG {float: right; margin: 20px;}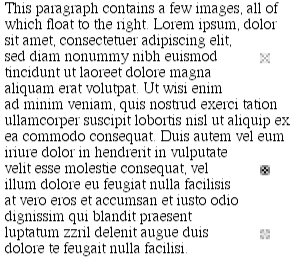
Figure 7-65. Floating images with margins
(To resurrect the old paper-and-plastic analogy, the plastic margins around an image never overlap the plastic surrounding other elements.)
If you do float a text element, realize that unless you declare a width for that element, the CSS specification says that its width will tend toward zero. Thus, a floated paragraph could literally be one character wide, assuming that to be the browser's minimum value for width. In order to avoid this problem, make sure that you declare a width for your floated elements. Otherwise, you could get something like Figure 7-66.
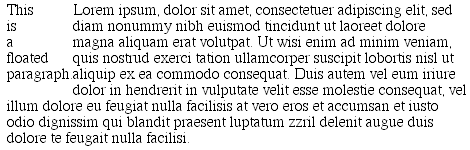
Figure 7-66. Floated text without an explicit width
7.6.1.1. Backgrounds and floats
There are many other interesting effects associated with floating elements. Take the example of a short document, composed of no more than a few paragraphs and H3 elements, where the first paragraph contains a floated image. Further, this floated image has a right margin of five pixels (5px). You would expect the document to be rendered very much as shown in Figure 7-67.
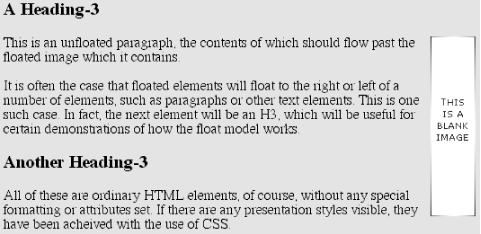
Figure 7-67. Floating an image
Nothing unusual there, of course, but look what happens when we set the first paragraph to have a background, as has been done in Figure 7-68.

Figure 7-68. Floating images and element backgrounds
There is nothing different about the second example, except for the visible background. As you can see, the floated image sticks out of the bottom of its parent element. Of course, it did so in the first example, but it was less obvious there because we couldn't see the background then. There is nothing forbidden about this behavior.
WARNING
In practice, some browsers may not do this correctly. Instead, they will increase the height of a parent element so that the floated element is contained within it, even though this results in a great deal of extra blank space within the parent element.
Then there is the question of what happens to elements that flow past a floated element but have visible backgrounds. Let's take the preceding example and change it so that the second H3 element has a visible background and border, as has been done in Figure 7-69.
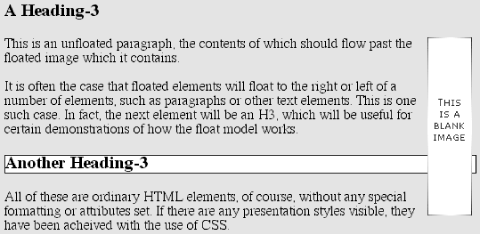
Figure 7-69. More floating images and element backgrounds
Yes, the figure is correct: the content of the H3 flows past the image, and the background "slides under" the image, so to speak. This is, in its way, no different than the example in which the paragraph that contained the floated image had a visible background.
7.6.1.2. Negative margins and floating
Negativity, of course, always complicates the situation. Let's consider an image that is floated to the left and has left and top margins of -15px . This image is placed inside a DIV that has no padding, borders, or margins. The result will be as shown in Figure 7-70.
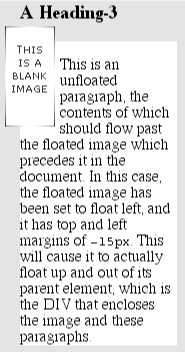
Figure 7-70. A floating image with negative top and left margins
The math in this situation works out something like this: assume the top inner edge of the DIV is at the pixel position 100. The browser, in order to figure out where the top inner edge of the floated element should be will do this: 100px + (-15px) margin + 0 padding = 85px . Thus the top inner edge of the floated element should be at pixel position 85.
A similar line of reasoning explains how the left inner edge of the floated element can be placed to the left of the left inner edge of its parent. This ability can be used for interesting effects like hanging floated images, but only if the browser honors negative margins on floated elements. If it does, the result will be something like that shown in Figure 7-71.
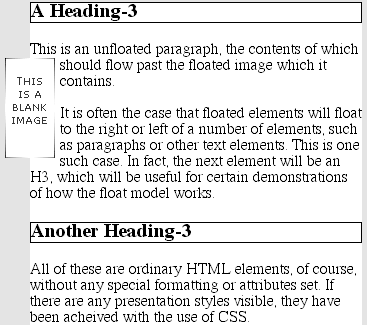
Figure 7-71. Hanging float
There is one important question here, which is this: what happens to the document display when an element is floated out of its parent element by using negative margins? For example, an image could be floated so far up that it intrudes into a paragraph that has already been displayed by the user agent.
In this case, it's up to the user agent, but the CSS specifications explicitly state that user agents are not required to reflow previous content to accommodate things that happen later in the document. In other words, if an image is floated up into a previous paragraph, it may simply overwrite whatever was already there. On the other hand, the user agent may handle the situation by flowing content around the float, even though doing so isn't required behavior. Either way, it's probably a bad idea to count on a particular behavior, which makes the utility of negative margins on floats rather limited. Hanging floats are probably fairly safe, but trying to push an element upward on the page is generally a bad idea.
There is one other case where a floated element can run outside of its parent element, and that's when the floated element is wider than its parent. In that case, the floated element will simply overrun either the right or left inner edge in its best attempt to display itself correctly, depending on which way it was floated. In such a case, you get the result shown in Figure 7-72.
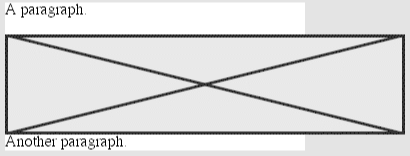
Figure 7-72. Floating an image wider than its parent element
Here, a left-floated image is wider than its parent, so its right edge overruns the right edge of the parent element. Had the image been floated to the right, then it would have overrun the left side of the parent element instead.
7.6.1.3. No floating at all
There is one other value for float besides left and right. float: none is used to prevent an element from floating at all. This might seem a little silly, since the easiest way to keep an element from floating is to simply avoid declaring a float, right? Well, first of all, the default value of float is none. In other words, the value has to exist in order for normal, nonfloating behavior to be possible; without it, all elements would float in one way or another.
Second, it's possible that you might want to override a certain style from an imported style sheet. Imagine that you're using a server-wide style sheet that floats images. On one particular page, you don't want those images to float. Rather than writing a whole new style sheet, you could simply place IMG {float: none;} in your document's embedded style sheet. Beyond this type of circumstance, though, there really isn't much call to use float: none in your HTML documents.
7.6.2. Clear
Well, we talked about a lot of floating behavior, so there's only one more thing to discuss. You won't always want your content to flow past a floated element -- in some cases, you'll specifically want to prevent it.
If you have a document that is grouped into sections, you might not want the floated elements from one section hanging down into the next. In that case, you'd want to set the first element of each section to prohibit floating elements from appearing next to it. If it might otherwise be placed next to a floated element, it will be pushed down until it appears below the floated image, and all subsequent content will appear after that, as shown in Figure 7-73.
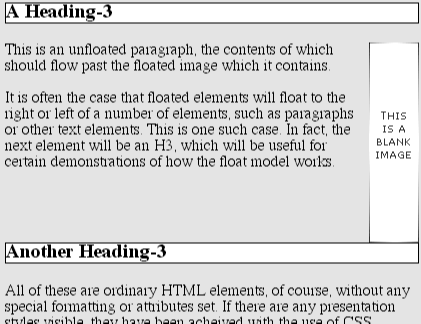
Figure 7-73. Displaying an element in the clear
This is done with clear.
clear
- Values
left | right | both | none
- Initial value
none
- Inherited
no
- Applies to
all elements
For example, to make sure all H2 elements are not placed to the right of left-floated elements, then you would declare H2 {clear: left;}. This can be translated as "make sure that the left side of an H2 is clear of floating images" and is a replacement for the HTML construct <BR clear="left">. Figure 7-74 shows the following declaration, which uses clear to prevent H2 elements from flowing past floated elements to the left side:
H2 {clear: left;}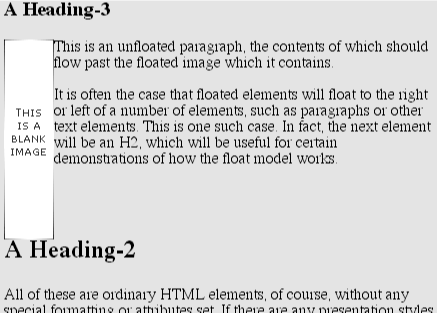
Figure 7-74. Clear to the left
However, this will allow floated elements to appear on the right side of H2 elements, as shown in Figure 7-75.
Figure 7-75. Clear to the left, but not the right
To avoid this sort of thing, and to make sure that H2 elements do not coexist on a line with any floated elements, we use the value both. This value prevents coexistence with floated elements on both sides of the element, as shown in Figure 7-76:
H2 {clear: both;}
Figure 7-76. Clear on both sides
If, on the other hand, we're only worried about H2 elements flowing past floated elements to their right, then we'd use H2 {clear: right;}, with the result shown in Figure 7-77.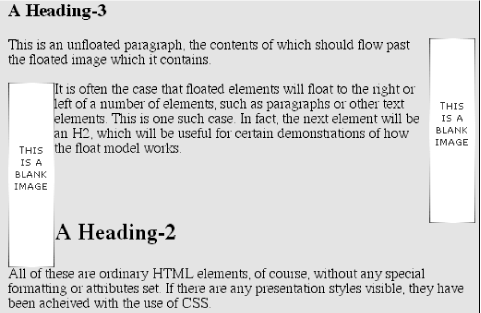
Figure 7-77. Clear to the right
Finally, there's clear: none, which allows elements to float to either side of an element. As with float: none, this value mostly exists to allow for normal document behavior, in which elements will permit floated elements to both sides. none can be used to override other styles, of course, as shown in Figure 7-78. Despite the document-wide rule that H2 elements will not permit floated elements to either side, one H2 in particular has been set so that it does permit floated elements on either side:
H2 {clear: both;}

<H2 STYLE="clear: none;">Not Cleared!</H2>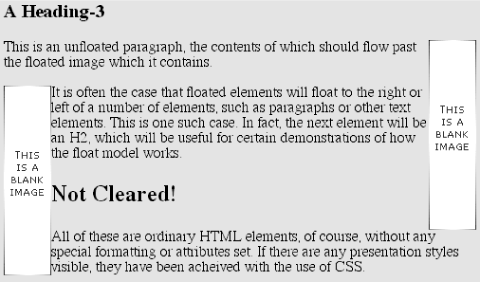
Figure 7-78. Not clear at all
clear works by increasing the top margin of an element so that it ends up below a floated element, so any margin width set for the top of a cleared element should be effectively ignored. That is, instead of being 1.5em , for example, it could be increased to 10em , or 25px , or 7.133in , or however much is needed to move the element down far enough so that the content area is below the bottom edge of a floated element.
 |  |  |
| 7.5. Padding |  | 7.7. Lists |

Copyright © 2002 O'Reilly & Associates. All rights reserved.