Chapter 8 TOC Chapter 10
Chapter 9. Larger GUI Examples
9.1 "Building a Better Mouse Trap"
This chapter continues our look at building graphical user interfaces with Python and its standard Tkinter library by presenting a collection of realistic GUI programs. In the previous three chapters, we met all the basics of Tkinter programming and toured the core set of widgets -- Python classes that generate devices on a computer screen and may reply to user-generated events like mouseclicks. Here, our focus is on putting those widgets together to create more useful GUIs. We'll study:
· Advanced GUI coding techniques
· PyEdit -- a text editor program
· PyView -- an image slideshow
· PyDraw -- a painting program
· PyClock -- a graphical clock
· PyToe -- and even a simple game just for fun[1]
As in Chapter 4, and Chapter 5, I've pulled the examples in this chapter from my own library of Python programs that I really use. For instance, the text editor and clock GUIs that we'll meet here are day-to-day workhorses on my machines. Because they are written in Python and Tkinter, they work unchanged on both my Windows and Linux machines, and they should work on Macs, too.
And since these are pure Python scripts, their future evolution is entirely up to their users -- once you get a handle on Tkinter interfaces, changing or augmenting the behavior of such programs by editing their Python code is a snap. Although some of these examples are similar to commercially available programs (e.g., PyEdit is reminiscent of the Windows Notepad accessory), the portability and almost infinite configurability of Python scripts can be a decided advantage.
9.1.1 Examples in Other Chapters
Later in the book, we'll meet other Tkinter GUI programs that put a good face on specific application domains. For instance, the following larger GUI examples show up in later chapters, too:
· PyMail -- an email client in Chapter 11
· PyForm -- a persistent object table viewer in Chapter 16
· PyTree -- a tree data structure viewer in Chapter 17
· PyCalc -- a calculator widget in Chapter 18
Most of these programs see regular action on my desktop, too. Because GUI libraries are general-purpose tools, there are few domains that cannot benefit from an easy-to-use, easy-to-program, and widely portable user interface coded in Python and Tkinter.
Beyond the examples in this book, you can also find higher-level GUI toolkits for Python, such as the PMW system mentioned in Chapter 6. Such systems build upon Tkinter to provide compound components such as notebook and tabbed widgets. We'll also later meet programs that build user interfaces in web browsers, not Tkinter. But apart from simple web-based interfaces, Tkinter GUIs can be an indispensable feature of almost any Python program you write.
9.1.2 This Chapter's Strategy
As for all case-study chapters in this text, this one is largely a "learn by example" exercise; most of the programs here are listed with minimal details. Along the way I'll point out new Tkinter features that each example introduces, but I'll also assume that you will study the listed source code and its comments for more details. Python's readability becomes a substantial advantage for programmers (and writers), especially once we reach the level of complexity demonstrated by programs here.
Finally, I want to remind you that all of the larger programs listed in the previous sections can be run from the PyDemos and PyGadgets launcher-bar GUIs that we met at the end of the previous chapter. Although I will try hard to capture some of their behavior in screen shots here, GUIs are event-driven systems by nature, and there is nothing quite like running one live to sample the flavor of its user interactions. Because of that, the launcher bars are really a supplement to the material in this chapter. They should run on most platforms and are designed to be easy to start (see the top-level README-PP2E.txt file for hints). You should go there and start clicking things immediately, if you haven't done so already.
9.2 Advanced GUI Coding Techniques
If you read Chapter 8, you know that the code used to construct non-trivial GUIs can become large if we make each widget by hand. Not only do we have to manually link up all the widgets, but there are dozens of options to be set and remember. If we stick to this strategy, GUI programming often becomes an exercise in typing, or at least in cut-and-paste text editor operations.
9.2.1 GuiMixin: Shared Behavior in "Mixin" Classes
Rather than doing each step by hand, a better idea is to wrap or automate as much of the GUI construction process as possible. One approach is to code functions that provide typical widget configurations; for instance, we could define a button function to handle configuration details and support most of the buttons we draw.
Alternatively, we can implement common methods in a class and inherit them everywhere they are needed. Such classes are commonly called mixin classes, because their methods are "mixed in" with other classes. Mixins serve to package generally useful tools as methods. The concept is almost like importing a module, but mixin classes can access the subject instance, self, to utilize per-instance state and inherited methods. The script in Example 9-1 shows how.
Example 9-1. PP2E\Gui\Tools\guimixin.py
########################################################
# a "mixin" class for other frames: common methods for
# canned-dialogs, spawning programs, etc; must be mixed
# with a class derived from Frame for its quit method
########################################################
from Tkinter import *
from tkMessageBox import *
from tkFileDialog import *
from ScrolledText import ScrolledText
from PP2E.launchmodes import PortableLauncher, System
class GuiMixin:
def infobox(self, title, text, *args): # use standard dialogs
return showinfo(title, text) # *args for bkwd compat
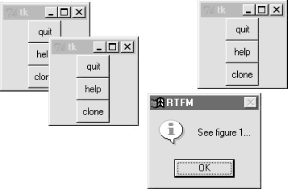
def errorbox(self, text): showerror('Error!', text) def question(self, title, text, *args): return askyesno(title, text) def notdone(self): showerror('Not implemented', 'Option not available') def quit(self): ans = self.question('Verify quit', 'Are you sure you want to quit?') if ans == 1: Frame.quit(self) # quit not recursive!
def help(self):self.infobox('RTFM', 'See figure 1...') # override this better
def selectOpenFile(self, file="", dir="."): # use standard dialogs
return askopenfilename(initialdir=dir, initialfile=file)
def selectSaveFile(self, file="", dir="."): return asksaveasfilename(initialfile=file, initialdir=dir) def clone(self):new = Toplevel( ) # make a new version of me
myclass = self.__class__ # instance's (lowest) class object
myclass(new) # attach/run instance to new window
def spawn(self, pycmdline, wait=0): if not wait:PortableLauncher(pycmdline, pycmdline)( ) # run Python progam
else:System(pycmdline, pycmdline)( ) # wait for it to exit
def browser(self, filename):new = Toplevel( ) # make new window
text = ScrolledText(new, height=30, width=90) # Text with scrollbar
text.config(font=('courier', 10, 'normal')) # use fixed-width font
text.pack( )
new.title("Text Viewer") # set window mgr attrs
new.iconname("browser")text.insert('0.0', open(filename, 'r').read( ) ) # insert file's text
if __name__ == '__main__':
class TestMixin(GuiMixin, Frame): # stand-alone test
def __init__(self, parent=None): Frame.__init__(self, parent)self.pack( )
Button(self, text='quit', command=self.quit).pack(fill=X)
Button(self, text='help', command=self.help).pack(fill=X)
Button(self, text='clone', command=self.clone).pack(fill=X)TestMixin().mainloop( )
Although Example 9-1 is geared towards GUIs, it's really about design concepts. The GuiMixin class implements common operations with standard interfaces that are immune to changes in implementation. In fact, the implementations of some of this class's method did change -- between the first and second editions of this book, old-style Dialog calls were replaced with the new Tk standard dialog calls. Because this class's interface hides such details, its clients did not have to be changed to use the new dialog techniques.
As is, GuiMixin provides methods for common dialogs, window cloning, program spawning, text file browsing, and so on. We can add more methods to such a mixin later if we find ourselves coding the same methods repeatedly; they will all become available immediately everywhere this class is imported and mixed. Moreover, GuiMixin's methods can be inherited and used as is, or they can be redefined in subclasses.
There are a few things to notice here:
· The quit method serves some of the same purpose as the reusable Quitter button we used in earlier chapters. Because mixin classes can define a large library of reusable methods, they can be a more powerful way to package reusable components than individual classes. If the mixin is packaged well, we can get a lot more from it than a single button's callback.
· The clone method makes a new copy of the most specific class that mixes in a GuiMixin, in a new top-level window (self.__class__ is the class object that the instance was created from). This opens a new independent copy of the window.
· The browser method opens the standard library's ScrolledText object in a new window and fills it with the text of a file to be viewed. We wrote our own ScrolledText in the last chapter; you might need to use it here instead, if the standard library's class ever becomes deprecated (please, no wagering).
· The spawn method launches a Python program command line as a new process, and waits for it to end or not (depending on the wait argument). This method is simple, though, because we wrapped launching details in the launchmodes module presented at the end of Chapter 3. GuiMixin both fosters and practices good code reuse habits.
The GuiMixin class is meant to be a library of reusable tool methods and is essentially useless by itself. In fact, it must generally be mixed with a Frame-based class to be used: quit assumes it's mixed with a Frame, and clone assumes it's mixed with a widget class. To satisfy such constraints this module's self-test code at the bottom combines GuiMixin with a Frame widget. Figure 9-1 shows the scene created by the self-test after pressing "clone" twice, and then "help" in one of the three copies.
Figure 9-1. GuiMixin self-test code in action
We'll see this class show up again as a mixin in later examples, too -- that's the whole point of code reuse, after all.
9.2.2 GuiMaker: Automating Menus and Toolbars
The last section's mixin class makes common tasks simpler, but it still doesn't address the complexity of linking up widgets like menus and toolbars. Of course, if we had access to a GUI layout tool that generated Python code, this would not be an issue. We'd design our widgets interactively, press a button, and fill in the callback handler blanks.
For now, a programming-based approach can work just as well. What we'd like is to be able to inherit something that does all the grunt work of construction for us, given a template for the menus and toolbars in a window. Here's one way it can be done -- using trees of simple objects. The class in Example 9-2 interprets data structure representations of menus and toolbars, and builds all the widgets automatically.
Example 9-2. PP2E\Gui\Tools\guimaker.py
###############################################################################
# An extended Frame that makes window menus and tool-bars automatically.
# Use GuiMakerFrameMenu for embedded components (makes frame-based menus).
# Use GuiMakerWindowMenu for top-level windows (makes Tk8.0 window menus).
# See the self-test code (and PyEdit) for an example layout tree format.
###############################################################################
import sys
from Tkinter import * # widget classesfrom types import * # type constants
class GuiMaker(Frame):
menuBar = [] # class defaults
toolBar = [] # change per instance in subclasses
helpButton = 1 # set these in start( ) if need self
def __init__(self, parent=None): Frame.__init__(self, parent) self.pack(expand=YES, fill=BOTH) # make frame stretchable
self.start( ) # for subclass: set menu/toolBar
self.makeMenuBar( ) # done here: build menu-bar
self.makeToolBar( ) # done here: build tool-bar
self.makeWidgets( ) # for subclass: add middle part
def makeMenuBar(self): """ make menu bar at the top (Tk8.0 menus below) expand=no, fill=x so same width on resize """ menubar = Frame(self, relief=RAISED, bd=2) menubar.pack(side=TOP, fill=X) for (name, key, items) in self.menuBar:mbutton = Menubutton(menubar, text=name, underline=key)
mbutton.pack(side=LEFT) pulldown = Menu(mbutton) self.addMenuItems(pulldown, items) mbutton.config(menu=pulldown) if self.helpButton: Button(menubar, text = 'Help',
cursor = 'gumby',
relief = FLAT,
command = self.help).pack(side=RIGHT) def addMenuItems(self, menu, items):for item in items: # scan nested items list
if item == 'separator': # string: add separator
menu.add_separator({})elif type(item) == ListType: # list: disabled item list
for num in item: menu.entryconfig(num, state=DISABLED) elif type(item[2]) != ListType:menu.add_command(label = item[0], # command:
underline = item[1], # add command
command = item[2]) # cmd=callable
else: pullover = Menu(menu)self.addMenuItems(pullover, item[2]) # sublist:
menu.add_cascade(label = item[0], # make submenu
underline = item[1], # add cascade
menu = pullover)
def makeToolBar(self): """ make button bar at bottom, if anyexpand=no, fill=x so same width on resize
""" if self.toolBar: toolbar = Frame(self, cursor='hand2', relief=SUNKEN, bd=2) toolbar.pack(side=BOTTOM, fill=X) for (name, action, where) in self.toolBar: Button(toolbar, text=name, command=action).pack(where)
def makeWidgets(self): """ make 'middle' part last, so menu/toolbar is always on top/bottom and clipped last; override this default, pack middle any side;for grid: grid middle part in a packed frame
""" name = Label(self, width=40, height=10,relief=SUNKEN, bg='white',
text = self.__class__.__name__,
cursor = 'crosshair')
name.pack(expand=YES, fill=BOTH, side=TOP) def help(self): """ override me in subclass """ from tkMessageBox import showinfo showinfo('Help', 'Sorry, no help for ' + self.__class__.__name__)def start(self): pass # override me in subclass
###############################################################################
# For Tk 8.0 main window menubar, instead of a frame
###############################################################################
GuiMakerFrameMenu = GuiMaker # use this for embedded component menusclass GuiMakerWindowMenu(GuiMaker): # use this for top-level window menus def makeMenuBar(self): menubar = Menu(self.master) self.master.config(menu=menubar) for (name, key, items) in self.menuBar: pulldown = Menu(menubar) self.addMenuItems(pulldown, items) menubar.add_cascade(label=name, underline=key, menu=pulldown) if self.helpButton: if sys.platform[:3] == 'win': menubar.add_command(label='Help', command=self.help) else:pulldown = Menu(menubar) # linux needs real pulldown
pulldown.add_command(label='About', command=self.help) menubar.add_cascade(label='Help', menu=pulldown)###############################################################################
# Self test when file run stand-alone: 'python guimaker.py'
###############################################################################
if __name__ == '__main__':
from guimixin import GuiMixin # mixin a help method
menuBar = [ ('File', 0,
[('Open', 0, lambda:0), # lambda:0 is a no-op
('Quit', 0, sys.exit)]), # use sys, no self here
('Edit', 0,[('Cut', 0, lambda:0),
('Paste', 0, lambda:0)]) ] toolBar = [('Quit', sys.exit, {'side': LEFT})] class TestAppFrameMenu(GuiMixin, GuiMakerFrameMenu): def start(self): self.menuBar = menuBar self.toolBar = toolBar class TestAppWindowMenu(GuiMixin, GuiMakerWindowMenu): def start(self): self.menuBar = menuBar self.toolBar = toolBar class TestAppWindowMenuBasic(GuiMakerWindowMenu): def start(self): self.menuBar = menuBarself.toolBar = toolBar # guimaker help, not guimixin
root = Tk( )
TestAppFrameMenu(Toplevel( ))
TestAppWindowMenu(Toplevel( ))
TestAppWindowMenuBasic(root)root.mainloop( )
To make sense of this module, you have to be familiar with the menu fundamentals introduced in the last chapter. If you are, though, it's straightforward -- the GuiMaker class simply traverses the menu and toolbar structures and builds menu and toolbar widgets along the way. This module's self-test code includes a simple example of the data structures used to lay out menus and toolbars:
Menubar templates
Lists and nested sublists of (label, underline, handler) triples. If a handler is a sublist instead of a function or method, it is assumed to be a cascading submenu.
Toolbar templates
List of (label, handler, pack-options) triples. pack-options is coded as a dictionary of options passed on to the widget pack method (it accepts dictionaries, but we could also transform the dictionary into keyword arguments by passing it as a third argument to apply).
9.2.2.1 Subclass protocols
In addition to menu and toolbar layouts, clients of this class can also tap into and customize the method and geometry protocols it implements:
Template attributes
Clients of this class are expected to set menuBar and toolBar attributes somewhere in the inheritance chain by the time the start method has finished.
Initialization
The start method can be overridden to construct menu and toolbar templates dynamically (since self is then available); start is also where general initializations should be performed -- GuiMixin's __init__ constructor must be run, not overridden.
Adding widgets
The makeWidgets method can be redefined to construct the middle part of the window -- the application portion between the menubar and toolbar. By default, makeWidgets adds a label in the middle with the name of the most specific class, but this method is expected to be specialized.
Packing protocol
In a specialized makeWidgets method, clients may attach their middle portion's widgets to any side of "self" (a Frame), since the menu and toolbars have already claimed the container's top and bottom by the time makeWidgets is run. The middle part does not need to be a nested frame if its parts are packed. The menu and toolbars are also automatically packed first so that they are clipped last if the window shrinks.
Gridding protocol
The middle part can contain a grid layout, as long as it is gridded in a nested Frame that is itself packed within the self parent. (Remember, that each container level may use grid or pack, not both, and self is a Frame with already-packed bars by the time makeWidgets is called.) Because the GuiMaker Frame packs itself within its parent, it is not directly embeddable in a container with widgets arranged in a grid for similar reasons -- add an intermediate gridded Frame to use it in this context.
9.2.2.2 GuiMaker classes
In return for conforming to GuiMaker protocols and templates, client subclasses get a Frame that knows how to automatically build up its own menus and toolbars from template data structures. If you read the last chapter's menu examples, you probably know that this is a big win in terms of reduced coding requirements. GuiMaker is also clever enough to export interfaces for both menu styles that we met in the last chapter:
· GuiMakerWindowMenu implements Tk 8.0-style top-level window menus, useful for menus associated with standalone programs and pop-ups.
· GuiMakerFrameMenu implements alternative Frame/Menubutton-based menus, useful for menus on objects embedded as components of a larger GUI.
Both classes build toolbars, export the same protocols, and expect to find the same template structures; they differ only in the way they process menu templates. In fact, one is simply a subclass of the other with a specialized menu maker method -- only top-level menu processing differs between the two styles (a Menu with Menu cascades, instead of a Frame with Menubuttons).
9.2.2.3 GuiMaker self-test
Like GuiMixin, when we run Example 9-2 as a top-level program, we trigger the self-test logic at the bottom; Figure 9-2 shows the windows we get. Three windows come up, representing each of the self-test code's TestApp classes. All three have a menu and toolbar with the options specified in the template data structures created in the self-test code: File and Edit menu pull-downs, plus a Quit toolbar button, and a standard Help menu button. In the screen shot, one window's File menu has been torn off, and the Edit menu of another is being pulled down.
Figure 9-2. GuiMaker self-test at work
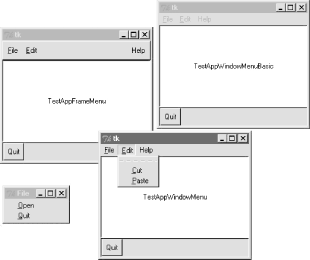
Because of the superclass relationships coded, two of the three windows get their help callback handler from GuiMixin; TestAppWindowMenuBasic gets GuiMaker's instead. Notice that the order in which these two classes are mixed can be important: because both GuiMixin and Frame define a quit method, we need to list the class we want to get it from first in the mixed class's header line due to the left-to-right search rule of multiple inheritance. To select GuiMixin's methods, it should usually be listed before a superclass derived from real widgets.
We'll put GuiMaker to more practical use in examples such as PyEdit later in this chapter. The next module shows another way to use GuiMaker's templates to build up a sophisticated interface.
9.2.3 BigGui: A Client Demo Program
Let's look at a program that makes better use of the two automation classes we just wrote. In the module in Example 9-3, the Hello class inherits from both GuiMixin and GuiMaker. GuiMaker provides the link to the Frame widget, plus the menu/toolbar construction logic. GuiMixin provides extra common-behavior methods. Really, Hello is another kind of extended Frame widget because it is derived from GuiMaker. To get a menu and toolbar for free, it simply follows the protocols defined by GuiMaker -- it sets the menuBar and toolBar attributes in its start method, and overrides makeWidgets to put a label in the middle.
Example 9-3. PP2E\Gui\Tools\BigGui\big_gui.py
#!/usr/bin/python
#########################################################
# gui implementation - combines maker, mixin, and this
#########################################################
import sys, os, string
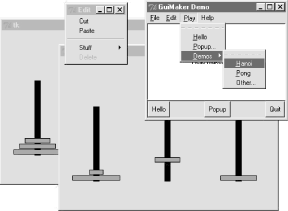
from Tkinter import * # widget classesfrom PP2E.Gui.Tools.guimixin import * # mix-in methodsfrom PP2E.Gui.Tools.guimaker import * # frame, plus menu/toolbar builderfrom find_demo_dir import findDemoDir # Python demos searchclass Hello(GuiMixin, GuiMakerWindowMenu): # or GuiMakerFrameMenu def start(self): self.hellos = 0 self.master.title("GuiMaker Demo") self.master.iconname("GuiMaker")self.menuBar = [ # a tree: 3 pulldowns
('File', 0, # (pull-down)
[('New...', 0, self.notdone), # [menu items list]
('Open...', 0, self.fileOpen), ('Quit', 0, self.quit)] # label,underline,action
), ('Edit', 0,[('Cut', -1, self.notdone), # no underline|action
('Paste',-1, self.notdone), # lambda:0 works too
'separator', # add a separator
('Stuff', -1, [('Clone', -1, self.clone), # cascaded submenu
('More', -1, self.more)]
), ('Delete', -1, lambda:0),[5]] # disable 'delete'
), ('Play', 0,[('Hello', 0, self.greeting),
('Popup...', 0, self.dialog),
('Demos', 0, [('Hanoi', 0, lambda x=self: x.spawn(findDemoDir( ) + '\guido\hanoi.py', wait=0)),
('Pong', 0,
lambda x=self: x.spawn(findDemoDir( ) + '\matt\pong-demo-1.py', wait=0)),
('Other...', -1, self.pickDemo)] )] )]self.toolBar = [
('Quit', self.quit, {'side': RIGHT}), # add 3 buttons
('Hello', self.greeting, {'side': LEFT}),('Popup', self.dialog, {'side': LEFT, 'expand':YES}) ]
def makeWidgets(self): # override default
middle = Label(self, text='Hello maker world!', width=40, height=10, cursor='pencil', bg='white', relief=SUNKEN) middle.pack(expand=YES, fill=BOTH) def greeting(self):self.hellos = self.hellos + 1
if self.hellos % 3: print "hi" else:self.infobox("Three", 'HELLO!') # on every third press
def dialog(self): button = self.question('OOPS!', 'You typed "rm*" ... continue?',
'questhead', ('yes', 'no', 'help'))[lambda:0, self.quit, self.help][button]( )
def fileOpen(self): pick = self.selectOpenFile(file='big_gui.py') if pick:self.browser(pick) # browse my source file, or other
def more(self):new = Toplevel( )
Label(new, text='A new non-modal window').pack( )
Button(new, text='Quit', command=self.quit).pack(side=LEFT) Button(new, text='More', command=self.more).pack(side=RIGHT) def pickDemo(self):pick = self.selectOpenFile(dir=findDemoDir( )+'\guido')
if pick:self.spawn(pick, wait=0) # spawn any python program
if __name__ == '__main__': Hello().mainloop( ) # make one, run one
This script lays out a fairly large menu and toolbar structure that we'll see in moment. It also adds callback methods of its own that print stdout messages, pop up text file browsers and new windows, and run other programs. Many of the callbacks don't do much more than run the notDone method inherited from GuiMixin, though; this code is intended mostly as a GuiMaker and GuiMixin demo.
The big_gui script is almost a complete program, but not quite: it relies on a utility module to search for canned demo programs that come packaged with the Python full source distribution. (These demos are not part of this book's example collection.) The Python source distribution might be unpacked anywhere on the host machine.
Because of that, it's impossible to know where the demo directory is located (if it is present at all). But rather than expecting beginners to change the source code of this script to hardcode a path, the guessLocation tool in the Launcher module we met at the end of Chapter 4 is used to hunt for the demo directory (see Example 9-4). Flip back if you've forgotten how this works (though the beauty of code reuse is that it's often okay to forget).
Example 9-4. PP2E\Gui\Tools\BigGui\find_demo_dir.py
#########################################################
# search for demos shipped in Python source distribution;
# PATH and PP2EHOME won't help here, because these demos
# are not part of the standard install or the book's tree
#########################################################
import os, string, PP2E.Launcher
demoDir = NonemyTryDir = ''
#sourceDir = r'C:\Stuff\Etc\Python-ddj-cd\distributions'
#myTryDir = sourceDir + r'\Python-1.5.2\Demo\tkinter'def findDemoDir( ): global demoDirif not demoDir: # only searches on first call
if os.path.exists(myTryDir): # use hard-coded dir, or search
demoDir = myTryDir # save in global for next call
else: print 'Searching for standard demos on your machine...' path = PP2E.Launcher.guessLocation('hanoi.py') if path: demoDir = string.join(string.split(path, os.sep)[:-2], os.sep) print 'Using demo dir:', demoDir assert demoDir, 'Where is your demo directory?' return demoDir
When big_gui is run as a top-level program, it creates a window with four menu pull-downs on top, and a three-button toolbar on the bottom, shown in Figure 9-3 along with some of the pop-up windows its callbacks create. The menus have separators, disabled entries, and cascading submenus, all as defined by the menuBar template.
Figure 9-3. big_gui with various pop-ups
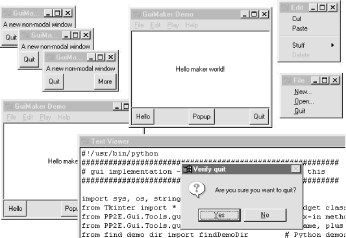
Figure 9-4 shows this script's window again, after its Play pull-down has been used to launch two independently running instances of the hanoi.py demo script that is shipped in the Python source distribution and coded by Python creator Guido van Rossum. This demo shows a simple animation of solutions to the "Towers of Hanoi" puzzle -- a classic recursive problem popular on computer science quizzes (if you never heard of it, I'll spare you the gory details here).
Figure 9-4. big_gui with spawned hanoi demos on the move
To find this demo, the script searches directory trees on your machine rooted at common places; it was found on mine only by a last-resort traversal of my entire C: hard drive:
C:\...\PP2E\Gui\Tools\BigGui>python big_gui.py
Searching for standard demos on your machine...
Searching for hanoi.py in C:\Program Files\Python
Searching for hanoi.py in C:\PP2ndEd\examples\PP2E\Gui\Tools\BigGui
Searching for hanoi.py in C:\Program Files
Searching for hanoi.py in C:\
Using demo dir: C:\PP2ndEd\cdrom\Python1.5.2\SourceDistribution\Unpacked\Python-
1.5.2\Demo\tkinter
C:\PP2ndEd\cdrom\Python1.5.2\SourceDistribution\Unpacked\Python-1.5.2\Demo\tkint
er\guido\hanoi.py
This search takes about 20 seconds on my 650 MHz Windows laptop, but is done only the first time you select one of these demos -- after a successful search, the find_demo_dir module caches away the directory name in a global variable for immediate retrieval the next time you start a demo. If you want to run demos from other directories (e.g., one of the book demos in the PP2E tree), select the Play menu's Other option to pop up a standard file selection dialog instead and navigate to the desired program's file.
Finally, I should note that GuiMaker can be redesigned to use trees of embedded class instances that know how to apply themselves to the Tkinter widget tree being constructed, instead of branching on the types of items in template data structures. In the interest of space, though, we'll banish that extension to the land of suggested exercises in this edition.
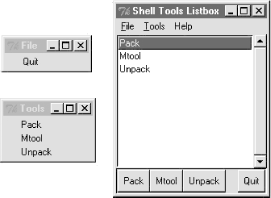
9.2.4 ShellGui: Adding GUIs to Command-Line Tools
To better show how things like the GuiMixin class can be of practical use, we need a more realistic application. Here's one: in Chapter 4, we saw simple scripts for packing and unpacking text files (see Section 4.5). The packapp.py script we met there, you'll recall, concatenates multiple text files into a single file, and unpackapp.py extracts the original files from the combined file.
We ran these scripts in that chapter with manually typed command lines that weren't the most complex ever devised, but were complicated enough to be easily forgotten. Rather than requiring users of such tools to type cryptic commands at a shell, why not also provide an easy-to-use Tkinter GUI interface for running such programs? While we're at it, why not generalize the whole notion of running command-line tools from a GUI, to make it easy to support future tools, too?
9.2.4.1 A generic shell-tools display
Examples Example 9-5 through Example 9-8 are one concrete implementation of these artificially rhetorical musings. Because I wanted this to be a general-purpose tool that could run any command-line program, its design is factored into modules that become more application-specific as we go lower in the software hierarchy. At the top, things are about as generic as they can be, as shown in Example 9-5.
Example 9-5. PP2E\Gui\ShellGui\shellgui.py.py
#!/usr/local/bin/python
#####################################################################
# tools launcher; uses guimaker templates, guimixin std quit dialog;
# I am just a class library: run mytools script to display the gui;
#####################################################################
from Tkinter import * # get widgetsfrom PP2E.Gui.Tools.guimixin import GuiMixin # get quit, not donefrom PP2E.Gui.Tools.guimaker import * # menu/toolbar builderclass ShellGui(GuiMixin, GuiMakerWindowMenu): # a frame + maker + mixinsdef start(self): # use GuiMaker if component
self.setMenuBar( )
self.setToolBar( )
self.master.title("Shell Tools Listbox") self.master.iconname("Shell Tools")def handleList(self, event): # on listbox double-click
label = self.listbox.get(ACTIVE) # fetch selection text
self.runCommand(label) # and call action here
def makeWidgets(self): # add listbox in middle
sbar = Scrollbar(self) # cross link sbar, list
list = Listbox(self, bg='white') # or use Tour.ScrolledList
sbar.config(command=list.yview) list.config(yscrollcommand=sbar.set)sbar.pack(side=RIGHT, fill=Y) # pack 1st=clip last
list.pack(side=LEFT, expand=YES, fill=BOTH) # list clipped first
for (label, action) in self.fetchCommands( ): # add to list-box
list.insert(END, label) # and menu/toolbars
list.bind('<Double-1>', self.handleList) # set event handler
self.listbox = list
def forToolBar(self, label): # put on toolbar?
return 1 # default = all
def setToolBar(self): self.toolBar = []for (label, action) in self.fetchCommands( ):
if self.forToolBar(label): self.toolBar.append((label, action, {'side': LEFT})) self.toolBar.append(('Quit', self.quit, {'side': RIGHT})) def setMenuBar(self):toolEntries = []
self.menuBar = [ ('File', 0, [('Quit', -1, self.quit)]), # pull-down name
('Tools', 0, toolEntries) # menu items list
] # label,underline,action
for (label, action) in self.fetchCommands( ):
toolEntries.append((label, -1, action)) # add app items to menu
###################################################
# delegate to template type-specific subclasses
# which delegate to app toolset-specific subclasses
###################################################
class ListMenuGui(ShellGui):
def fetchCommands(self): # subclass: set 'myMenu'
return self.myMenu # list of (label, callback)
def runCommand(self, cmd):for (label, action) in self.myMenu:
if label == cmd: action( )
class DictMenuGui(ShellGui):
def fetchCommands(self): return self.myMenu.items( )
def runCommand(self, cmd): self.myMenu[cmd]( )
The ShellGui class in this module knows how to use the GuiMaker and GuiMix interfaces to construct a selection window that displays tool names in menus, a scrolled list, and a toolbar. It also provides an overridable forToolBar method that allows subclasses to specify which tools should and should not be added to the window's toolbar (the toolbar can get crowded in a hurry). However, it is deliberately ignorant about both the names of tools that should be displayed in those places, and the actions to be run when tool names are selected.
Instead, ShellGui relies on the ListMenuGui and DictMenuGui subclasses in this file to provide a list of tool names from a fetchCommands method and dispatch actions by name in a runCommand method. These two subclasses really just serve to interface to application-specific tool sets laid out as lists or dictionaries, though; they are still naive about what tool names really go up on the GUI. That's by design, too -- because the tool sets displayed are defined by lower subclasses, we can use ShellGui to display a variety of different tool sets.
9.2.4.2 Application-specific tool set classes
To get to the actual tool sets, we need to go one level down. The module in Example 9-6 defines subclasses of the two type-specific ShellGui classes, to provide sets of available tools in both list and dictionary format (you would normally need only one, but this module is meant for illustration). This is also the module that is actually run to kick off the GUI -- the shellgui module is a class library only.
Example 9-6. PP2E\Gui\ShellGui\mytools.py
#!/usr/local/bin/python
from shellgui import * # type-specific shell interfaces from packdlg import runPackDialog # dialogs for data entry
from unpkdlg import runUnpackDialog # they both run app classes
class TextPak1(ListMenuGui):
def __init__(self):self.myMenu = [('Pack', runPackDialog),
('Unpack', runUnpackDialog), # simple functions
('Mtool', self.notdone)] # method from guimixin
ListMenuGui.__init__(self) def forToolBar(self, label): return label in ['Pack', 'Unpack']class TextPak2(DictMenuGui):
def __init__(self):
self.myMenu = {'Pack': runPackDialog, # or use input here...
'Unpack': runUnpackDialog, # instead of in dialogs
'Mtool': self.notdone}
DictMenuGui.__init__(self)if __name__ == '__main__': # self-test code...from sys import argv # 'menugui.py list|^'
if len(argv) > 1 and argv[1] == 'list': print 'list test'TextPak1().mainloop( )
else: print 'dict test'TextPak2().mainloop( )
The classes in this module are specific to a particular tools set; to display a different set of tool names, simply code and run a new subclass. By separating out application logic into distinct subclasses and modules like this, software can become widely reusable.
Figure 9-5 shows the main ShellGui window created when the mytools script is run with its dictionary-based menu layout class on Windows, along with menu tear-offs so you can see what they contain. This window's menu and toolbar are built by GuiMaker, and its Quit and Help buttons and menu selections trigger quit and help methods inherited from GuiMixin through the ShellGui module's superclasses. Are you starting to see why this book preaches code reuse so often?
Figure 9-5. mytools items in a ShellGui window
9.2.4.3 Adding GUI frontends to command lines
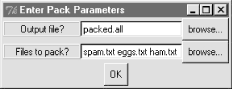
The callback actions named within the prior module's classes, though, should normally do something GUI-oriented. Because the original file packing and unpacking scripts live in the world of text-based streams, we need to code wrappers around them that accept input parameters from more GUI-minded users.
The module in Example 9-7 uses the custom modal dialog techniques we studied in Chapter 7, to pop up an input display to collect pack script parameters. Its runPackDialog function is the actual callback handler invoked when tool names are selected in the main ShellGui window.
Example 9-7. PP2E\Gui\ShellGui\packdlg.py.
# added file select dialogs, empties test; could use grids
import string
from glob import glob # filename expansionfrom Tkinter import * # gui widget stufffrom tkFileDialog import * # file selector dialogfrom PP2E.System.App.Clients.packapp import PackApp # use pack classdef runPackDialog( ):s1, s2 = StringVar(), StringVar( ) # run class like a function
PackDialog(s1, s2) # pop-up dialog: sets s1/s2
output, patterns = s1.get(), s2.get( ) # whether 'ok' or wm-destroy
if output != "" and patterns != "": patterns = string.split(patterns) filenames = []for sublist in map(glob, patterns): # do expansion manually
filenames = filenames + sublist # Unix does auto on command-line
print 'PackApp:', output, filenamesapp = PackApp(ofile=output) # run with redirected output
app.args = filenames # reset cmdline args list
app.main( ) # should show msgs in gui too
class PackDialog(Toplevel):
def __init__(self, target1, target2):Toplevel.__init__(self) # a new top-level window
self.title('Enter Pack Parameters') # 2 frames plus a button
f1 = Frame(self) l1 = Label(f1, text='Output file?', relief=RIDGE, width=15)
e1 = Entry(f1, relief=SUNKEN)
b1 = Button(f1, text='browse...') f1.pack(fill=X) l1.pack(side=LEFT) e1.pack(side=LEFT, expand=YES, fill=X) b1.pack(side=RIGHT)b1.config(command= (lambda x=target1: x.set(askopenfilename( ))) )
f2 = Frame(self)l2 = Label(f2, text='Files to pack?', relief=RIDGE, width=15)
e2 = Entry(f2, relief=SUNKEN)
b2 = Button(f2, text='browse...') f2.pack(fill=X) l2.pack(side=LEFT) e2.pack(side=LEFT, expand=YES, fill=X) b2.pack(side=RIGHT) b2.config(command=(lambda x=target2: x.set(x.get() +' '+ askopenfilename( ))) )
Button(self, text='OK', command=self.destroy).pack( )
e1.config(textvariable=target1) e2.config(textvariable=target2)self.grab_set( ) # make myself modal:
self.focus_set( ) # mouse grab, keyboard focus, wait...
self.wait_window( ) # till destroy; else returns to caller now
if __name__ == '__main__':
root = Tk( )
Button(root, text='pop', command=runPackDialog).pack(fill=X) Button(root, text='bye', command=root.quit).pack(fill=X) root.mainloop( )
When run, this script makes the input form shown in Figure 9-6. Users may either type input and output filenames into the entry fields, or press the "browse..." buttons to pop up standard file selection dialogs. They can also enter filename patterns -- the manual glob.glob call in this script expands filename patterns to match names and filters out nonexistent input filenames. The Unix command line does this pattern expansion automatically when running PackApp from a shell, but Windows does not (see Chapter 2, for more details).
Figure 9-6. The packdlg input form
When the form is filled in and submitted with its OK button, parameters are finally passed to an instance of the PackApp class we wrote in Chapter 4 to do file concatenations. The GUI interface to the unpacking script is simpler, because there is only one input field -- the name of the packed file to scan. The script in Example 9-8 generated the input form window shown in Figure 9-7.
Example 9-8. PP2E\Gui\ShellGui\unpkdlg.py
# added file select dialog, handles cancel better
from Tkinter import * # widget classesfrom tkFileDialog import * # file open dialogfrom PP2E.System.App.Clients.unpackapp import UnpackApp # use unpack classdef runUnpackDialog( ):input = UnpackDialog( ).input # get input from GUI
if input != '': # do non-gui file stuff
print 'UnpackApp:', input
app = UnpackApp(ifile=input) # run with input from file
app.main( ) # execute app class
class UnpackDialog(Toplevel):
def __init__(self): # a function would work too
Toplevel.__init__(self) # resizable root box
self.input = '' # a label and an entry
self.title('Enter Unpack Parameters') Label(self, text='input file?', relief=RIDGE, width=11).pack(side=LEFT) e = Entry(self, relief=SUNKEN) b = Button(self, text='browse...') e.bind('<Key-Return>', self.gotit)b.config(command=(lambda x=e: x.insert(0, askopenfilename( ))))
b.pack(side=RIGHT) e.pack(side=LEFT, expand=YES, fill=X) self.entry = eself.grab_set( ) # make myself modal
self.focus_set( )
self.wait_window( ) # till I'm destroyed on return->gotit
def gotit(self, event): # on return key: event.widget==Entry
self.input = self.entry.get( ) # fetch text, save in self
self.destroy( ) # kill window, but instance lives on
if __name__ == "__main__":
Button(None, text='pop', command=runUnpackDialog).pack( )
mainloop( )
The "browse..." button in Figure 9-7 pops up a file selection dialog just like the packdlg form. Rather than an OK button, this dialog binds the enter key-press event to kill the window and end the modal wait state pause; on submission, the name of the file is passed to an instance of the UnpackApp class shown in Chapter 4 to perform the actual file scan process.
Figure 9-7. The unpkdlg input form
![]()
This all works as advertised -- by making command-line tools available in graphical form like this, they become much more attractive to users accustomed to the GUI way of life. Still, there are two aspects of this design that seem prime for improvement.
First of all, both of the input dialogs use custom code to render a unique appearance, but we could probably simplify them substantially by importing a common form-builder module instead. We met generalized form builder code in Chapter 7 and Chapter 8, and we'll meet more later; see the form.py module in Chapter 10, for pointers on genericizing form construction, too.
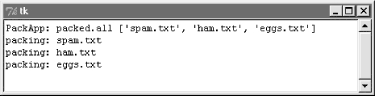
Secondly, at the point where the user submits input data in either form dialog, we've lost the GUI trail -- PackApp and UnpackApp messages still show up in the stdout console window:
C:\...\PP2E\Gui\ShellGui\test>python ..\mytools.py
dict test
PackApp: packed.all ['spam.txt', 'eggs.txt', 'ham.txt']
packing: spam.txt
packing: eggs.txt
packing: ham.txt
UnpackApp: packed.all
creating: spam.txt
creating: eggs.txt
creating: ham.txt
We can do better here, by redirecting stdout to an object that throws text up in a GUI window as it is received. You'll have to read the next section to see how.
9.2.5 GuiStreams: Redirecting Streams to GUI Widgets
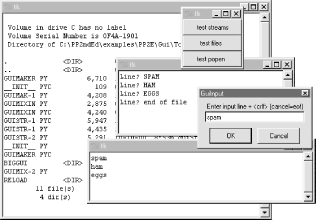
The script in Example 9-9 arranges to map input and output sources to pop-up windows in a GUI application, much as we did with strings in the stream redirection topics in Chapter 2. Although this module is really just a first-cut prototype and needs improvement itself (e.g., each input line request pops up a new input dialog), it demonstrates the concepts in general.
Its GuiOutput and GuiInput objects define methods that allow them to masquerade as files in any interface that expects a file. As we learned earlier in Chapter 2, this includes standard stream processing tools like print, raw_input, and explicit read and write calls. The redirectedGuiFunc function in this module uses this plug-and-play compatibility to run a function with its standard input and output streams mapped completely to pop-up windows instead of the console window (or wherever streams would otherwise be mapped).
Example 9-9. PP2E\Gui\Tools\guiStreams.py
##############################################################################
# first-cut implementation of file-like classes that can be used to redirect
# input and output streams to GUI displays; as is, input comes from a common
# dialog popup (a single output+input interface or a persistent Entry field
# for input would be better); this also does not properly span lines for read
# requests with a byte count > len(line); see guiStreamsTools.py for more;
##############################################################################
from Tkinter import *
from ScrolledText import ScrolledText
from tkSimpleDialog import askstring
class GuiOutput:
def __init__(self, parent=None): self.text = Noneif parent: self.popupnow(parent) # popup now or on first write
def popupnow(self, parent=None): # in parent now, Toplevel later
if self.text: returnself.text = ScrolledText(parent or Toplevel( ))
self.text.config(font=('courier', 9, 'normal'))self.text.pack( )
def write(self, text):self.popupnow( )
self.text.insert(END, str(text)) self.text.see(END)self.text.update( )
def writelines(self, lines): # lines already have '\n'
for line in lines: self.write(line) # or map(self.write, lines)
class GuiInput:
def __init__(self): self.buff = '' def inputLine(self): line = askstring('GuiInput', 'Enter input line + <crlf> (cancel=eof)') if line == None:return '' # popup dialog for each line
else: # cancel button means eof
return line + '\n' # else add end-line marker
def read(self, bytes=None): if not self.buff:self.buff = self.inputLine( )
if bytes: # read by byte count
text = self.buff[:bytes] # doesn't span lines
self.buff = self.buff[bytes:] else:text = '' # read all till eof
line = self.buff while line: text = text + lineline = self.inputLine( ) # until cancel=eof=''
return text def readline(self):text = self.buff or self.inputLine( ) # emulate file read methods
self.buff = '' return text def readlines(self): lines = [] # read all lines
while 1:next = self.readline( )
if not next: break lines.append(next) return linesdef redirectedGuiFunc(func, *pargs, **kargs):
import syssaveStreams = sys.stdin, sys.stdout # map func streams to popups
sys.stdin = GuiInput( ) # pops up dialog as needed
sys.stdout = GuiOutput( ) # new output window per call
sys.stderr = sys.stdout
result = apply(func, pargs, kargs) # this is a blocking func call
sys.stdin, sys.stdout = saveStreams return resultdef redirectedGuiShellCmd(command):
import osinput = os.popen(command, 'r')
output = GuiOutput( )
def reader(input, output): # show a shell command's
while 1: # standard output in a new
line = input.readline( ) # popup text box widget
if not line: break output.write(line) reader(input, output)if __name__ == '__main__':
import stringdef makeUpper( ): # use standard streams
while 1: try: line = raw_input('Line? ') except: break print string.upper(line) print 'end of file'def makeLower(input, output): # use explicit files
while 1:line = input.readline( )
if not line: break output.write(string.lower(line)) print 'end of file'root = Tk( )
Button(root, text='test streams', command=lambda: redirectedGuiFunc(makeUpper)).pack(fill=X)Button(root, text='test files ',
command=lambda: makeLower(GuiInput(), GuiOutput( )) ).pack(fill=X)
Button(root, text='test popen ',
command=lambda: redirectedGuiShellCmd('dir *')).pack(fill=X)root.mainloop( )
As coded here, GuiOutput either attaches a ScrolledText to a parent container, or pops up a new top-level window to serve as the container on the first write call. GuiInput pops up a new standard input dialog every time a read request requires a new line of input. Neither one of these policies is ideal for all scenarios (input would be better mapped to a more long-lived widget), but they prove the general point. Figure 9-8 shows the scene generated by this script's self-test code, after capturing the output of a shell dir listing command (on the left), and two interactive loop tests (the one with "Line?" prompts and uppercase letters represents the makeUpper streams test). An input dialog has just popped up for a new makeLower files test.
Figure 9-8. guiStreams routing streams to pop-up windows
9.2.5.1 Using redirection for the packing scripts
Now, to use such redirection tools to map command-line script output back to a GUI, simply run calls and command lines with the two redirected functions in this module. Example 9-10 shows one way to wrap the packing operation to force its printed output to appear in a pop-up window when generated, instead of the console.
Example 9-10. PP2E\Gui\ShellGui\packdlg-redirect.py
# wrap command-line script in GUI redirection tool to popup its output
from Tkinter import *
from packdlg import runPackDialog
from PP2E.Gui.Tools.guiStreams import redirectedGuiFunc
def runPackDialog_Wrapped( ):redirectedGuiFunc(runPackDialog) # wrap entire callback handler
if __name__ == '__main__':
root = Tk( )
Button(root, text='pop', command=runPackDialog_Wrapped).pack(fill=X)root.mainloop( )
You can run this script directly to test its effect, without bringing up the ShellGui window. Figure 9-9 shows the resulting stdout window after the pack input dialog is dismissed. This window pops up as soon as script output is generated, and is a bit more GUI user-friendly than hunting for messages in a console. You can similarly code the unpack parameters dialog to route its output to a pop-up too.[2] In fact, you can use this technique to route the output of any function call or command line to a pop-up window; as usual, the notion of compatible object interfaces are at the heart of much of Python's flexibility.
Figure 9-9. Routing script outputs to GUI pop-ups
9.2.6 Reloading GUI Callback Handlers Dynamically
One last GUI programming technique merits a quick look here. The Python reload function lets you dynamically change and reload a program's modules without stopping the program. For instance, you can bring up a text editor window to change the source code of selected parts of a system while it is running and see those changes show up immediately after reloading the changed module.
This is a powerful feature, especially for developing programs that take a long time to restart. Programs that connect to databases or network servers, initialize large objects, or travel through a long series of steps to retrigger a callback are prime candidates for reload. It can shave substantial time from the development cycle.
The catch for GUIs, though, is that because callback handlers are registered as object references instead of module and object names, reloads of callback handler functions are ineffective after the callback has been registered. The Python reload operation works by changing a module object's contents in place. Because Tkinter stores a pointer to the registered handler object directly, though, it is oblivious to any reloads of the module that the handler came from. That is, Tkinter will still reference a module's old objects even after the module is reloaded and changed.
This is a subtle thing, but you really only need to remember that you must do something special to reload callback handler functions dynamically. Not only do you need to explicitly request reloading of the modules that you change, but you must also generally provide an indirection layer that routes callbacks from registered objects to modules, so that reloads have impact.
For example, the script in Example 9-11 goes the extra mile to indirectly dispatch callbacks to functions in an explicitly reloaded module. The callback handlers registered with Tkinter are method objects that do nothing but reload and dispatch again. Because the true callback handler functions are fetched through a module object, reloading that module makes the latest versions of the functions accessible.
Example 9-11. PP2E\Gui\Tools\Reload\rad.py
from Tkinter import * import actions # get initial callback handlersclass Hello(Frame):
def __init__(self, master=None): Frame.__init__(self, master)self.pack( )
self.make_widgets( )
def make_widgets(self): Button(self, text='message1', command=self.message1).pack(side=LEFT) Button(self, text='message2', command=self.message2).pack(side=RIGHT) def message1(self):reload(actions) # need to reload actions module before calling
actions.message1( ) # now new version triggered by pressing button
def message2(self):reload(actions) # changes to actions.py picked up by reload
actions.message2(self) # call the most recent version; pass self
def method1(self):print 'exposed method...' # called from actions function
Hello().mainloop( )
When run, this script makes a two-button window that triggers the message1 and message2 methods. Example 9-12 contains the actual callback handlers' code. Its functions receive a self argument that gives access back to the Hello class object, as though these were real methods. You can change this file any number of times while the rad script's GUI is active; each time you do so, you'll change the behavior of the GUI when a button press occurs.
Example 9-12. PP2E\Gui\Tools\Reload\actions.py
# callback handlers: reloaded each time triggered
def message1( ): # change me
print 'spamSpamSPAM' # could build a dialog...
def message2(self): print 'Ni! Ni!' # change me
self.method1( ) # access the 'Hello' instance...
Try running rad and editing the messages printed by actions in another window; you should see your new messages printed in the stdout console window each time the GUI's buttons are pressed. This example is deliberately simple to illustrate the concept, but the actions reloaded like this in practice might build pop-up dialogs, new top-level windows, and so on. Reloading the code that creates such windows would also let us dynamically change their appearances.
There are other ways to change a GUI while it's running. For instance, we saw in Chapter 8 that appearances can be altered at any time by calling the widget config method, and widgets can be added and deleted from a display dynamically with methods like pack_forget and pack (and their grid manager relatives). Furthermore, passing a new command=action option setting to a widget's config method might reset a callback handler to a new action object on the fly; with enough support code, this may be a viable alternative to the indirection scheme used above to make reloads more effective in GUIs.
9.3 Complete Program Examples
The rest of this chapter presents a handful of complete GUI programs, as examples of how far Python and Tkinter can take you. Because I've already shown the interfaces these scripts employ, this section is mostly screen shots, program listings, and a few bullets describing some of the most important aspects of these programs. In other words, this is a self-study section: read the source, run the examples on your own computer, and refer to the previous chapters for further details on the code listed here. Many of these scripts also are accompanied on the book CD by alternative or experimental implementations not listed here; see the CD for extra code examples.
9.4 PyEdit: A Text Editor Program/Object
In the last few decades, I've typed text into a lot of programs. Most were closed systems (I had to live with whatever decisions their designers made), and many ran on only one platform. The PyEdit program presented in this section does better on both counts: it implements a full-featured, graphical text editor program in roughly 470 lines of portable Python code (including whitespace and comments). Despite its size, PyEdit was sufficiently powerful and robust to serve as the primary tool used to code most examples in this book.
PyEdit supports all the usual mouse and keyboard text-editing operations: cut and paste, search and replace, open and save, and so on. But really, PyEdit is a bit more than just another text editor -- it is designed to be used as both a program and a library component, and can be run in a variety of roles:
Standalone mode
As a standalone text editor program, with or without the name of a file to be edited passed in on the command line. In this mode, PyEdit is roughly like other text-editing utility programs (e.g., Notepad on Windows), but also provides advanced functions such as running Python program code being edited, changing fonts and colors, and so on. More importantly, because it is coded in Python, PyEdit is easy to customize, and runs portably on Windows, X Windows, and Macintosh.
Pop-up mode
Within a new pop-up window, allowing an arbitrary number of copies to appear as pop-ups at once in a program. Because state information is stored in class instance attributes, each PyEdit object created operates independently. In this mode and the next, PyEdit serves as a library object for use in other scripts, not a canned application.
Embedded mode
As an attached component, to provide a text- editing widget for other GUIs. When attached, PyEdit uses a frame-based menu, and can optionally disable some of its menu options for an embedded role. For instance, PyView (later in this chapter) uses PyEdit in embedded mode this way to serve as a note editor for photos, and PyMail (in Chapter 11) attaches it to get an email text editor for free.
While such mixed-mode behavior may sound complicated to implement, most of PyEdit's modes are a natural by-product of coding GUIs with the class-based techniques we've seen in the last three chapters.
9.4.1 Running PyEdit
PyEdit sports lots of features, and the best way to learn how it works is to test drive it for yourself -- it can be run by starting the file textEditor.pyw, or from the PyDemo and PyGadget launcher bars described in the previous chapter (the launchers themselves live in the top level of the book examples directory tree). To give you a sampling of its interfaces, Figure 9-10 shows the main window's default appearance, after opening PyEdit's source code file.
Figure 9-10. PyEdit main window, editing itself
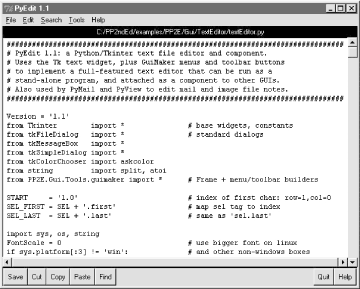
The main part of this window is a Text widget object, and if you read the last chapter's coverage of this widget, PyEdit text-editing operations will be familiar. It uses text marks, tags, and indexes, and implements cut-and-paste operations with the system clipboard so that PyEdit can paste data to and from other applications. Both vertical and horizontal scrollbars are cross-linked to the Text widget, to support movement through arbitrary files.
If PyEdit's menu and toolbars look familiar, they should -- it builds the main window with minimal code and appropriate clipping and expansion policies, by mixing in the GuiMaker class we met earlier in this chapter. The toolbar at the bottom contains shortcut buttons for operations I tend to use most often; if my preferences don't match yours, simply change the toolbar list in the source code to show the buttons you want (this is Python, after all). As usual for Tkinter menus, shortcut key combinations can be used to invoke menu options quickly, too -- press Alt plus all the underlined keys of entries along the path to the desired action.
PyEdit pops up a variety of modal and nonmodal dialogs, both standard and custom. Figure 9-11 shows the custom and nonmodal change dialog, along with a standard dialog used to display file statistics.
Figure 9-11. PyEdit with colors, font, and a few pop-ups
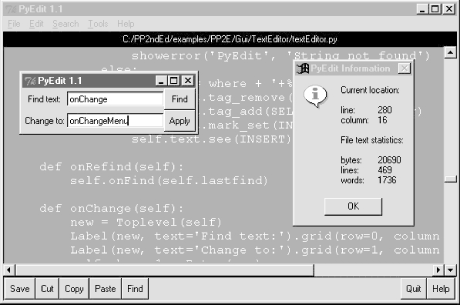
The main window here has been given new foreground and background colors (with the standard color selection dialog), and a new text font has been selected from a canned list in the script that users can change to suit their preferences (this is Python, after all). The standard file open and save selection dialogs in PyEdit use object-based interfaces to remember the last directory visited, so you don't have to renavigate there every time.
One of the more unique features of PyEdit is that it can actually run Python program code that you are editing. This isn't as hard as it may sound either -- because Python provides built-ins for both compiling and running code strings and launching programs, PyEdit simply has to make the right calls for this to work. For example, it's easy to code a simple-minded Python interpreter in Python (though you need a bit more to handle multiple-line statements), as shown in Example 9-13.
Example 9-13. PP2E\Gui\TextEditor\simpleshell.py
namespace= {}while 1:
try:line = raw_input('>>> ') # single line statements only
except EOFError: break else:exec line in namespace # or eval( ) and print result
Depending on the user's preference, PyEdit either does something similar to this to run code fetched from the text widget, or uses the launchmodes module we wrote at the end of Chapter 3 to run the code's file as an independent program. There are a variety of options in both schemes that you can customize as you like (this is Python, after all). See the onRunCode method for details, or simply edit and run some Python code on your own.
Figure 9-12 shows four independently started instances of PyEdit running with a variety of color schemes, sizes, and fonts. This figure also captures two PyEdit torn-off menus (lower right) and the PyEdit help pop-up (upper right). The edit windows' backgrounds are shades of yellow, blue, purple, and orange; use the Tools menu's Pick options to set colors as you like.
Figure 9-12. Multiple PyEdit sessions at work
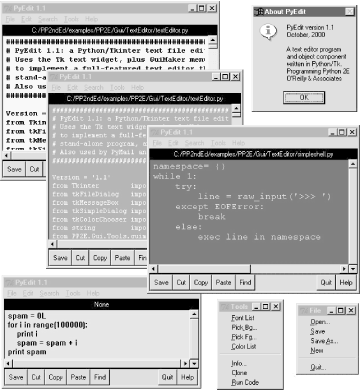
Since these four PyEdit sessions are all editing Python source-coded text, you can run their contents with the Run Code option in the Tools pull-down menu. Code run from files is spawned independently; the standard streams of code run not from a file (i.e., fetched from the text widget itself) are mapped to the PyEdit session's console window. This isn't an IDE by any means; it's just something I added because I found it to be useful. It's nice to run code you're editing without fishing through directories.
One caveat before I turn you loose on the source code: PyEdit does not yet have an Undo button in this release. I don't use such a mode myself, and it's easy to undo cuts and pastes right after you've done them (simply paste back from the clipboard, or cut the pasted and selected text). Adding a general undo option would make for a fun exercise if you are so motivated. An interesting approach may be to subclass either the TextEditor class here or the Tkinter Text class itself. Such a subclass would record text operations on a limited-length list and run calls to back out of each logged operation on demand and in reverse. It could also be used to make PyEdit smarter about knowing when to ask about saving the file before it exits. By adding undo as an external subclass, exiting PyEdit code would not have to be instrumented to keep track of everything it does to the text. This is Python, after all.
9.4.2 PyEdit Source Code
The program in Example 9-14 consists of just two source files -- a .pyw that can be run on Windows to avoid the DOS console streams window pop-up, and a main .py that can be either run or imported. We need both because PyEdit is both script and library, and .pyw files can only be run, not imported (see Chapter 2 if you've forgotten what that implies).
Example 9-14. PP2E\Gui\TextEditor\textEditor.pyw
#################################################################
# run PyEdit without DOS console popup for os.system on Windows;
# at present, ".pyw" files cannot be imported as modules;
# if you want a file to be both a program that launches without
# a dos console box on windows, and be imported from elsewhere,
# use ".py" for the main file and import .py code from a ".pyw";
# execfile('textEditor.py') fails when run from another dir,# because the current working dir is the dir I'm run from;
#################################################################
import textEditor # grab .py (or .pyc) filetextEditor.main( ) # run top-level entry point
The module in Example 9-15 is PyEdit's implementation; the main classes used to start and embed a PyEdit object appear at the end of this file. Study this listing while you experiment with PyEdit, to learn about its features and techniques.
Example 9-15. PP2E\Gui\TextEditor\textEditor.py
################################################################################
# PyEdit 1.1: a Python/Tkinter text file editor and component.
# Uses the Tk text widget, plus GuiMaker menus and toolbar buttons
# to implement a full-featured text editor that can be run as a # stand-alone program, and attached as a component to other GUIs.
# Also used by PyMail and PyView to edit mail and image file notes.
################################################################################
Version = '1.1'
from Tkinter import * # base widgets, constants
from tkFileDialog import * # standard dialogs
from tkMessageBox import *from tkSimpleDialog import *
from tkColorChooser import askcolor
from string import split, atoifrom PP2E.Gui.Tools.guimaker import * # Frame + menu/toolbar buildersSTART = '1.0' # index of first char: row=1,col=0
SEL_FIRST = SEL + '.first' # map sel tag to indexSEL_LAST = SEL + '.last' # same as 'sel.last'
import sys, os, string
FontScale = 0 # use bigger font on linuxif sys.platform[:3] != 'win': # and other non-windows boxes FontScale = 3class TextEditor: # mix with menu/toolbar Frame class startfiledir = '.'ftypes = [('All files', '*'), # for file open dialog
('Text files', '.txt'), # customize in subclass
('Python files', '.py')] # or set in each instance
colors = [{'fg':'black', 'bg':'white'}, # color pick list
{'fg':'yellow', 'bg':'black'}, # first item is default
{'fg':'white', 'bg':'blue'}, # tailor me as desired
{'fg':'black', 'bg':'beige'}, # or do PickBg/Fg chooser
{'fg':'yellow', 'bg':'purple'},
{'fg':'black', 'bg':'brown'},
{'fg':'lightgreen', 'bg':'darkgreen'},{'fg':'darkblue', 'bg':'orange'},
{'fg':'orange', 'bg':'darkblue'}]
fonts = [('courier', 9+FontScale, 'normal'), # platform-neutral fonts
('courier', 12+FontScale, 'normal'), # (family, size, style)
('courier', 10+FontScale, 'bold'), # or popup a listbox
('courier', 10+FontScale, 'italic'), # make bigger on linux
('times', 10+FontScale, 'normal'),
('helvetica', 10+FontScale, 'normal'),('ariel', 10+FontScale, 'normal'),
('system', 10+FontScale, 'normal'),
('courier', 20+FontScale, 'normal')]
def __init__(self, loadFirst=''): if not isinstance(self, GuiMaker): raise TypeError, 'TextEditor needs a GuiMaker mixin' self.setFileName(None)self.lastfind = None
self.openDialog = None self.saveDialog = Noneself.text.focus( ) # else must click in text
if loadFirst: self.onOpen(loadFirst)def start(self): # run by GuiMaker.__init__
self.menuBar = [ # configure menu/toolbar
('File', 0, [('Open...', 0, self.onOpen),
('Save', 0, self.onSave),
('Save As...', 5, self.onSaveAs),('New', 0, self.onNew),
'separator',('Quit...', 0, self.onQuit)]
), ('Edit', 0,[('Cut', 0, self.onCut),
('Copy', 1, self.onCopy),
('Paste', 0, self.onPaste),
'separator',('Delete', 0, self.onDelete),
('Select All', 0, self.onSelectAll)] ),('Search', 0,
[('Goto...', 0, self.onGoto),
('Find...', 0, self.onFind),
('Refind', 0, self.onRefind),
('Change...', 0, self.onChange)]
), ('Tools', 0,[('Font List', 0, self.onFontList),
('Pick Bg...', 4, self.onPickBg),
('Pick Fg...', 0, self.onPickFg),
('Color List', 0, self.onColorList),
'separator',('Info...', 0, self.onInfo),
('Clone', 1, self.onClone),
('Run Code', 0, self.onRunCode)]
)] self.toolBar = [('Save', self.onSave, {'side': LEFT}),
('Cut', self.onCut, {'side': LEFT}),
('Copy', self.onCopy, {'side': LEFT}),
('Paste', self.onPaste, {'side': LEFT}),
('Find', self.onRefind, {'side': LEFT}),
('Help', self.help, {'side': RIGHT}),
('Quit', self.onQuit, {'side': RIGHT})]
def makeWidgets(self): # run by GuiMaker.__init__
name = Label(self, bg='black', fg='white') # add below menu, above tool
name.pack(side=TOP, fill=X) # menu/toolbars are packed
vbar = Scrollbar(self)
hbar = Scrollbar(self, orient='horizontal')
text = Text(self, padx=5, wrap='none')
vbar.pack(side=RIGHT, fill=Y)
hbar.pack(side=BOTTOM, fill=X) # pack text last
text.pack(side=TOP, fill=BOTH, expand=YES) # else sbars clipped
text.config(yscrollcommand=vbar.set) # call vbar.set on text move
text.config(xscrollcommand=hbar.set)vbar.config(command=text.yview) # call text.yview on scroll move
hbar.config(command=text.xview) # or hbar['command']=text.xview
text.config(font=self.fonts[0], bg=self.colors[0]['bg'], fg=self.colors[0]['fg'])self.text = text
self.filelabel = name ##################### # Edit menu commands #####################def onCopy(self): # get text selected by mouse,etc
if not self.text.tag_ranges(SEL): # save in cross-app clipboard
showerror('PyEdit', 'No text selected') else:text = self.text.get(SEL_FIRST, SEL_LAST)
self.clipboard_clear( )
self.clipboard_append(text)def onDelete(self): # delete selected text, no save
if not self.text.tag_ranges(SEL): showerror('PyEdit', 'No text selected') else: self.text.delete(SEL_FIRST, SEL_LAST) def onCut(self):if not self.text.tag_ranges(SEL):
showerror('PyEdit', 'No text selected') else: self.onCopy( ) # save and delete selected text
self.onDelete( )
def onPaste(self): try: text = self.selection_get(selection='CLIPBOARD') except TclError: showerror('PyEdit', 'Nothing to paste') returnself.text.insert(INSERT, text) # add at current insert cursor
self.text.tag_remove(SEL, '1.0', END) self.text.tag_add(SEL, INSERT+'-%dc' % len(text), INSERT)self.text.see(INSERT) # select it, so it can be cut
def onSelectAll(self):self.text.tag_add(SEL, '1.0', END+'-1c') # select entire text
self.text.mark_set(INSERT, '1.0') # move insert point to top
self.text.see(INSERT) # scroll to top
###################### # Tools menu commands ###################### def onFontList(self):self.fonts.append(self.fonts[0]) # pick next font in list
del self.fonts[0] # resizes the text area
self.text.config(font=self.fonts[0]) def onColorList(self):self.colors.append(self.colors[0]) # pick next color in list
del self.colors[0] # move current to end
self.text.config(fg=self.colors[0]['fg'], bg=self.colors[0]['bg']) def onPickFg(self): self.pickColor('fg') # added on 10/02/00
def onPickBg(self): # select arbitrary color
self.pickColor('bg') # in standard color dialog
def pickColor(self, part): # this is way too easy
(triple, hexstr) = askcolor( )
if hexstr:apply(self.text.config, ( ), {part: hexstr})
def onInfo(self):text = self.getAllText( ) # added on 5/3/00 in 15 mins
bytes = len(text) # words uses a simple guess:
lines = len(string.split(text, '\n')) # any separated by whitespace
words = len(string.split(text)) index = self.text.index(INSERT) where = tuple(string.split(index, '.')) showinfo('PyEdit Information', 'Current location:\n\n' + 'line:\t%s\ncolumn:\t%s\n\n' % where + 'File text statistics:\n\n' + 'bytes:\t%d\nlines:\t%d\nwords:\t%d\n' % (bytes, lines, words)) def onClone(self):new = Toplevel( ) # a new edit window in same process
myclass = self.__class__ # instance's (lowest) class object
myclass(new) # attach/run instance of my class
def onRunCode(self, parallelmode=1): """ run Python code being edited--not an ide, but handy; tries to run in file's dir, not cwd (may be pp2e root); inputs and adds command-line arguments for script files; code's stdin/out/err = editor's start window, if any; but parallelmode uses start to open a dos box for i/o; """ from PP2E.launchmodes import System, Start, Forkfilemode = 0
thefile = str(self.getFileName( ))
cmdargs = askstring('PyEdit', 'Commandline arguments?') or ''
if os.path.exists(thefile): filemode = askyesno('PyEdit', 'Run from file?')if not filemode: # run text string
namespace = {'__name__': '__main__'} # run as top-level
sys.argv = [thefile] + string.split(cmdargs) # could use threads
exec self.getAllText( ) + '\n' in namespace # exceptions ignored
elif askyesno('PyEdit', 'Text saved in file?'):mycwd = os.getcwd( ) # cwd may be root
os.chdir(os.path.dirname(thefile) or mycwd) # cd for filenames
thecmd = thefile + ' ' + cmdargs
if not parallelmode: # run as file
System(thecmd, thecmd)( ) # block editor
else:if sys.platform[:3] == 'win': # spawn in parallel
Start(thecmd, thecmd)( ) # or use os.spawnv
else:Fork(thecmd, thecmd)( ) # spawn in parallel
os.chdir(mycwd) ####################### # Search menu commands ####################### def onGoto(self): line = askinteger('PyEdit', 'Enter line number')self.text.update( )
self.text.focus( )
if line is not None: maxindex = self.text.index(END+'-1c')maxline = atoi(split(maxindex, '.')[0])
if line > 0 and line <= maxline:self.text.mark_set(INSERT, '%d.0' % line) # goto line
self.text.tag_remove(SEL, '1.0', END) # delete selects
self.text.tag_add(SEL, INSERT, 'insert + 1l') # select line
self.text.see(INSERT) # scroll to line
else: showerror('PyEdit', 'Bad line number') def onFind(self, lastkey=None): key = lastkey or askstring('PyEdit', 'Enter search string')self.text.update( )
self.text.focus( )
self.lastfind = key if key:where = self.text.search(key, INSERT, END) # don't wrap
if not where: showerror('PyEdit', 'String not found') else:pastkey = where + '+%dc' % len(key) # index past key
self.text.tag_remove(SEL, '1.0', END) # remove any sel
self.text.tag_add(SEL, where, pastkey) # select key
self.text.mark_set(INSERT, pastkey) # for next find
self.text.see(where) # scroll display
def onRefind(self): self.onFind(self.lastfind) def onChange(self): new = Toplevel(self) Label(new, text='Find text:').grid(row=0, column=0) Label(new, text='Change to:').grid(row=1, column=0) self.change1 = Entry(new) self.change2 = Entry(new) self.change1.grid(row=0, column=1, sticky=EW) self.change2.grid(row=1, column=1, sticky=EW)Button(new, text='Find',
command=self.onDoFind).grid(row=0, column=2, sticky=EW) Button(new, text='Apply', command=self.onDoChange).grid(row=1, column=2, sticky=EW)new.columnconfigure(1, weight=1) # expandable entrys
def onDoFind(self):self.onFind(self.change1.get( )) # Find in change box
def onDoChange(self):if self.text.tag_ranges(SEL): # must find first
self.text.delete(SEL_FIRST, SEL_LAST) # Apply in change
self.text.insert(INSERT, self.change2.get( )) # deletes if empty
self.text.see(INSERT)self.onFind(self.change1.get( )) # goto next appear
self.text.update( ) # force refresh
##################### # File menu commands #####################def my_askopenfilename(self): # objects remember last result dir/file
if not self.openDialog: self.openDialog = Open(initialdir=self.startfiledir, filetypes=self.ftypes)return self.openDialog.show( )
def my_asksaveasfilename(self): # objects remember last result dir/file
if not self.saveDialog: self.saveDialog = SaveAs(initialdir=self.startfiledir, filetypes=self.ftypes)return self.saveDialog.show( )
def onOpen(self, loadFirst=''):doit = self.isEmpty( ) or askyesno('PyEdit', 'Disgard text?')
if doit:
file = loadFirst or self.my_askopenfilename( )
if file: try:text = open(file, 'r').read( )
except: showerror('PyEdit', 'Could not open file ' + file) else: self.setAllText(text) self.setFileName(file) def onSave(self):self.onSaveAs(self.currfile) # may be None
def onSaveAs(self, forcefile=None):file = forcefile or self.my_asksaveasfilename( )
if file:text = self.getAllText( )
try: open(file, 'w').write(text) except: showerror('PyEdit', 'Could not write file ' + file) else:self.setFileName(file) # may be newly created
def onNew(self):doit = self.isEmpty( ) or askyesno('PyEdit', 'Disgard text?')
if doit: self.setFileName(None)self.clearAllText( )
def onQuit(self): if askyesno('PyEdit', 'Really quit PyEdit?'):self.quit( ) # Frame.quit via GuiMaker
#################################### # Others, useful outside this class #################################### def isEmpty(self):return not self.getAllText( )
def getAllText(self):return self.text.get('1.0', END+'-1c') # extract text as a string
def setAllText(self, text):self.text.delete('1.0', END) # store text string in widget
self.text.insert(END, text) # or '1.0'
self.text.mark_set(INSERT, '1.0') # move insert point to top
self.text.see(INSERT) # scroll to top, insert set
def clearAllText(self):self.text.delete('1.0', END) # clear text in widget
def getFileName(self): return self.currfile def setFileName(self, name):self.currfile = name # for save
self.filelabel.config(text=str(name)) def help(self): showinfo('About PyEdit', 'PyEdit version %s\nOctober, 2000\n\n' 'A text editor program\nand object component\n' 'written in Python/Tk.\nProgramming Python 2E\n' "O'Reilly & Associates" % Version)##################################################################
# ready-to-use editor classes
# mix in a Frame subclass that builds menu/toolbars
##################################################################
# when editor owns the window
class TextEditorMain(TextEditor, GuiMakerWindowMenu): # add menu/toolbar maker def __init__(self, parent=None, loadFirst=''): # when fills whole window
GuiMaker.__init__(self, parent) # use main window menus
TextEditor.__init__(self, loadFirst) # self has GuiMaker frame
self.master.title('PyEdit ' + Version) # title if stand-alone
self.master.iconname('PyEdit') # catch wm delete button
self.master.protocol('WM_DELETE_WINDOW', self.onQuit)class TextEditorMainPopup(TextEditor, GuiMakerWindowMenu):
def __init__(self, parent=None, loadFirst=''):
self.popup = Toplevel(parent) # create own window
GuiMaker.__init__(self, self.popup) # use main window menus
TextEditor.__init__(self, loadFirst) assert self.master == self.popup self.popup.title('PyEdit ' + Version) self.popup.iconname('PyEdit')
def quit(self):self.popup.destroy( ) # kill this window only
# when embedded in another window
class TextEditorComponent(TextEditor, GuiMakerFrameMenu): def __init__(self, parent=None, loadFirst=''): # use Frame-based menus
GuiMaker.__init__(self, parent) # all menus, buttons on
TextEditor.__init__(self, loadFirst) # GuiMaker must init 1st
class TextEditorComponentMinimal(TextEditor, GuiMakerFrameMenu):
def __init__(self, parent=None, loadFirst='', deleteFile=1):
self.deleteFile = deleteFileGuiMaker.__init__(self, parent)
TextEditor.__init__(self, loadFirst) def start(self):
TextEditor.start(self) # GuiMaker start call
for i in range(len(self.toolBar)): # delete quit in toolbar
if self.toolBar[i][0] == 'Quit': # delete file menu items
del self.toolBar[i]; break # or just disable file
if self.deleteFile: for i in range(len(self.menuBar)): if self.menuBar[i][0] == 'File': del self.menuBar[i]; break else: for (name, key, items) in self.menuBar: if name == 'File': items.append([1,2,3,4,6]) # stand-alone program run
def testPopup( ):
# see PyView and PyMail for component testsroot = Tk( )
TextEditorMainPopup(root) TextEditorMainPopup(root) Button(root, text='More', command=TextEditorMainPopup).pack(fill=X)Button(root, text='Quit', command=root.quit).pack(fill=X)
root.mainloop( )
def main( ): # may be typed or clicked
try: # or associated on Windows
fname = sys.argv[1] # arg = optional filename
except IndexError: fname = None TextEditorMain(loadFirst=fname).pack(expand=YES, fill=BOTH)mainloop( )
if __name__ == '__main__': # when run as a script#testPopup( )
main( ) # run .pyw for no dos box
9.5 PyView: An Image and Notes Slideshow
A picture may be worth a thousand words, but it takes considerably fewer to display one with Python. The next program, PyView, implements a simple photo slideshow program in portable Python/Tkinter code.
9.5.1 Running PyView
PyView pulls together many of the topics we studied in the last chapter: it uses after events to sequence a slideshow, displays image objects in an automatically sized canvas, and so on. Its main window displays a photo on a canvas; users can either open and view a photo directly or start a slideshow mode that picks and displays a random photo from a directory, at regular intervals specified with a scale widget.
By default, PyView slideshows show images in the book's image file directory (though the Open button allows you to load images in arbitrary directories). To view other sets of photos, either pass a directory name in as a first command-line argument or change the default directory name in the script itself. I can't show you a slideshow in action here, but I can show you the main window in general. Figure 9-13 shows the main PyView window's default display.
Figure 9-13. PyView without notes

Though it's not obvious as rendered in this book, the black-on-red label at the top gives the pathname of the photo file displayed. For a good time, move the slider at the bottom all the way over to "0" to specify no delay between photo changes, and click Start to begin a very fast slideshow. If your computer is at least as fast as mine, photos flip by much too fast to be useful for anything but subliminal advertising. Slideshow photos are loaded on startup to retain references to them (remember, you must hold on to image objects). But the speed with which large GIFs can be thrown up in a window in Python is impressive, if not downright exhilarating.
The GUI's Start button changes to a Stop button during a slideshow (its text attribute is reset with the widget config method). Figure 9-14 shows the scene after pressing Stop at an opportune moment.
Figure 9-14. PyView after stopping a slideshow
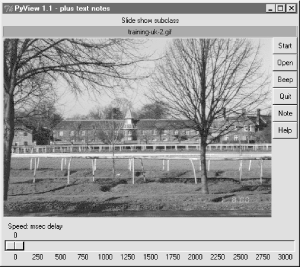
In addition, each photo can have an associated "notes" text file which is automatically opened along with the image. You can use this feature to record basic information about the photo. Press the Note button to open an additional set of widgets that let you view and change the note file associated with the currently displayed photo. This additional set of widgets should look familiar -- the PyEdit text editor of the previous section is attached to PyView to serve as a display and editing widget for photo notes. Figure 9-15 shows PyView with the attached PyEdit note-editing component opened.
Figure 9-15. PyView with notes
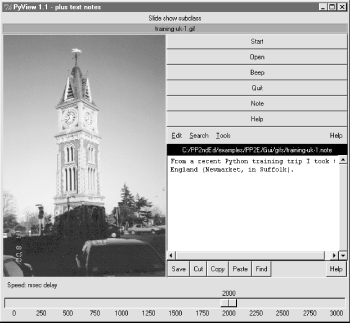
This makes for a very big window, usually best view maximized (taking up the entire screen). The main thing to notice, though, is the lower right corner of this display above the scale -- it's simply an attached PyEdit object, running the very same code listed in the prior section. Because PyEdit is implemented as a GUI class, it can be reused like this in any GUI that needs a text editing interface. When embedded like this, PyEdit's menus are based on a frame (it doesn't own the window at large), text content is stored and fetched directly, and some stand-alone options are omitted (e.g, the File pull-down is gone).
The note file viewer only appears if you press the Note button, and it is erased if you press it again; PyView uses widget pack and pack_forget methods introduced at the end of the last chapter to show and hide the note viewer frame. The window automatically expands to accommodate the note viewer when it is packed and displayed. It is also possible to open the note file in a PyEdit pop-up window, but PyView embeds the editor to retain a direct visual association. Watch for PyEdit to show up embedded within another GUI like this when we meet PyMail in Chapter 11.
A caveat here: out of the box, PyView supports as many photo formats as Tkinter's PhotoImage object does; that's why it looks for GIF files by default. You can improve this by installing the PIL extension to view JPEGs (and many others). But because PIL is an optional extension today, it's not incorporated into this PyView release. See the end of Chapter 7 for more on PIL and image formats.
9.5.2 PyView Source Code
Because the PyView program was implemented in stages, you need to study the union of two files and classes to understand how it truly works. One file implements a class that provides core slideshow functionality; the other implements a class the extends the original class, to add additional features on top of the core behavior. Let's start with the extension class: Example 9-16 adds a set of features to an imported slideshow base class -- note editing, a delay scale and file label, etc. This is the file that is actually run to start PyView.
Example 9-16. PP2E\Gui\SlideShow\slideShowPlus.py
###################################################################
# SlideShowPlus: add note files with an attached PyEdit object,
# a scale for setting the slideshow delay interval, and a label
# that gives the name of the image file currently being displayed;
###################################################################
import os, string
from Tkinter import *
from PP2E.Gui.TextEditor.textEditor import *
from slideShow import SlideShow
#from slideShow_threads import SlideShow
class SlideShowPlus(SlideShow):
def __init__(self, parent, picdir, editclass, msecs=2000): self.msecs = msecs self.editclass = editclass SlideShow.__init__(self, parent=parent, picdir=picdir, msecs=msecs) def makeWidgets(self): self.name = Label(self, text='None', bg='red', relief=RIDGE) self.name.pack(fill=X) SlideShow.makeWidgets(self) Button(self, text='Note', command=self.onNote).pack(fill=X) Button(self, text='Help', command=self.onHelp).pack(fill=X) s = Scale(label='Speed: msec delay', command=self.onScale, from_=0, to=3000, resolution=50, showvalue=YES, length=400, tickinterval=250, orient='horizontal') s.pack(side=BOTTOM, fill=X) s.set(self.msecs)if self.editclass == TextEditorMain: # make editor now
self.editor = self.editclass(self.master) # need root for menu else:self.editor = self.editclass(self) # embedded or popup
self.editor.pack_forget( ) # hide editor initially
self.editorUp = self.image = None def onStart(self): SlideShow.onStart(self) self.config(cursor='watch') def onStop(self): SlideShow.onStop(self) self.config(cursor='hand2') def onOpen(self): SlideShow.onOpen(self) if self.image: self.name.config(text=os.path.split(self.image[0])[1]) self.config(cursor='crosshair')self.switchNote( )
def quit(self):self.saveNote( )
SlideShow.quit(self) def drawNext(self): SlideShow.drawNext(self) if self.image: self.name.config(text=os.path.split(self.image[0])[1])self.loadNote( )
def onScale(self, value): self.msecs = string.atoi(value) def onNote(self):if self.editorUp: # if editor already open
#self.saveNote( ) # save text, hide editor
self.editor.pack_forget( )
self.editorUp = 0 else:self.editor.pack(side=TOP) # else unhide/pack editor
self.editorUp = 1 # and load image note text
self.loadNote( )
def switchNote(self): if self.editorUp:self.saveNote( ) # save current image's note
self.loadNote( ) # load note for new image
def saveNote(self): if self.editorUp:currfile = self.editor.getFileName() # or self.editor.onSave( )
currtext = self.editor.getAllText( ) # but text may be empty
if currfile and currtext: try: open(currfile, 'w').write(currtext) except: pass # this may be normal if run off cd def loadNote(self): if self.image and self.editorUp: root, ext = os.path.splitext(self.image[0])notefile = root + '.note'
self.editor.setFileName(notefile)
try:self.editor.setAllText(open(notefile).read( ))
except:self.editor.clearAllText( )
def onHelp(self): showinfo('About PyView','PyView version 1.1\nJuly, 1999\n'
'An image slide show\nProgramming Python 2E')if __name__ == '__main__':
import sys picdir = '../gifs' if len(sys.argv) >= 2: picdir = sys.argv[1] editstyle = TextEditorComponentMinimal if len(sys.argv) == 3: try: editstyle = [TextEditorMain, TextEditorMainPopup, TextEditorComponent, TextEditorComponentMinimal][string.atoi(sys.argv[2])] except: passroot = Tk( )
root.title('PyView 1.1 - plus text notes')Label(root, text="Slide show subclass").pack( )
SlideShowPlus(parent=root, picdir=picdir, editclass=editstyle)root.mainloop( )
The core functionality extended by SlideShowPlus lives in Example 9-17. This was the initial slideshow implementation; it opens images, displays photos, and cycles through a slideshow. You can run it by itself, but you won't get advanced features like notes and sliders added by the SlideShowPlus subclass.
Example 9-17. PP2E\Gui\SlideShow\slideShow.py
########################################################################
# SlideShow: a simple photo image slideshow in Python/Tkinter;
# the base feature set coded here can be extended in subclasses;
########################################################################
from Tkinter import *
from glob import glob
from tkMessageBox import askyesno
from tkFileDialog import askopenfilename
import random
Width, Height = 450, 450
imageTypes = [('Gif files', '.gif'), # for file open dialog('Ppm files', '.ppm'), # plus jpg with a Tk patch,
('Pgm files', '.pgm'), # plus bitmaps with BitmapImage
('All files', '*')]class SlideShow(Frame):
def __init__(self, parent=None, picdir='.', msecs=3000, **args):Frame.__init__(self, parent, args)
self.makeWidgets( )
self.pack(expand=YES, fill=BOTH) self.opens = picdir files = [] for label, ext in imageTypes[:-1]: files = files + glob('%s/*%s' % (picdir, ext)) self.images = map(lambda x: (x, PhotoImage(file=x)), files)self.msecs = msecs
self.beep = 1
self.drawn = None
def makeWidgets(self): self.canvas = Canvas(self, bg='white', height=Height, width=Width)self.canvas.pack(side=LEFT, fill=BOTH, expand=YES)
self.onoff = Button(self, text='Start', command=self.onStart) self.onoff.pack(fill=X)Button(self, text='Open', command=self.onOpen).pack(fill=X)
Button(self, text='Beep', command=self.onBeep).pack(fill=X)
Button(self, text='Quit', command=self.onQuit).pack(fill=X)
def onStart(self): self.loop = 1 self.onoff.config(text='Stop', command=self.onStop) self.canvas.config(height=Height, width=Width)self.onTimer( )
def onStop(self): self.loop = 0 self.onoff.config(text='Start', command=self.onStart) def onOpen(self):self.onStop( )
name = askopenfilename(initialdir=self.opens, filetypes=imageTypes) if name: if self.drawn: self.canvas.delete(self.drawn) img = PhotoImage(file=name)self.canvas.config(height=img.height(), width=img.width( ))
self.drawn = self.canvas.create_image(2, 2, image=img, anchor=NW) self.image = name, img def onQuit(self):self.onStop( )
self.update( )
if askyesno('PyView', 'Really quit now?'):self.quit( )
def onBeep(self): self.beep = self.beep ^ 1 def onTimer(self): if self.loop:self.drawNext( )
self.after(self.msecs, self.onTimer) def drawNext(self): if self.drawn: self.canvas.delete(self.drawn)name, img = random.choice(self.images)
self.drawn = self.canvas.create_image(2, 2, image=img, anchor=NW)
self.image = name, imgif self.beep: self.bell( )
self.canvas.update( )
if __name__ == '__main__':
import sys if len(sys.argv) == 2: picdir = sys.argv[1] else: picdir = '../gifs'root = Tk( )
root.title('PyView 1.0') root.iconname('PyView')Label(root, text="Python Slide Show Viewer").pack( )
SlideShow(root, picdir=picdir, bd=3, relief=SUNKEN)root.mainloop( )
To give you a better idea of what this core base class implements, Figure 9-16 shows what it looks like if run by itself (actually, two copies run by themselves) by a script called slideShow_frames, which is on this book's CD.
Figure 9-16. Two attached SlideShow objects
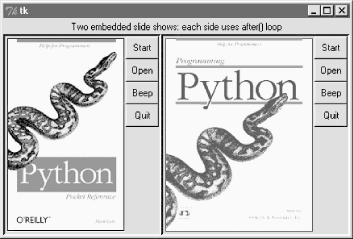
The simple slideShow_frames scripts attach two instances of SlideShow to a single window -- a feat possible only because state information is recorded in class instance variables, not globals. The slideShow_toplevels script also on the CD attaches two SlideShows to two top-level pop-up windows instead. In both cases, the slideshows run independently, but are based on after events fired from the same single event loop in a single process.
9.6 PyDraw: Painting and Moving Graphics
The previous chapter introduced simple Tkinter animation techniques (see the tour's canvasDraw variants). The PyDraw program listed here builds upon those ideas to implement a more feature-rich painting program in Python. It adds new trails and scribble drawing modes, object and background color fills, embedded photos, and more. In addition, it implements object movement and animation techniques -- drawn objects may be moved around the canvas by clicking and dragging, and any drawn object can be gradually moved across the screen to a target location clicked with the mouse.
9.6.1 Running PyDraw
PyDraw is essentially a Tkinter canvas with lots of keyboard and mouse event bindings to allow users to perform common drawing operations. This isn't a professional-grade paint program by any definition, but it's fun to play with. In fact, you really should -- it is impossible to capture things like object motion in the medium afforded by this book. Start PyDraw from the launcher bars (or run the file movingpics.pyfrom Example 9-18 directly). Press the ? key to view a help message giving available commands (or read the help string in the code listings).
Figure 9-17 shows PyDraw after a few objects have been drawn on the canvas. To move any object shown here, either click it with the middle mouse button and drag to move it with the mouse cursor, or middle-click the object and then right-click in the spot you want it to move towards. In the latter case, PyDraw performs an animated (gradual) movement of the object to the target spot. Try this on the picture of Python creator Guido van Rossum near the top to start the famous "Moving Guido Demo" (yes, he has a sense of humor, too).
Figure 9-17. PyDraw with draw objects ready to be moved
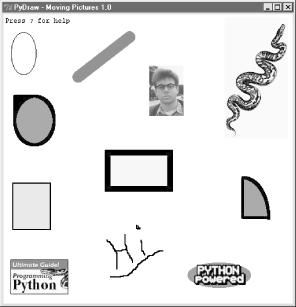
Press "p" to insert photos, and use left-button drags to draw shapes. Windows users -- middle-click is usually both mouse buttons at once, but you may need to configure this in your control panel. In addition to mouse events, there are 17 key-press commands for tailoring sketches that I won't cover here. It takes a while to get the hang of what all the keyboard and mouse commands do; but once you've mastered the bindings, you too can begin generating senseless electronic artwork like that in Figure 9-18.
Figure 9-18. PyDraw after substantial play
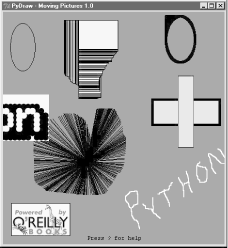
9.6.2 PyDraw Source Code
Like PyEdit, PyDraw lives in a single file. Two extensions that customize motion implementations are listed following the main module shown in Example 9-18.
Example 9-18. PP2E\Gui\MovingPics\movingpics.py
##############################################################################
# PyDraw: simple canvas paint program and object mover/animator
# uses time.sleep loops to implement object move loops, such that only
# one move can be in progress at once; this is smooth and fast, but see
# the widget.after and thread-based subclasses here for other techniques;
##############################################################################
helpstr = """--PyDraw version 1.0--
Mouse commands:
Left = Set target spot
Left+Move = Draw new object
Double Left = Clear all objectsRight = Move current object
Middle = Select closest object
Middle+Move = Drag current objectKeyboard commands:
w=Pick border width c=Pick color
u=Pick move unit s=Pick move delay
o=Draw ovals r=Draw rectangles
l=Draw lines a=Draw arcs
d=Delete object 1=Raise object
2=Lower object f=Fill object
b=Fill background p=Add photo
z=Save postscript x=Pick pen modes
?=Help other=clear text
"""
import time, sys
from Tkinter import *
from tkFileDialog import *
from tkMessageBox import *
PicDir = '../gifs'
if sys.platform[:3] == 'win':
HelpFont = ('courier', 9, 'normal')else:
HelpFont = ('courier', 12, 'normal')pickDelays = [0.01, 0.025, 0.05, 0.10, 0.25, 0.0, 0.001, 0.005]
pickUnits = [1, 2, 4, 6, 8, 10, 12]pickWidths = [1, 2, 5, 10, 20]
pickFills = [None,'white','blue','red','black','yellow','green','purple']pickPens = ['elastic', 'scribble', 'trails']class MovingPics:
def __init__(self, parent=None): canvas = Canvas(parent, width=500, height=500, bg= 'white') canvas.pack(expand=YES, fill=BOTH)canvas.bind('<ButtonPress-1>', self.onStart)
canvas.bind('<B1-Motion>', self.onGrow)
canvas.bind('<Double-1>', self.onClear)
canvas.bind('<ButtonPress-3>', self.onMove)
canvas.bind('<Button-2>', self.onSelect)
canvas.bind('<B2-Motion>', self.onDrag)
parent.bind('<KeyPress>', self.onOptions)
self.createMethod = Canvas.create_oval self.canvas = canvas self.moving = [] self.images = [] self.object = Noneself.where = None
self.scribbleMode = 0 parent.title('PyDraw - Moving Pictures 1.0') parent.protocol('WM_DELETE_WINDOW', self.onQuit) self.realquit = parent.quit self.textInfo = self.canvas.create_text( 5, 5, anchor=NW, font=HelpFont,
text='Press ? for help') def onStart(self, event):self.where = event
self.object = None def onGrow(self, event): canvas = event.widget if self.object and pickPens[0] == 'elastic': canvas.delete(self.object) self.object = self.createMethod(canvas, self.where.x, self.where.y, # start
event.x, event.y, # stop
fill=pickFills[0], width=pickWidths[0]) if pickPens[0] == 'scribble': self.where = event # from here next time
def onClear(self, event):if self.moving: return # ok if moving but confusing
event.widget.delete('all') # use all tag
self.images = [] self.textInfo = self.canvas.create_text( 5, 5, anchor=NW, font=HelpFont,text='Press ? for help')
def plotMoves(self, event):diffX = event.x - self.where.x # plan animated moves
diffY = event.y - self.where.y # horizontal then vertical
reptX = abs(diffX) / pickUnits[0] # incr per move, number moves
reptY = abs(diffY) / pickUnits[0] # from last to event click
incrX = pickUnits[0] * ((diffX > 0) or -1)
incrY = pickUnits[0] * ((diffY > 0) or -1)
return incrX, reptX, incrY, reptY def onMove(self, event):traceEvent('onMove', event, 0) # move current object to click
object = self.object # ignore some ops during mv
if object and object not in self.moving: msecs = int(pickDelays[0] * 1000)
parms = 'Delay=%d msec, Units=%d' % (msecs, pickUnits[0])
self.setTextInfo(parms) self.moving.append(object) canvas = event.widget incrX, reptX, incrY, reptY = self.plotMoves(event) for i in range(reptX): canvas.move(object, incrX, 0) canvas.update( )
time.sleep(pickDelays[0]) for i in range(reptY): canvas.move(object, 0, incrY)canvas.update( ) # update runs other ops
time.sleep(pickDelays[0]) # sleep until next move
self.moving.remove(object)if self.object == object: self.where = event
def onSelect(self, event):self.where = event
self.object = self.canvas.find_closest(event.x, event.y)[0] # tuple
def onDrag(self, event):diffX = event.x - self.where.x # ok if object in moving
diffY = event.y - self.where.y # throws it off course
self.canvas.move(self.object, diffX, diffY) self.where = event def onOptions(self, event): keymap = { 'w': lambda self: self.changeOption(pickWidths, 'Pen Width'),'c': lambda self: self.changeOption(pickFills, 'Color'),
'u': lambda self: self.changeOption(pickUnits, 'Move Unit'),
's': lambda self: self.changeOption(pickDelays, 'Move Delay'),'x': lambda self: self.changeOption(pickPens, 'Pen Mode'),
'o': lambda self: self.changeDraw(Canvas.create_oval, 'Oval'),
'r': lambda self: self.changeDraw(Canvas.create_rectangle, 'Rect'), 'l': lambda self: self.changeDraw(Canvas.create_line, 'Line'),
'a': lambda self: self.changeDraw(Canvas.create_arc, 'Arc'),
'd': MovingPics.deleteObject, '1': MovingPics.raiseObject,'2': MovingPics.lowerObject, # if only 1 call pattern
'f': MovingPics.fillObject, # use unbound method objects
'b': MovingPics.fillBackground, # else lambda passed self
'p': MovingPics.addPhotoItem, 'z': MovingPics.savePostscript, '?': MovingPics.help} try: keymap[event.char](self) except KeyError: self.setTextInfo('Press ? for help') def changeDraw(self, method, name):self.createMethod = method # unbound Canvas method
self.setTextInfo('Draw Object=' + name) def changeOption(self, list, name): list.append(list[0]) del list[0] self.setTextInfo('%s=%s' % (name, list[0]))def deleteObject(self):
if self.object != self.textInfo: # ok if object in moving
self.canvas.delete(self.object) # erases but move goes on
self.object = None def raiseObject(self):if self.object: # ok if moving
self.canvas.tkraise(self.object) # raises while moving
def lowerObject(self): if self.object: self.canvas.lower(self.object) def fillObject(self): if self.object:type = self.canvas.type(self.object)
if type == 'image': pass elif type == 'text': self.canvas.itemconfig(self.object, fill=pickFills[0]) else: self.canvas.itemconfig(self.object, fill=pickFills[0], width=pickWidths[0]) def fillBackground(self): self.canvas.config(bg=pickFills[0]) def addPhotoItem(self): if not self.where: return filetypes=[('Gif files', '.gif'), ('All files', '*')] file = askopenfilename(initialdir=PicDir, filetypes=filetypes) if file:image = PhotoImage(file=file) # load image
self.images.append(image) # keep reference
self.object = self.canvas.create_image( # add to canvas
self.where.x, self.where.y, # at last spot
image=image, anchor=NW)def savePostscript(self):
file = asksaveasfilename( )
if file:self.canvas.postscript(file=file) # save canvas to file
def help(self): self.setTextInfo(helpstr) #showinfo('PyDraw', helpstr) def setTextInfo(self, text): self.canvas.dchars(self.textInfo, 0, END) self.canvas.insert(self.textInfo, 0, text) self.canvas.tkraise(self.textInfo) def onQuit(self): if self.moving: self.setTextInfo("Can't quit while move in progress") else:self.realquit( ) # std wm delete: err msg if move in progress
def traceEvent(label, event, fullTrace=1):
print label if fullTrace: for key in dir(event): print key, '=>', getattr(event, key)if __name__ == '__main__':
from sys import argv # when this file is executed
if len(argv) == 2: PicDir = argv[1] # '..' fails if run elsewhere
root = Tk( ) # make, run a MovingPics object
MovingPics(root)root.mainloop( )
Just as in the last chapter's canvasDraw examples, we can add support for moving more than one object at the same time with either after scheduled-callback events, or threads. Example 9-19 shows a MovingPics subclass that codes the necessary customizations to do parallel moves with after events. Run this file directly to see the difference; I could try to capture the notion of multiple objects in motion with a screen shot, but would almost certainly fail.
Example 9-19. PP2E\Gui\MovingPics\movingpics_after.py
##############################################################################
# PyDraw-after: simple canvas paint program and object mover/animator
# use widget.after scheduled events to implement object move loops, such
# that more than one can be in motion at once without having to use threads;
# this does moves in parallel, but seems to be slower than time.sleep version;
# see also canvasDraw in Tour: builds and passes the incX/incY list at once:
# here, would be allmoves = ([(incrX, 0)] * reptX) + ([(0, incrY)] * reptY)
##############################################################################
from movingpics import *
class MovingPicsAfter(MovingPics):
def doMoves(self, delay, objectId, incrX, reptX, incrY, reptY): if reptX: self.canvas.move(objectId, incrX, 0) reptX = reptX - 1 else: self.canvas.move(objectId, 0, incrY) reptY = reptY - 1 if not (reptX or reptY): self.moving.remove(objectId) else: self.canvas.after(delay, self.doMoves, delay, objectId, incrX, reptX, incrY, reptY) def onMove(self, event): traceEvent('onMove', event, 0)object = self.object # move cur obj to click spot
if object:msecs = int(pickDelays[0] * 1000)
parms = 'Delay=%d msec, Units=%d' % (msecs, pickUnits[0])
self.setTextInfo(parms) self.moving.append(object) incrX, reptX, incrY, reptY = self.plotMoves(event) self.doMoves(msecs, object, incrX, reptX, incrY, reptY) self.where = eventif __name__ == '__main__':
from sys import argv # when this file is executed
if len(argv) == 2: import movingpics # not this module's global
movingpics.PicDir = argv[1] # and from* doesn't link names
root = Tk( )
MovingPicsAfter(root)root.mainloop( )
Now, while one or more moves are in progress, you can start another by middle-clicking on another object and right-clicking on the spot you want it to move to. It starts its journey immediately, even if other objects are in motion. Each object's scheduled after events are added to the same event loop queue and dispatched by Tkinter as soon as possible after a timer expiration. If you run this subclass module directly, you'll probably notice that movement isn't quite as fast or as smooth as in the original, but multiple moves can overlap in time.
Example 9-20 shows how to achieve such parallelism with threads. This process works, but as we learned in the last chapter, updating GUIs in spawned threads is generally a dangerous affair. On my machine, the movement that this script implements with threads is a bit more jerky than the original version -- a reflection of the overhead incurred for switching the interpreter (and CPU) between multiple threads.
Example 9-20. PP2E\Gui\MovingPics\movingpics_threads.py
###################################################################
# use threads to move objects; seems to work on Windows provided
# that canvas.update( ) not called by threads(else exits with fatal# errors, some objs start moving immediately after drawn, etc.);
# at least some canvas method calls must be thread safe in Tkinter;
# this is less smooth than time.sleep, and is dangerous in general:
# threads are best coded to update global vars, not change GUI;
###################################################################
import thread, time, sys, random
from Tkinter import Tk, mainloop
from movingpics import MovingPics, pickUnits, pickDelays
class MovingPicsThreaded(MovingPics):
def __init__(self, parent=None): MovingPics.__init__(self, parent)self.mutex = thread.allocate_lock( )
import sys #sys.setcheckinterval(0) # switch after each vm op- doesn't help def onMove(self, event): object = self.object if object and object not in self.moving: msecs = int(pickDelays[0] * 1000)
parms = 'Delay=%d msec, Units=%d' % (msecs, pickUnits[0])
self.setTextInfo(parms)#self.mutex.acquire( )
self.moving.append(object) #self.mutex.release( )
thread.start_new_thread(self.doMove, (object, event)) def doMove(self, object, event): canvas = event.widget incrX, reptX, incrY, reptY = self.plotMoves(event) for i in range(reptX): canvas.move(object, incrX, 0) # canvas.update( )
time.sleep(pickDelays[0]) # this can change
for i in range(reptY): canvas.move(object, 0, incrY)# canvas.update( ) # update runs other ops
time.sleep(pickDelays[0]) # sleep until next move
#self.mutex.acquire( )
self.moving.remove(object)if self.object == object: self.where = event
#self.mutex.release( )
if __name__ == '__main__':
root = Tk( )
MovingPicsThreaded(root)mainloop( )
9.7 PyClock: An Analog/Digital Clock Widget
One of the first things I always look for when exploring a new computer interface is a clock. Because I spend so much time glued to computers, it's essentially impossible for me to keep track of the time unless it is right there on the screen in front of me (and even then, it's iffy). The next program, PyClock, implements such a clock widget in Python. It's not substantially different than clock programs you may be used to seeing on the X Windows system. Because it is coded in Python, though, this one is both easily customized, and fully portable among Windows, the X Windows system, and Macs, like all the code in this chapter. In addition to advanced GUI techniques, this example demonstrates Python math and time module tools.
9.7.1 A Quick Geometry Lesson
Before I show you PyClock, though, a little background and a confession. Quick -- how do you plot points on a circle? This, along with time formats and events, turns out to be a core concept in clock widget programs. To draw an analog clock face on a canvas widget, you essentially need to be able to sketch a circle -- the clock face itself is composed of points on a circle, and the second, minute, and hour hands of the clock are really just lines from a circle's center out to a point on the circle. Digital clocks are simpler to draw, but not much to look at.
Now the confession: when I started writing PyClock, I couldn't answer the last paragraph's opening question. I had utterly forgotten the math needed to sketch out points on a circle (as had most of the professional software developers I queried about this magic formula). It happens. After going unused for a few decades, such knowledge tends to be garbage-collected. I finally was able to dust off a few neurons long enough to code the plotting math needed, but it wasn't my finest intellectual hour.
If you are in the same boat, I don't have space to teach geometry in depth here, but I can show you one way to code the point-plotting formulas in Python in simple terms. Before tackling the more complex task of implementing a clock, I wrote the plotterGui script shown in Example 9-21 to focus on just the circle-plotting logic.
Its point function is where the circle logic lives -- it plots the (X,Y) coordinates of a point on the circle, given the relative point number, the total number of points to be placed on the circle, and the circle's radius (the distance from the circle's center to the points drawn upon it). It first calculates the point's angle from the top by dividing 360 by the number of points to be plotted, and then multiplying by the point number; in case you've forgotten, too, it's 360 degrees around the whole circle (e.g., if you plot 4 points on a circle, each is 90 degrees from the last, or 360/4). Python's standard math module gives all the required constants and functions from that point forward -- pi, sine, and cosine. The math is really not too obscure if you study this long enough (in conjunction with your old geometry text if necessary). See the book's CD for alternative ways to code the number crunching.[3]
Even if you don't care about the math, though, check out this script's circle function. Given the (X,Y) coordinates of a point on the circle returned by point, it draws a line from the circle's center out to the point and a small rectangle around the point itself -- not unlike the hands and points of an analog clock. Canvas tags are used to associate drawn objects for deletion before each plot.
Example 9-21. PP2E\Gui\Clock\plotterGui.py
# plot circles (like I did in high school)
import math, sys
from Tkinter import *
def point(tick, range, radius):
angle = tick * (360.0 / range) radiansPerDegree = math.pi / 180 pointX = int( round( radius * math.sin(angle * radiansPerDegree) )) pointY = int( round( radius * math.cos(angle * radiansPerDegree) )) return (pointX, pointY)def circle(points, radius, centerX, centerY, slow=0):
canvas.delete('lines') canvas.delete('points') for i in range(points): x, y = point(i+1, points, radius-4) scaledX, scaledY = (x + centerX), (centerY - y) canvas.create_line(centerX, centerY, scaledX, scaledY, tag='lines') canvas.create_rectangle(scaledX-2, scaledY-2, scaledX+2, scaledY+2, fill='red', tag='points')
if slow: canvas.update( )
def plotter( ):circle(scaleVar.get(), (Width / 2), originX, originY, checkVar.get( ))
def makewidgets( ): global canvas, scaleVar, checkVar canvas = Canvas(width=Width, height=Width) canvas.pack(side=TOP)scaleVar = IntVar( )
checkVar = IntVar( )
scale = Scale(label='Points on circle', variable=scaleVar, from_=1, to=360) scale.pack(side=LEFT) Checkbutton(text='Slow mode', variable=checkVar).pack(side=LEFT) Button(text='Plot', command=plotter).pack(side=LEFT, padx=50)if __name__ == '__main__':
Width = 500 # default width, height
if len(sys.argv) == 2: Width = int(sys.argv[1]) # width cmdline arg?
originX = originY = Width / 2 # same as circle radius
makewidgets( ) # on default Tk root
mainloop( )
The circle defaults to 500 pixels wide unless you pass a width on the command line. Given a number of points on a circle, this script marks out the circle in clockwise order every time you press Plot, by drawing lines out from the center to small rectangles at points on the circle's shape. Move the slider to plot a different number of points, and click the checkbutton to make the drawing happen slow enough to notice the clockwise order in which lines and points are drawn (this forces the script to update the display after each line is drawn). Figure 9-19 shows the result for plotting 120 points with the circle width set to 400 on the command line; if you ask for 60 and 12 points on the circle, the relationship to clock faces and hands starts becoming more clear.
Figure 9-19. plotterGui in action
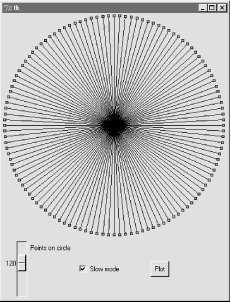
For more help, the book CD also includes text-based versions of this plotting script that print circle point coordinates to the stdout stream for review, rather than rendering them in a GUI. See the plotterText scripts in the clock's directory. Here is the sort of output they produce when plotting 4 and 12 points on a circle that is 400 points wide and high; the output format is simply:
pointnumber : angle = (Xcoordinate, Ycoordinate)
and assumes that the circle is centered at coordinate (0,0):
----------
1 : 90.0 = (200, 0)
2 : 180.0 = (0, -200)
3 : 270.0 = (-200, 0)
4 : 360.0 = (0, 200)
----------
1 : 30.0 = (100, 173)
2 : 60.0 = (173, 100)
3 : 90.0 = (200, 0)
4 : 120.0 = (173, -100)
5 : 150.0 = (100, -173)
6 : 180.0 = (0, -200)
7 : 210.0 = (-100, -173)
8 : 240.0 = (-173, -100)
9 : 270.0 = (-200, 0)
10 : 300.0 = (-173, 100)
11 : 330.0 = (-100, 173)
12 : 360.0 = (0, 200)
----------
To understand how these points are mapped to a canvas, you first need to know that the width and height of a circle are always the same -- the radius x 2. Because Tkinter canvas (X,Y) coordinates start at (0,0) in the upper left corner, the plotter GUI must offset the circle's center point to coordinates (width/2, width/2) -- the origin point from which lines are drawn. For instance, in a 400-by-400 circle, the canvas center is (200,200). A line to the 90-degree angle point on the right side of the circle runs from (200,200) to (400,200) -- the result of adding the (200,0) point coordinates plotted for the radius and angle. A line to the bottom at 180 degrees runs from (200,200) to (200,400) after factoring in the (0,-200) point plotted.
This point-plotting algorithm used by plotterGui, along with a few scaling constants, is at the heart of the PyClock analog display. If this still seems a bit much, I suggest you focus on the PyClock script's digital display implementation first; the analog geometry plots are really just extensions of underlying timing mechanisms used for both display modes. In fact, the clock itself is structured as a generic Frame object that embeds digital and analog display objects, and dispatches time change and resize events to both the same way. The analog display is an attached Canvas that knows how to draw circles, but the digital object is simply an attached Frame with labels to show time components.
9.7.2 Running PyClock
Apart from the circle geometry bit, the rest of PyClock is straightforward. It simply draws a clock face to represent the current time and uses widget after methods to wake itself up 10 times per second to check if the system time has rolled over to the next second. On second rollovers, the analog second, minute, and hour hands are redrawn to reflect the new time (or the text of the digital display's labels is changed). In terms of GUI construction, the analog display is etched out on a canvas, is redrawn whenever the window is resized, and changes to a digital format upon request.
PyClock also puts Python's standard time module into service to fetch and convert system time information as needed for a clock. In brief, the onTimer method gets system time with time.time, a built-in tool that returns a floating-point number giving seconds since the "epoch" -- the point from which your computer counts time. The time.localtime call is then used to convert epoch time into a tuple that contains hour, minute, and second values; see the script and Python library manual for additional time-related call details.
Checking the system time 10 times per second may seem intense, but it guarantees that the second hand ticks when it should without jerks or skips (after events aren't precisely timed), and is not a significant CPU drain on systems I use.[4] On Linux and Windows, PyClock uses negligible processor resources, and what it does use is spent largely on screen updates in analog display mode, not after events. To minimize screen updates, PyClock redraws only clock hands on second rollovers; points on the clock's circle are redrawn at startup and on window resizes only. Figure 9-20 shows the default initial PyClock display format you get when file clock.py is run directly.
Figure 9-20. PyClock default analog display
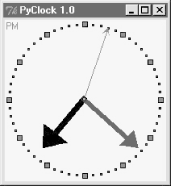
The clock hand lines are given arrows at their endpoints with the canvas line object's arrow and arrowshape options. The arrow option can be "first", "last", "none", or "both"; the arrowshape option takes a tuple giving the length of the arrow touching the line, its overall length, and its width.
Like PyView, PyClock also uses the widget pack_forget and pack methods to dynamically erase and redraw portions of the display on demand (i.e., in response to bound events). Clicking on the clock with a left mouse button changes its display to digital by erasing the analog widgets and drawing the digital interface; you get the simpler display captured in Figure 9-21.
Figure 9-21. PyClock goes digital
![]()
This digital display form is useful if you want to conserve real estate on your computer screen and minimize PyClock CPU utilization (it incurs very little screen update overhead). Left-clicking on the clock again changes back to the analog display. The analog and digital displays are both constructed when the script starts, but only one is ever packed at any given time.
A right mouseclick on the clock in either display mode shows or hides an attached label that gives the current date in simple text form. Figure 9-22 shows a PyClock running with a digital display, a clicked-on date label, and a centered photo image object.
Figure 9-22. PyClock extended display with an image
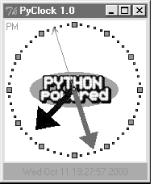
The image in the middle of Figure 9-22 is added by passing in a configuration object with appropriate settings to the PyClock object constructor. In fact, almost everything about this display can be customized with attributes in PyClock configuration objects -- hand colors, clock tick colors, center photos, and initial size.
Because PyClock's analog display is based upon a manually sketched figure on a canvas, it has to process window resize events itself: whenever the window shrinks or expands, the clock face has to be redrawn and scaled for the new window size. To catch screen resizes, the script registers for the <Configure> event with bind; surprisingly, this isn't a top-level window manager event like the close button. As you expand a PyClock, the clock face gets bigger with the window -- try expanding, shrinking, and maximizing the clock window on your computer. Because the clock face is plotted in a square coordinate system, PyClock always expands in equal horizontal and vertical proportions, though; if you simply make the window only wider or taller, the clock is unchanged.
Finally, like PyEdit, PyClock can be run either standalone or attached to and embedded in other GUIs that need to display the current time. To make it easy to start preconfigured clocks, a utility module called clockStyles provides a set of clock configuration objects you can import, subclass to extend, and pass to the clock constructor; Figure 9-23 shows a few of the preconfigured clock styles and sizes in action, ticking away in sync.
Figure 9-23. A few canned clock styles (Guido's photo reprinted with permission from Dr. Dobb's Journal)
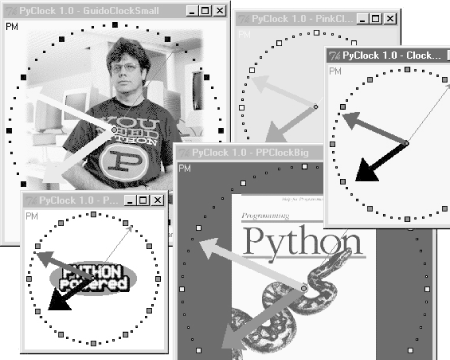
Each of these clocks uses after events to check for system-time rollover 10 times per second. When run as top-level windows in the same process, all receive a timer event from the same event loop. When started as independent programs, each has an event loop of its own. Either way, their second hands sweep in unison each second.
9.7.3 PyClock Source Code
PyClock source code all lives in one file, except for the precoded configuration style objects. If you study the code at the bottom of the file shown in Example 9-22, you'll notice that you can either make a clock object with a configuration object passed in, or specify configuration options by command line arguments (in which case, the script simply builds a configuration object for you). More generally, you can run this file directly to start a clock, import and make its objects with configuration objects to get a more custom display, or import and attach its objects to other GUIs. For instance, PyGadgets runs this file with command line options to tailor the display.
Example 9-22. PP2E\Gui\Clock\clock.py
###############################################################################
# PyClock: a clock GUI, with both analog and digital display modes, a
# popup date label, clock face images, resizing, etc. May be run both # stand-alone, or embbeded (attached) in other GUIs that need a clock.
###############################################################################
from Tkinter import *
import math, time, string
###############################################################################
# Option configuration classes
###############################################################################
class ClockConfig: # defaults--override in instance or subclasssize = 200 # width=height
bg, fg = 'beige', 'brown' # face, tick colors
hh, mh, sh, cog = 'black', 'navy', 'blue', 'red' # clock hands, center
picture = None # face photo file
class PhotoClockConfig(ClockConfig): # sample configurationsize = 320
picture = '../gifs/ora-pp.gif' bg, hh, mh = 'white', 'blue', 'orange'###############################################################################
# Digital display object
###############################################################################
class DigitalDisplay(Frame):
def __init__(self, parent, cfg): Frame.__init__(self, parent) self.hour = Label(self) self.mins = Label(self) self.secs = Label(self) self.ampm = Label(self) for label in self.hour, self.mins, self.secs, self.ampm: label.config(bd=4, relief=SUNKEN, bg=cfg.bg, fg=cfg.fg) label.pack(side=LEFT) def onUpdate(self, hour, mins, secs, ampm, cfg): mins = string.zfill(str(mins), 2)self.hour.config(text=str(hour), width=4)
self.mins.config(text=str(mins), width=4)
self.secs.config(text=str(secs), width=4)
self.ampm.config(text=str(ampm), width=4)
def onResize(self, newWidth, newHeight, cfg): pass # nothing to redraw here
###############################################################################
# Analog display object
###############################################################################
class AnalogDisplay(Canvas):
def __init__(self, parent, cfg): Canvas.__init__(self, parent, width=cfg.size, height=cfg.size, bg=cfg.bg) self.drawClockface(cfg) self.hourHand = self.minsHand = self.secsHand = self.cog = None def drawClockface(self, cfg): # on start and resize
if cfg.picture: # draw ovals, picture
try:
self.image = PhotoImage(file=cfg.picture) # bkground
except:self.image = BitmapImage(file=cfg.picture) # save ref
imgx = (cfg.size - self.image.width( )) / 2 # center it
imgy = (cfg.size - self.image.height( )) / 2
self.create_image(imgx+1, imgy+1, anchor=NW, image=self.image)
originX = originY = radius = cfg.size/2
for i in range(60): x, y = self.point(i, 60, radius-6, originX, originY)self.create_rectangle(x-1, y-1, x+1, y+1, fill=cfg.fg) # mins
for i in range(12): x, y = self.point(i, 12, radius-6, originX, originY)self.create_rectangle(x-3, y-3, x+3, y+3, fill=cfg.fg) # hours
self.ampm = self.create_text(3, 3, anchor=NW, fill=cfg.fg) def point(self, tick, units, radius, originX, originY): angle = tick * (360.0 / units) radiansPerDegree = math.pi / 180pointX = int( round( radius * math.sin(angle * radiansPerDegree) ))
pointY = int( round( radius * math.cos(angle * radiansPerDegree) )) return (pointX + originX+1), (originY+1 - pointY)def onUpdate(self, hour, mins, secs, ampm, cfg): # on timer callback
if self.cog: # redraw hands, cog
self.delete(self.cog) self.delete(self.hourHand) self.delete(self.minsHand) self.delete(self.secsHand) originX = originY = radius = cfg.size/2 hour = hour + (mins / 60.0) hx, hy = self.point(hour, 12, (radius * .80), originX, originY) mx, my = self.point(mins, 60, (radius * .90), originX, originY) sx, sy = self.point(secs, 60, (radius * .95), originX, originY) self.hourHand = self.create_line(originX, originY, hx, hy, width=(cfg.size * .04), arrow='last', arrowshape=(25,25,15), fill=cfg.hh)self.minsHand = self.create_line(originX, originY, mx, my,
width=(cfg.size * .03), arrow='last', arrowshape=(20,20,10), fill=cfg.mh) self.secsHand = self.create_line(originX, originY, sx, sy, width=1, arrow='last', arrowshape=(5,10,5), fill=cfg.sh) cogsz = cfg.size * .01 self.cog = self.create_oval(originX-cogsz, originY+cogsz, originX+cogsz, originY-cogsz, fill=cfg.cog) self.dchars(self.ampm, 0, END) self.insert(self.ampm, END, ampm) def onResize(self, newWidth, newHeight, cfg): newSize = min(newWidth, newHeight) #print 'analog onResize', cfg.size+4, newSize if newSize != cfg.size+4: cfg.size = newSize-4 self.delete('all')self.drawClockface(cfg) # onUpdate called next
###############################################################################
# Clock composite object
###############################################################################
ChecksPerSec = 10 # second change timerclass Clock(Frame):
def __init__(self, config=ClockConfig, parent=None): Frame.__init__(self, parent) self.cfg = configself.makeWidgets(parent) # children are packed but
self.labelOn = 0 # clients pack or grid me
self.display = self.digitalDisplay self.lastSec = -1 self.onSwitchMode(None)self.onTimer( )
def makeWidgets(self, parent): self.digitalDisplay = DigitalDisplay(self, self.cfg)self.analogDisplay = AnalogDisplay(self, self.cfg)
self.dateLabel = Label(self, bd=3, bg='red', fg='blue')
parent.bind('<ButtonPress-1>', self.onSwitchMode) parent.bind('<ButtonPress-3>', self.onToggleLabel)parent.bind('<Configure>', self.onResize)
def onSwitchMode(self, event):self.display.pack_forget( )
if self.display == self.analogDisplay: self.display = self.digitalDisplay else: self.display = self.analogDisplay self.display.pack(side=TOP, expand=YES, fill=BOTH) def onToggleLabel(self, event): self.labelOn = self.labelOn + 1 if self.labelOn % 2: self.dateLabel.pack(side=BOTTOM, fill=X) else:self.dateLabel.pack_forget( )
self.update( )
def onResize(self, event): if event.widget == self.display: self.display.onResize(event.width, event.height, self.cfg) def onTimer(self):secsSinceEpoch = time.time( )
timeTuple = time.localtime(secsSinceEpoch)
hour, min, sec = timeTuple[3:6] if sec != self.lastSec: self.lastSec = secampm = ((hour >= 12) and 'PM') or 'AM' # 0...23
hour = (hour % 12) or 12 # 12..11
self.display.onUpdate(hour, min, sec, ampm, self.cfg) self.dateLabel.config(text=time.ctime(secsSinceEpoch))self.after(1000 / ChecksPerSec, self.onTimer) # run N times per second
###############################################################################
# Stand-alone clocks
###############################################################################
class ClockWindow(Clock):
def __init__(self, config=ClockConfig, parent=None, name=''): Clock.__init__(self, config, parent) self.pack(expand=YES, fill=BOTH) title = 'PyClock 1.0' if name: title = title + ' - ' + nameself.master.title(title) # master=parent or default
self.master.protocol('WM_DELETE_WINDOW', self.quit) ###############################################################################
# Program run
###############################################################################
if __name__ == '__main__':
def getOptions(config, argv):for attr in dir(ClockConfig): # fill default config obj,
try: # from "-attr val" cmd args
ix = argv.index('-' + attr) except: continue else: if ix in range(1, len(argv)-1): if type(getattr(ClockConfig, attr)) == type(0): setattr(config, attr, int(argv[ix+1])) else:setattr(config, attr, argv[ix+1])
import sysconfig = ClockConfig( )
#config = PhotoClockConfig( )
if len(sys.argv) >= 2:getOptions(config, sys.argv) # clock.py -size n -bg 'blue'...
myclock = ClockWindow(config, Tk( )) # parent is Tk root if standalone
myclock.mainloop( )
And finally, Example 9-23 shows the module that is actually run from the PyDemos launcher script -- it predefines a handful of clock styles, and runs six of them at once attached to new top-level windows for demo effect (though one clock per screen is usually enough in practice, even for me).[5]
Example 9-23. PP2E\Gui\Clock\clockStyles.py
from clock import *
from Tkinter import mainloop
gifdir = '../gifs/'
if __name__ == '__main__':
from sys import argv if len(argv) > 1: gifdir = argv[1] + '/'class PPClockBig(PhotoClockConfig):
picture, bg, fg = gifdir + 'ora-pp.gif', 'navy', 'green'class PPClockSmall(ClockConfig):
size = 175
picture = gifdir + 'ora-pp.gif' bg, fg, hh, mh = 'white', 'red', 'blue', 'orange'class GilliganClock(ClockConfig):
size = 550
picture = gifdir + 'gilligan.gif' bg, fg, hh, mh = 'black', 'white', 'green', 'yellow'class GuidoClock(GilliganClock):
size = 400 picture = gifdir + 'guido_ddj.gif' bg = 'navy'class GuidoClockSmall(GuidoClock):
size, fg = 278, 'black'class OusterhoutClock(ClockConfig):
size, picture = 200, gifdir + 'ousterhout-new.gif'bg, fg, hh = 'black', 'gold', 'brown'
class GreyClock(ClockConfig):
bg, fg, hh, mh, sh = 'grey', 'black', 'black', 'black', 'white'class PinkClock(ClockConfig):
bg, fg, hh, mh, sh = 'pink', 'yellow', 'purple', 'orange', 'yellow'class PythonPoweredClock(ClockConfig):
bg, size, picture = 'white', 175, gifdir + 'pythonPowered.gif'if __name__ == '__main__':
for configClass in [ ClockConfig, PPClockBig, #PPClockSmall, GuidoClockSmall, #GilliganClock, OusterhoutClock, #GreyClock, PinkClock, PythonPoweredClock ]:ClockWindow(configClass, Toplevel( ), configClass.__name__)
Button(text='Quit Clocks', command='exit').pack( )
mainloop( )
9.8 PyToe: A Tic-Tac-Toe Game Widget
Finally, a bit of fun to close out this chapter. Our last example, PyToe, implements an artificially intelligent tic-tac-toe (sometimes called "naughts and crosses") game-playing program in Python. Most readers are probably familiar with this simple game, so I won't dwell on its details. In short, players take turns marking board positions, in an attempt to occupy an entire row, column, or diagonal. The first player to fill such a pattern wins.
In PyToe, board positions are marked with mouseclicks, and one of the players is a Python program. The gameboard itself is displayed with a simple Tkinter GUI; by default, PyToe builds a 3-by-3 game board (the standard tic-tac-toe setup), but can be configured to build and play an arbitrary N-by-N game.
When it comes time for the computer to select a move, artificial intelligence (AI) algorithms are used to score potential moves and search a tree of candidate moves and countermoves. This is a fairly simple problem as gaming programs go, and the heuristics used to pick moves are not perfect. Still, PyToe is usually smart enough to spot wins a few moves in advance of the user.
9.8.1 Running PyToe
PyToe's GUI is implemented as a frame of packed labels, with mouse-click bindings on the labels to catch user moves. The label's text is configured with the player's mark after each move, computer or user. The GuiMaker class we coded earlier in this chapter is also reused here to add a simple menu bar at the top (but no toolbar is drawn at the button, because PyToe leaves its descriptor empty). By default, the user's mark is "X", and PyToe's is "O". Figure 9-24 shows PyToe on the verge of beating me one of two ways.
Figure 9-24. PyToe thinks its way to a win
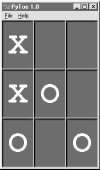
Figure 9-25 shows PyToe's help pop-up dialog, which lists its command-line configuration options. You can specify colors and font sizes for board labels, the player who moves first, the mark of the user ("X" or "O"), the board size (to override the 3-by-3 default), and the move selection strategy for the computer (e.g., "Minimax" performs a move tree search to spot wins and losses, and "Expert1" and "Expert2" use static scoring heuristics functions).
Figure 9-25. PyToe help pop-up with options info
The AI gaming techniques used in PyToe are CPU-intensive, and some computer move selection schemes take longer than others, but their speed varies mostly with the speed of your computer. Move selection delays are fractions of a second long on my 650 MHz machine for a 3-by-3 game board, for all "-mode" move-selection strategy options.
Figure 9-26 shows an alternative PyToe configuration just after it beat me. Despite the scenes captured for this book, under some move selection options, I do still win once in awhile. In larger boards and more complex games, PyToe's move selection algorithms become even more useful.
Figure 9-26. an alternative layout
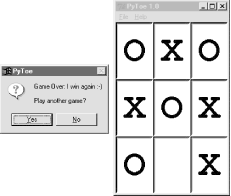
9.8.2 PyToe Source Code (on CD)
PyToe is a big system that assumes some AI background knowledge and doesn't really demonstrate anything new in terms of GUIs. Partly because of that, but mostly because I've already exceeded my page limit for this chapter, I'm going to refer you to the book's CD (view CD-ROM content online at http://examples.oreilly.com/python2) for its source code rather than listing it all here. Please see these two files in the examples distribution for PyToe implementation details:
· PP2E\Ai\TicTacToe\tictactoe.py, a top-level wrapper script
· PP2E\Ai\TicTacToe\tictactoe_lists.py, the meat of the implementation
If you do look, though, probably the best hint I can give you is that the data structure used to represent board state is the crux of the matter. That is, if you understand the way that boards are modeled, the rest of the code comes naturally.
For instance, the lists-based variant uses a list-of-lists to representation the board's state, along with a simple dictionary of entry widgets for the GUI indexed by board coordinates. Clearing the board after a game is simply a matter of clearing the underlying data structures, as shown in this code excerpt from the examples named above:
def clearBoard(self):
for row, col in self.label.keys(): self.board[row][col] = Empty self.label[(row, col)].config(text=' ')
Similarly, picking a move, at least in random mode, is simply a matter of picking a nonempty slot in the board array and storing the machine's mark there and in the GUI (degree is the board's size):
def machineMove(self):
row, col = self.pickMove() self.board[row][col] = self.machineMark self.label[(row, col)].config(text=self.machineMark)def pickMove(self):
empties = [] for row in self.degree: for col in self.degree: if self.board[row][col] == Empty: empties.append((row, col)) return random.choice(empties)
Finally, checking for an end-of-game state boils down to inspecting rows, columns, and diagonals in the two-dimensional list-of-lists board in this scheme:
def checkDraw(self, board=None):
board = board or self.board for row in board: if Empty in row: return 0 return 1 # none empty: draw or windef checkWin(self, mark, board=None):
board = board or self.board for row in board:if row.count(mark) == self.degree: # check across
return 1 for col in range(self.degree):for row in board: # check down
if row[col] != mark: break else: return 1for row in range(self.degree): # check diag1
col = row # row == col
if board[row][col] != mark: break else: return 1for row in range(self.degree): # check diag2
col = (self.degree-1) - row # row+col = degree-1
if board[row][col] != mark: break else: return 1def checkFinish(self):
if self.checkWin(self.userMark): outcome = "You've won!" elif self.checkWin(self.machineMark): outcome = 'I win again :-)' elif self.checkDraw(): outcome = 'Looks like a draw'
Other move-selection code mostly just performs other kinds of analysis on the board data structure or generates new board states to search a tree of moves and countermoves.
You'll also find relatives of these files in the same directory that implement alternative search and move-scoring schemes, different board representations, and so on. For additional background on game scoring and searches in general, consult an AI text. It's fun stuff, but too advanced to cover well in this book.
9.9 Where to Go from Here
This concludes the GUI section of this book, but is not an end to its GUI coverage. If you want to learn more about GUIs, be sure to see the Tkinter examples that appear later in this book and are described at the start of this chapter. PyMail, PyCalc, PyForm, and PyTree all provide additional GUI case studies. In the next section of this book, we'll also learn how to build user interfaces that run in web browsers -- a very different concept, but another option for simple interface design.
Keep in mind, too, that even if you don't see a GUI example in this book that looks very close to one you need to program, you've already met all the building blocks. Constructing larger GUIs for your application is really just a matter of laying out hierarchical composites of the widgets presented in this part of the text.
For instance, a complex display might be composed as a collection of radiobuttons, listboxes, scales, text fields, menus, and so on -- all arranged in frames or grids to achieve the desired appearance. Pop-up top-level windows, as well as independently run GUI programs linked with IPC mechanisms like pipes, signals, and sockets, can further supplement a complex graphical interface.
Moreover, you can implement larger GUI components as Python classes and attach or extend them anywhere you need a similar interface device (see PyEdit for a prime example). With a little creativity, Tkinter's widget set and Python support a virtually unlimited number of layouts.
Beyond this book, see the documentation and books departments at Python's web site, http://www.python.org. I would plug Tkinter-related texts here, but I suspect that the offerings in this department will expand during the shelf-life of this book. Finally, if you catch the Tkinter bug, I want to again recommend downloading and experimenting with packages introduced in Chapter 6 -- especially PMW and PIL. Both add additional tools to the Tkinter arsenal that can make your GUIs more sophisticated with minimal coding.
[1] All of the larger examples in this book have a
"Py" at the start of their names. This is by convention in the Python
world. If you shop around at http://www.python.org,
you'll find other free software that follows this pattern too: PyApache (a
Python interface to the Apache web server), PySol (a Python/Tkinter solitaire
game system), and many more. I'm not sure who started this pattern, but it has
turned out to be a more or less subtle way to advertise programming language
preferences to the rest of the open source world. Pythonistas are nothing if
not subtle. [back]
[2] These two scripts are something of a unique case;
because the App superclass they employ saves away standard streams in
its own attributes at object creation time, you must kick off the GUI
redirection wrapper calls as soon as possible so that App finds the redirected GUI streams in sys when saving them locally. Most other scripts aren't
quite as tricky when it comes to internal stream redirections. [back]
[3] And if you do enough number crunching to have followed
this paragraph, you will probably also be interested in exploring the NumPy
numeric programming extension for Python. It adds things like vector objects
and advanced mathematical operations, and effectively turns Python into a
scientific programming tool. It's been used effectively by many organizations,
including Lawrence Livermore National Labs. NumPy must be fetched and installed
separately; see Python's web site for links. Python also has a built-in complex
number type for engineering work; see the library manual for details. [back]
[4] Speaking of performance, I've run multiple clocks on
all test machines -- from a 650 MHz Pentium III to an "old" 200 MHz
Pentium I -- without seeing any degraded performance in any running clocks. The
PyDemos script, for instance, launches six clocks running in the same process,
and all update smoothly. They probably do on older machines, too, but mine have
collected too much dust to yield useful metrics. [back]
[5] Note that images named in this script may be missing on
your CD due to copyright concerns. Insert lawyer joke here. [back]