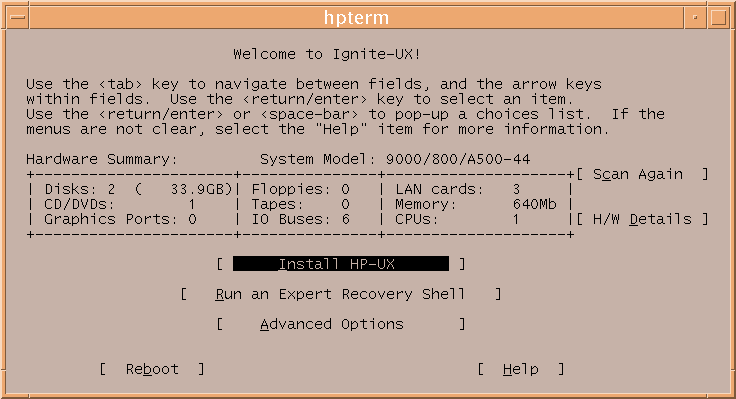
Once
you have successfully booted the client system
from the Ignite-UX server using one of the
previously discussed methods, the following screen will appear on
the client console.
Select Install HP-UX. (Move
between menu buttons with the Tab key, and select
by pressing Enter.)
 |
| |
|
 | TIP: As an alternative to using the Tab key to navigate,
simply type the shortcut key (the underlined letter) of the item you
wish to select. For instance, press B to reboot. |
|
| |
|
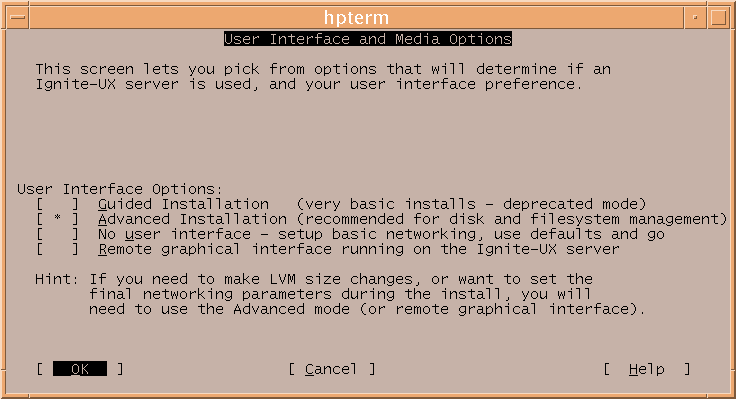
Leave the selection for User Interface Options at the default: Advanced Installation.
|
| |
|
| TIP: Similar to the previous screen, you can use shortcut keys (indicated
with an underline) to make a selection. |
|
| |
|
Selecting Cancel will return
you to the Welcome to Ignite-UX! screen.
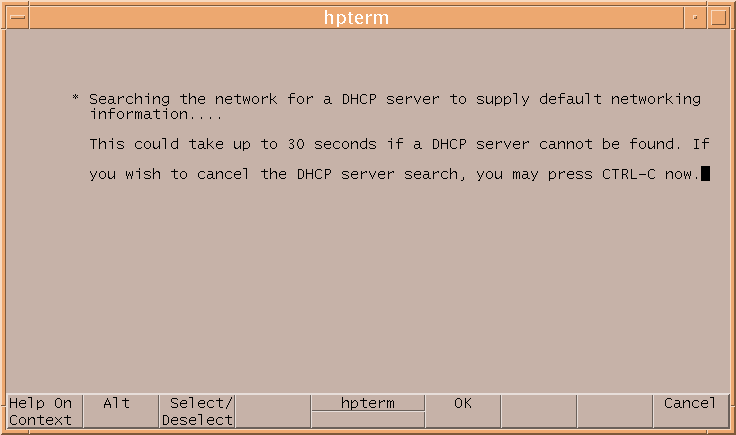
For a network boot, Ignite-UX will then
look for networking information.
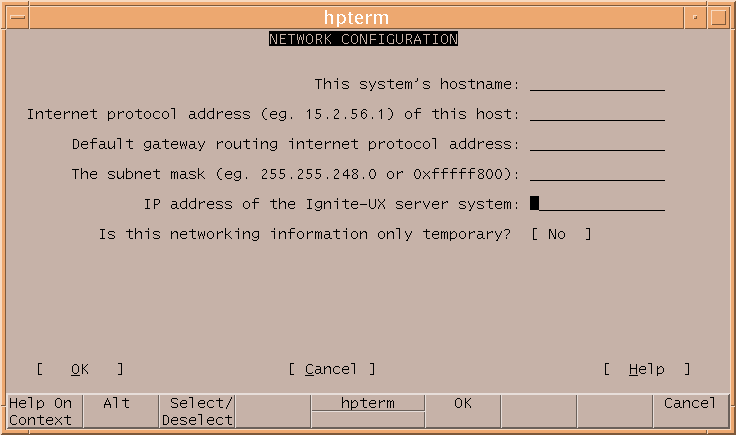
If no DHCP server is found, the following
NETWORK CONFIGURATION screen is displayed.
If a DHCP server is found, the NETWORK CONFIGURATION screen
will contain the client's hostname and IP address. If there is
networking configuration information on the server, the parameters
regarding contacting the server will be filled-in as well.
Set the NETWORK CONFIGURATION parameters so the client system can contact the Ignite-UX server.
When the parameters are set, select OK.
The server will then be contacted for its installation
configuration information for the client. (A dialog box will be displayed
on the server with information that this client was found.) The client
configuration information is then displayed in the terminal user interface
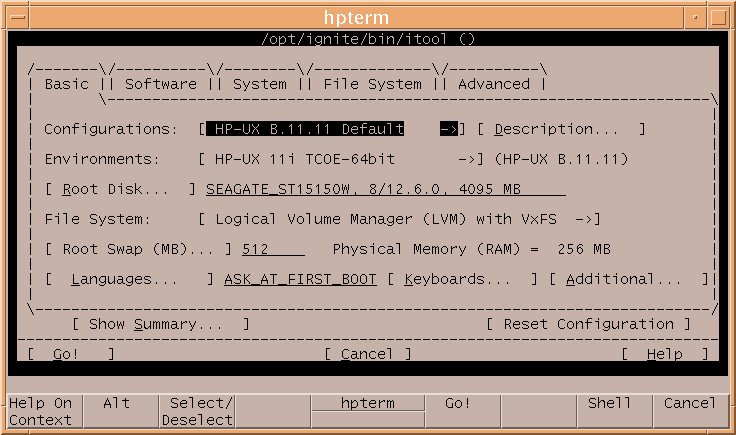
(TUI) version of the client installation configuration interface (itool).
|
| |
|
 | NOTE: The NETWORK CONFIGURATION screen has input fields. Typing a
shortcut key, such as O for OK, while the cursor is positioned at an input field will
result in an O being entered in the field instead
of selecting the OK button. |
|
| |
|
The TUI itool has the same functionality
as the GUI itool that runs on the Ignite-UX server.
Navigate the TUI using the Tab to move around and
by pressing Enter to make selections. See “The Client Installation Configuration Interface” for detailed information
on using the client installation interface to configure a client's
installation.
|
| |
|
| TIP: Shortcut keys also work in the itool TUI,
but similar to the NETWORK CONFIGURATION screen, you cannot use them
when positioned at an input field. Using shortcuts can significantly
reduce the time required to navigate the TUI itool. |
|
| |
|
When the installation has been configured, select Go! to start the installation.