The Ignite-UX GUI workspace provides access to
all management tasks using the menu bar and context-sensitive menus.
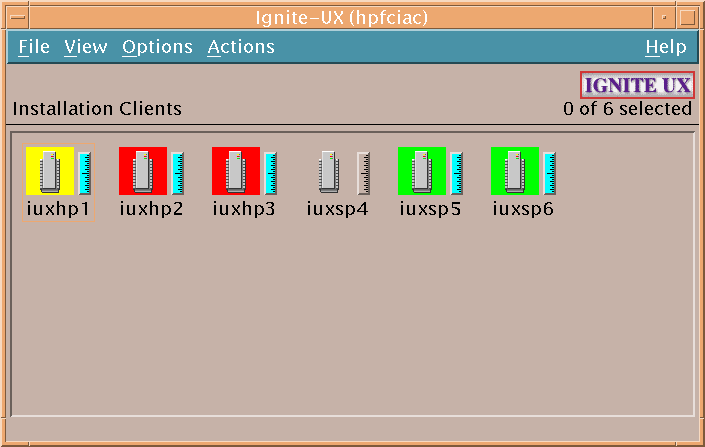
The Ignite-UX GUI workspace graphically represents clients as icons labeled with the clients’ hostnames.
You can:
Click a client icon to
select it for further actions.
Double-click the client
icon to display the Client Status dialog box.
Right-click to activate
the Actions menu. You must select the client before right-clicking;
any selections made from the Actions menu apply to the selected client.
For more information about these actions, see Chapter 10: “Booting and Installing HP-UX on Clients Using the Server”, or click Help.
Each client’s installation status is indicated by the colored border around its icon, and the
installation gauge shows the relative progress:
Green: The operating system is completely
installed, booted, and running with no errors or warnings.
Yellow: A warning condition exists and should
be investigated.
Red: An error condition is present. The operating
system is partially installed, or the installation has stopped.
No color: Installation has not yet started
or the client has been stopped.
Client icons are shown for all booted clients
and those that can be used as recovery systems. These systems are
known to Ignite-UX by their existence in the /var/opt/ignite/clients file.
File Menu
The File menu
contains basic Ignite-UX functionality:
Search - Find clients that match a text string.
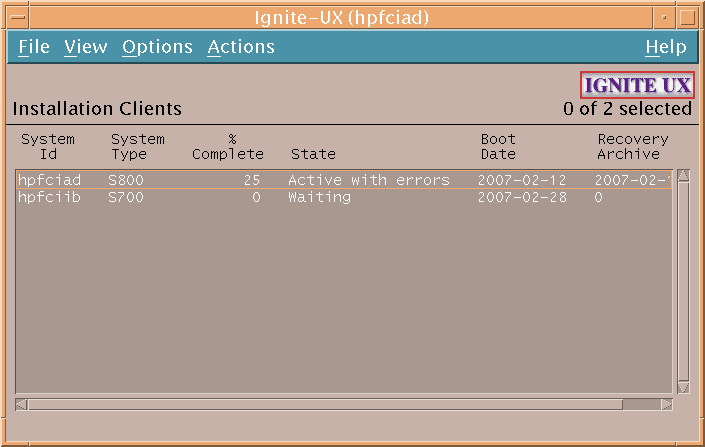
Print - To print a listing of systems, the display must
be set with View->By Properties
View Menu
Use the View menu
to customize the Ignite-UX GUI display:
Columns - Choose which client attributes to display in
which column. These selections are apparent only when the object list
is displayed by properties.
Filter - View a subset of clients by selected criteria.
Sort - Orders the displayed clients by sort criteria.
By Name and Icon - Displays clients graphically.
Save View as Default - Saves the current Ignite-UX GUI View settings.
Options Menu
Use the Options menu to set server configuration variables and to control the refresh
rate of the Ignite-UX display.
Server Configuration - Identify and set up your installation
server. The selections here are covered in detail in “More Server Setup Options”.
Change Refresh Interval - Select how frequently you want
the client display updated.
Refresh List - Update the client display immediately.
Actions Menu
To view available actions for a client, select
its icon, then select the Actions menu. The actions displayed are dependent on the status of the client,
so all actions may not be available. You can use the following actions
to manage clients:
View Install History... - Lists details of all successfully
installed clients.
Boot Client... - Boots the selected
client. If no client is selected, one will be prompted for.
Add New Client for Recovery... - Selects a client to be
recovered. For more information, see “Adding Clients for Recovery ”.
Run Tutorial/Server Setup... - Displays the Welcome dialog box. From there, you can run the Tutorial and Demo, or click Server Setup... to launch the Server Setup Wizard.
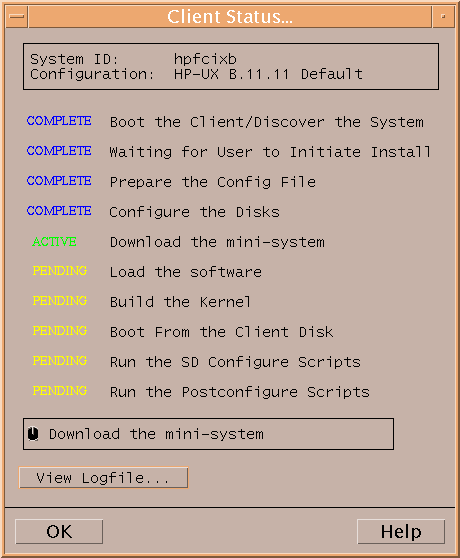
Client Status... - The status of the selected client is
polled and displayed, as in Figure 1-4.
Install Client - Starts the HP-UX installation process
for the selected client. This process is explained in Chapter 10: “Booting and Installing HP-UX on Clients Using the Server”.
Stop Install... - Stops the installation process on the
selected client. After stopping an install, you can reboot or halt
the client.
Create Network Recovery Archive - Creates a network recovery image using the make_net_recovery command. See Chapter 15: “Recovery Methods” for more information.
Create Tape Recovery Archive - Creates
a recovery image using the make_tape_recovery command.
See Chapter 15: “Recovery Methods” for more information.
Move to History... - Saves critical files for
the client, adds them to the history file, and removes the client.
The client installation must successfully complete for the configuration
to be moved to the history file.
Remove Client... - Deletes the selected client configuration.
All client data, except for the recovery image, is removed. Recovery information in the client’s directories
will be removed.
View Hardware... - Lists the hardware associated with
the selected client.
View/Print Manifest... - Allows you to view and print
the manifest for the selected client. The manifest
file details the client’s installation and is available on
the client and Ignite-UX server after the installation. For more information,
see “Viewing and Printing a Manifest ”.
Change Icon Name... - Launches a dialog box for renaming
the selected icon.