SD-UX adds extra components to the GUI programs
when remote operations are enabled. The extra components for remote
operations include a target selection window and features for managing
target lists, job preferences, and job monitoring windows. Otherwise,
the GUI programs are identical to those used for local operations.
After you set up remote operations and enable
the remote operations GUI on the central controller, you can start
the swinstall, swcopy, or swremove GUI as you normally would. For example:
/usr/sbin/swinstall
or
/usr/sbin/swinstall -i
 |
| |
|
 | NOTE: The Terminal User Interface (TUI) is not available
with remote operations. |
|
| |
|
Target Selection Window |
|
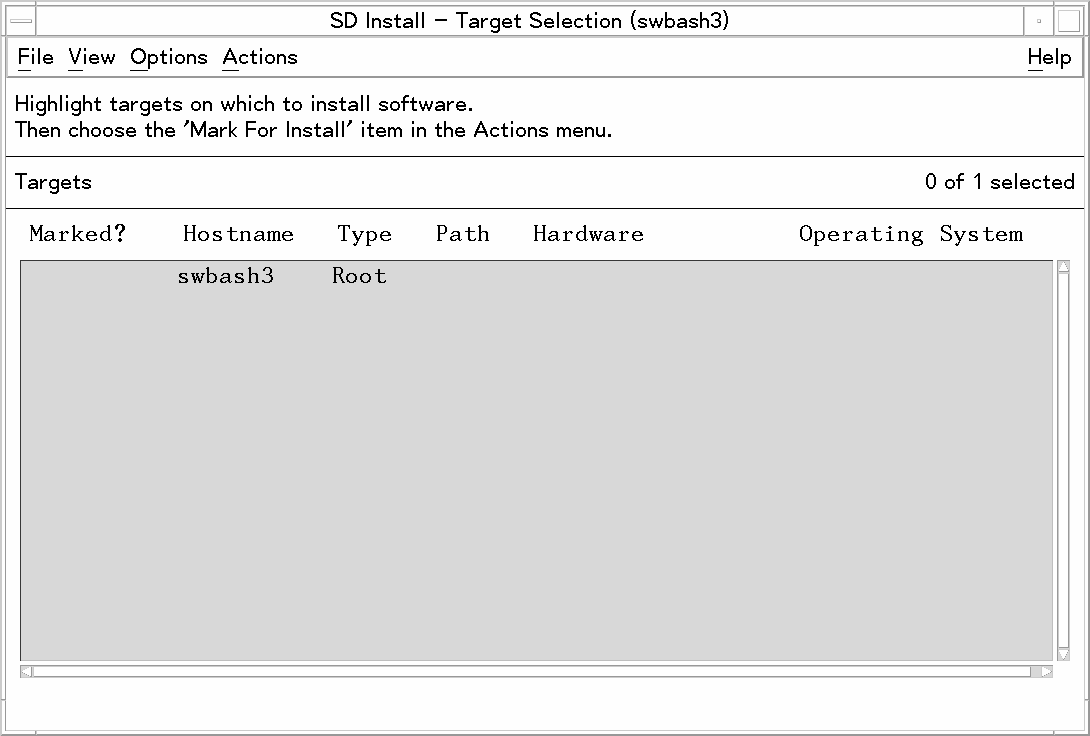
The Target Selection Window always appears first
with the remote GUI programs. Like the Software Selection Window,
it features the standard menu bar, message area, and object list of
targets available for selection. Instead of selecting software, you
select the remote targets on which the remote operation will take
place. Menu items and target selection are discussed in the following
sections.
Performing Actions |
|
The general procedure for using the remote operations
GUI is to:
Select one target at a time by highlighting a target
in the object list of the Target Selection Window.
Select Actions→Mark
for Install....(or Actions→Mark for Copy....or Actions→Mark for Remove....).
Repeat 1 and 2 for any additional targets.
When you have selected all targets for your operation,
select Actions→Show Software for Selection.... to display the Software Selection Window.
Selecting Multiple Targets |
|
This section discusses how to install to multiple
targets, create target groups, and how to save these groups for future
software installations. (For single-target installations to your local
(default) target, see the procedures in “Remote Operations Tutorial”).
The Target Selection Window displays a list of
targets may be displayed:
If you have recalled a
session file (File→Recall Session), any hosts
defined in that session are displayed.
Otherwise, any hosts specified
in the default hosts file (/var/adm/sw/defaults.hosts or $HOME/.sw/defaults.hosts) are
displayed. (See “Preselecting Host Files”.)
If the desired target for the installation is
not in the list:
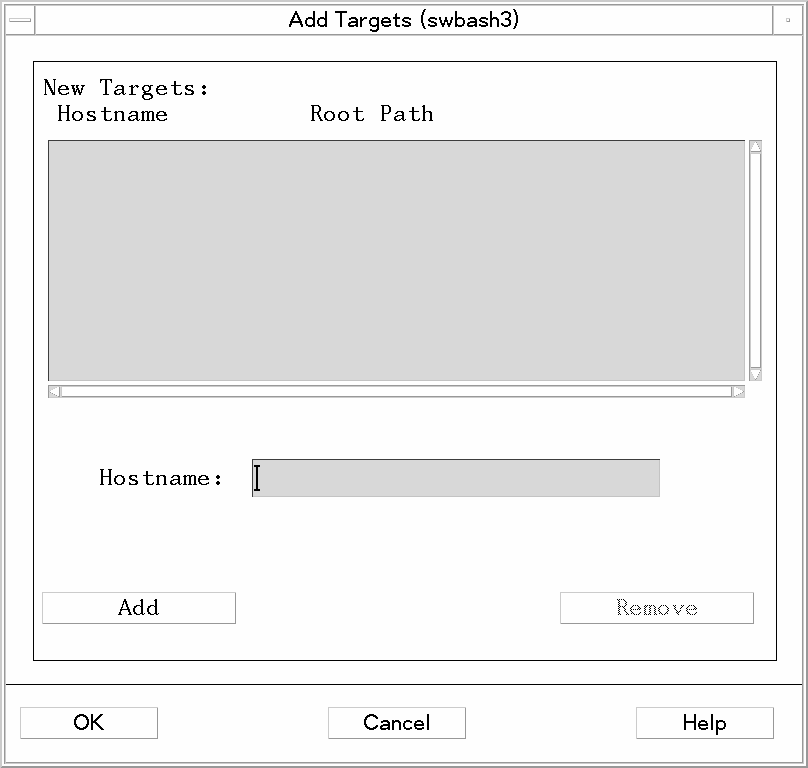
Choose Actions→Add Targets.... The Add Targets dialog (Figure 7-2: “Add Targets Dialog ”,) is displayed.
Enter the primary root
name in the Hostname: area and select Add.
The Select Target Path
dialog appears. The default path is root (/). To accept the default root (/), click OK.
After selecting the root
path, the Hostname and Root Path are automatically updated in the
Add Target dialog (Figure 7-2: “Add Targets Dialog ”,). To add additional targets, repeat
2.
Select OK in the Add Targets dialog. This adds your selections to the Target
Selection Window. Each target is contacted as it is added to the Target
Selection Window. Networking may cause delays; if the SD-UX daemon
is not running on the target, the delay lasts until the daemon times
out.
From the Target Selection Window, any
targets added using Add Targets... are automatically
marked Yes.
If there are any other
desired targets in the Target Selection List that are not marked and
you want to install to them, highlight the target by clicking on it.
Choose Actions→Mark for Install. The Marked? column is set to Yes for that target.
— or —
Hold down the right mouse
button and choose Mark for Install from the resulting
menu.
To unmark a target in
the Target Selection Window (i.e., object list):
Highlight the target
Choose Actions→Unmark for Install. The Marked? column is cleared for that target.
— or —
Hold down the right mouse
button and choose Unmark for install.
At this point, all desired targets should be listed
and have Yes in the Marked? column. If you have not marked any targets,
you cannot proceed to the Selecting Software phase.
Selecting Individual Targets |
|
You can add or delete individual targets.
To add a new target:
Select Actions→Add Targets.... The Add Targets dialog appears.
Type in the name of the
desired target and click on Add. The Select Target
Path dialog appears.
Click OK to accept the default (/) or click
on the Root Path...button to display the Shared Root
Paths dialog, which contains more selection options.
Select the desired root
and click OK to return to the Select Target Path
dialog.
Click OK to return to the Add Targets dialog
Click OK. You have now marked an additional target.
To delete targets, select one or more targets
from the Target Selection Window, then select Actions→Unmark for Install.
Saving a Target Group |
|
You may want to re-use your
list of targets for a later session. To do so,
Select Actions→Save Target Group...
The Select File dialog appears. If target groups already exist, the
first file path appears in the text box in the bottom of the dialog.
Type a name for a new group or re-use an existing group (saving your
current list to existing target group overwrites that group). Groups
are saved in the directory:
$HOME/.sw/targets
To save the group, click OK.
This saves all the target
selections you have just marked (all targets listed with Yes in the Marked? Column). This group will automatically appear in the Select File
dialog for all subsequent target group selections.
Adding a Target Group |
|
To re-use a target group that you previously saved:
Select Actions→Add Target Group.... The Select File dialog
appears. All existing target groups appear in the list.
Select the target group
you want and click OK.
The targets from that group are now marked, along with any other
targets you had already marked.