|
|

Table Of Contents
Installing Cisco Customer Relations Management Communications Connector 2.1.2
Upgrading Cisco CRM Communications Connector Software Versions 2.1x
Required Steps to Install Cisco CRM Communications Connector
Downloading Cisco CRM Communications Connector Software
Installing the Cisco CRM Communications Connector Server
Installing the Cisco CRM Communications Connector Server Web Installer
Installing the Cisco CRM Communications Connector
Client Software
Installing Cisco Customer Relations Management Communications Connector 2.1.2
This chapter describes how to install the Cisco Customer Relations Management (CRM) Communications Connector 2.1.2 with the following software:
•
Cisco CallManager 4.0 or later
•
•
Note
Contents
Upgrading Cisco CRM Communications Connector Software Versions 2.1x
Required Steps to Install Cisco CRM Communications Connector
Downloading Cisco CRM Communications Connector Software
Installing the Cisco CRM Communications Connector Server
Installing the Cisco CRM Communications Connector Server Web Installer
Installing the Cisco CRM Communications Connector Client Software
Upgrading Cisco CRM Communications Connector Software Versions 2.1x
The upgrade for Cisco CRM Communications Connector software versions 2.1x uses an auto-update process. Cisco CRM Communications Connector Client components automatically update when they detect that newer Cisco CRM Communications Connector Server components are installed.
Note
and above.
Note
Perform the following steps to upgrade Cisco CRM Communications Connector software version 2.1x:
Step 1
Step 2
Step 3
Step 4
Note
Step 5
The PC should recognize that there is a new version of the client available from the server, and will ask if you want to upgrade.
Step 6
Repeat this procedure on each installed PC using Cisco CRM Communications Connector.
Required Steps to Install Cisco CRM Communications Connector
Perform these required steps to install Cisco CRM Communications Connector with Cisco CallManager, Cisco CallManager Express, and Cisco IPCC Express:
Step 1
Step 2
Step 3
Step 4
Note
Downloading Cisco CRM Communications Connector Software
Perform the following steps to download and extract the Cisco CRM Communications Connector 2.1.2 software on your PC.
Note
Step 1
•
•
•
Step 2
http://www.cisco.com/cgi-bin/Software/Tablebuild/tablebuild.pl/CRM-Connector
Note
Step 3
Files will automatically install into your specified folder location. Figure 1 shows a typical extracted folder; in this example, the Cisco CRM Communications Connector Server extracted files.
Figure 1 Cisco CRM Communications Connector Server Extracted Files
Installing the Cisco CRM Communications Connector Server
Install the Cisco CRM Communications Connector Server on any server in the same Active Directory domain as the target Microsoft CRM server. It is recommended, however, that it be installed on the Microsoft CRM server itself.
Perform the following steps to install the Cisco CRM Communications Connector 2.1.2 with Cisco CallManager, Cisco CallManager Express, and Cisco IPCC Express:
Step 1
Figure 2 Cisco CRM Communications Connector Server Setup.Exe File
The Cisco CRM Communications Connector Server Setup Wizard appears (see Figure 3).
Figure 3 Cisco CRM Communications Connector Server Setup Wizard
Step 2
The License Agreement window appears (see Figure 4).
Figure 4 License Agreement Window
Step 3
The Select Installation Folder window appears (see Figure 5).
Figure 5 Select Installation Folder Window
Step 4
Step 5
The Confirm Installation window appears (see Figure 6).
Figure 6 Installation Confirmation Window
Step 6
The installation is now ready to begin copying files.
After the files are copied, the Cisco CRM Communications Connector Server Configuration window appears (see Figure 7). Table 2 summarizes the field options for the Cisco CRM Communications Connector Server Configuration window.
Figure 7 Cisco CRM Communications Connector Server Configuration Window
Table 2 Cisco CRM Communications Connector Server Window Field Descriptions
Step 7
(see Figure 8).Figure 8 Cisco CRM Server Services Test
If successful, The URL is Valid message appears (see Figure 9).
Figure 9 C4 Server Contact Successful Window
If you receive a Validation Error (see Figure 10), the URL is probably not the correct location to the Cisco CRM Communications Connector Web Services.
Figure 10 URL Error Window
If you receive a SOAP Server Application error (see Figure 11), you do not have access to
Microsoft CRM.Figure 11 SOAP Server Application Error Window
Step 8
Step 9
Figure 12 Edit Phone Number Processor Configuration Button
The Cisco Phone Number Processor (PNP) Configuration window appears (see Figure 13).
Note
Figure 13 Cisco Phone Number Processor Configuration Window
Step 10
Figure 14 New PNP Configuration Button
The New PNP Configuration window appears (see Figure 15).
Figure 15 New PNP Configuration Window
Step 11
The Cisco Phone Number Processor Configuration window appears (see Figure 16).
Figure 16 Cisco Phone Number Processor Configuration Window
Note
You can define multiple configurations and use them on any PC. For example, you can define additional configuration as remote locations, for use with branch or remote offices which have a different area code than the main business location where the Microsoft CRM server is located.
Table 3 summarizes the Cisco Phone Number Processor Configuration window options.
Table 3
Five access codes that can be defined are listed below. Their use is dictated by the values provided in the How to dial... section of the Phone Number Processor Configuration Window, but their general use is as described below. Each access code has a mnemonic associated with it, which is shown in curly braces.
Obtain a local outside line {out}
The digit string that is typically dialed before placing local calls.
Obtain a long-distance outside line {ldout}
This digit string will be the digit string that is typically dialed before placing long-distance (and international) calls.
National Long Distance Prefix {ldp}
The digit string that is typically dialed ahead of the area code when dialing long-distance (and international) calls.
International Long Distance Prefix {idp}
The digit string that is typically dialed to indicate that the call is international.
Local Country Code {localcc}
The digit string that represents the country the user is located in when being dialed from another country.
Each box in this section defines how to dial a phone number once it has been broken into parts (country code, area code, and so forth). Typically, the values provided in each style phone number field will be various combinations of codes that are built into the program, although you could also provide numbers directly in each box. The codes that are available are the same codes that are shown in the Access Codes and Pattern Recognition sections, plus one special code, '{}' that means all digits.
The Ask checkbox next to each field instructs the client whether it should still ask the user to verify the phone number before dialing when using click-to-dial, and when there is only one phone number for the requested click-to-dial contact.
The values provided in these boxes are used by the Pattern Recognition section to determine the accurate parts of each phone number, and to determine the style (local, long distance, and so forth) of the phone number being processed. The exact manner in which these area codes are utilized are dictated by the Pattern Recognition section of the Phone Number Processor Configuration Window, but the intended meaning of values in each box are the following:
Local
Values placed in this box considered local area codes.
Long Distance
Values placed in this box are considered long-distance area codes.
Split Local/LD
Values placed in this box are area codes in which some numbers are local and others are long distance.
Local Exchange
For each area code in the Split Local/LD box, values placed in the box are the local exchanges for that area code. Note that the values in this box are maintained individually for each area code in the Split Local/LD box.
Enable a Default Area Code
The Enable Default Area Code allows the system to assign the users local area code when it is not provided in the contacts record. If the area code is provided in the CRM contact record, then this field is not used during processing.
The Pattern Recognition area allows the client to pick out the parts of the phone number for efficient CRM searching and for accurate no-touch click-to-dial functionality. It utilizes Microsoft.NET Regular Expressions to identify each part of the phone number. The patterns are used during both incoming/outgoing phone call detection for efficient CRM Searches, as well as click-to-dial functionality.
First, the phone number is filtered according to the prefilter. Anything that matches the prefilter is removed from the digit string being considered. Then, the digit string is tested against each pattern in order until a match is found. Each pattern should result in at least one named match for the following values:
•
•
•
•
•
•
Note that the subscriber number may or may not follow the typical definition of subscriber number. It is a generic container.
Once a pattern is found that matches the digit string, and it is broken out into its parts, one of two things occurs:
•
•
The search formats allow the administrator to maximize efficiency and accuracy when searching CRM. After a phone number is processed by the Pattern Recognizers, the list of Search Formats is processed in order until one is found in which all components of the search format can be provided. Each search format component is a code that matches the named match values that are detected by the pattern recognizers. Each matching value is then replaced with that portion of the phone number. There are two formats for each search component, using AC as demonstration:
•
•
The difference between the two formats is that the first format provides the most accurate searching, but in some cases may not find the correct records if there are other characters interspersed in the text stored in Cisco CCC. Normally this will not occur if Cisco CRM 2.1 users are diligent about how they input phone numbers into the Cisco CCC system. If there are cases in which there are other characters interspersed in the text in Cisco CCC, the {%ac%} format can help because it will catch those values and probably produce results that are not true matches.
Cisco Phone Number Processor Configuration Window Field Descriptions
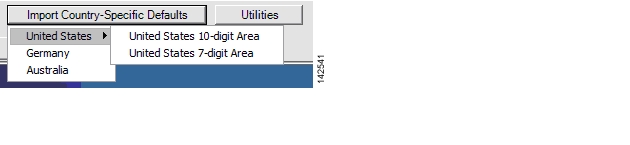
Step 12
The supported predefined configurations are:
•
•
•
•
Figure 17 Import Country-Specific Defaults Menu
The specified Phone Number Processor Configuration window appears (see Figure 18).
Note
Figure 18 Import Country-Specific Defaults Selection
Step 13
Figure 19 shows an example of a typical basic Phone Number Processor configuration window.
Note
Figure 19 Basic PNP Configuration
Step 14
Step 15
The Cisco CRM Communications Connector Server installs and starts automatically (see Figure 20).
Figure 20 Cisco CRM Communications Connector Server Service Window
You are now ready to install the Cisco CRM Communications Connector Server Web (see the "Installing the Cisco CRM Communications Connector Server Web Installer" section).
Installing the Cisco CRM Communications Connector Server Web Installer
The Cisco CRM Communications Connector Server Web Installer adds the Call This Person customization button within the Microsoft CRM contact records. The integration uses the ISV.config file on the Microsoft CRM server to customize the contact records.
Perform following steps to install the Cisco CRM Communications Connector 2.1.2 with Cisco CallManager, Cisco CallManager Express, and Cisco IPCC Express.
Step 1
Figure 21 Cisco CRM Communications Connector Server Web Extracted Files
The Cisco CRM Communications Connector Server Web Installer Setup Wizard appears
(see Figure 22).Figure 22 Cisco CRM Communications Connector Server Web Component Window Setup Wizard
Step 2
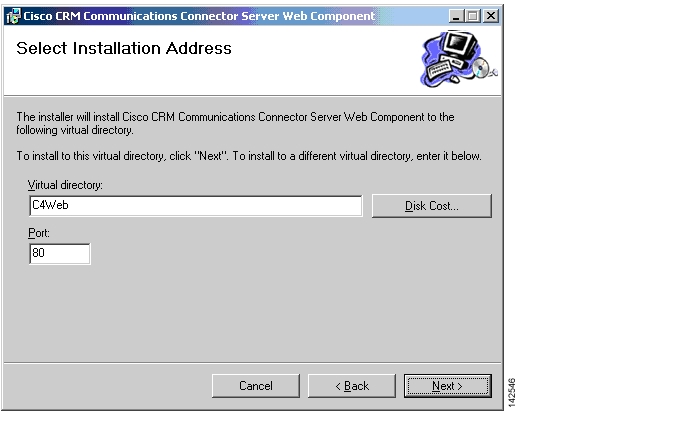
Step 3
Figure 23 Cisco CRM Communications Connector Server Web Component
Select Installation Address Window
Step 4
Figure 24 File Selection Window
Step 5
Figure 25 Cisco CRM Communications Connector Server Web Component
Confirm Installation Window
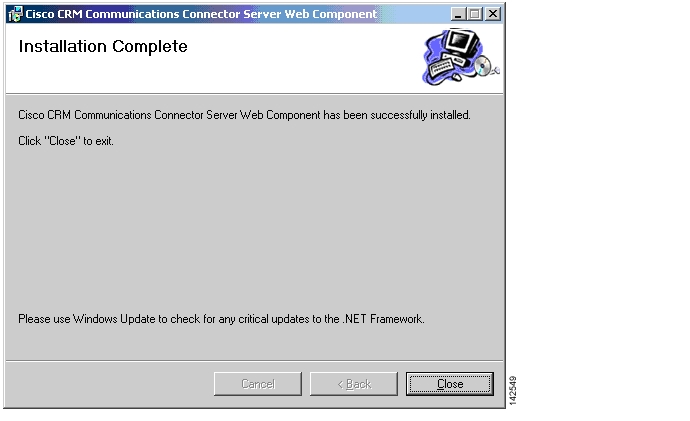
Step 6
Figure 26 Cisco CRM Communications Connecdtor Server Web Component
Installation Complete Window
Step 7
You are now ready to install the Cisco CRM Communications Connector Client (see the "Installing the Cisco CRM Communications Connector Client Software" section).
Installing the Cisco CRM Communications Connector
Client Software
Note
Install the following software for the Cisco CRM Communications Connector Client.
•
–
–
•
Perform the following steps to install the Cisco CRM Communications Connector Client with Cisco CallManager, Cisco CallManager Express, and Cisco IPCC Express.
Step 1
Figure 27 Cisco CRM Communications Connector Client Installer Extracted Files
The Cisco CRM Communications Connector Client Setup Wizard appears (see Figure 28).
Figure 28 Cisco CRM Communications Connector Client Setup Wizard
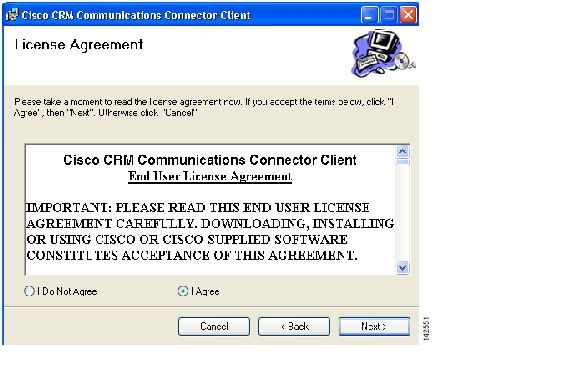
Step 2
The License Agreement dialog appears (see Figure 29).
Figure 29 Cisco CRM Communications Connector Client Licence Agreement Window
Step 3
Step 4
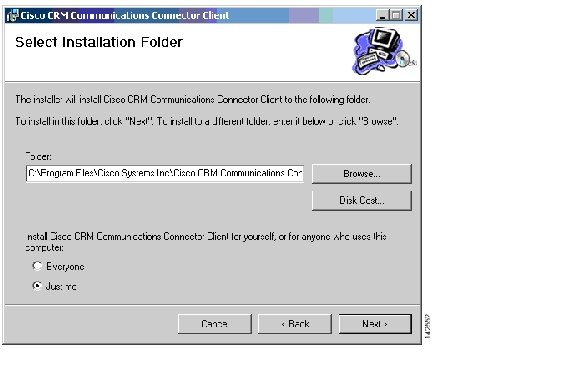
The Cisco CRM Communications Connector Select Installation Folder window appears (see Figure 30).
Figure 30 Cisco CRM Communications Connector Client Select Installation Folder Window
Step 5
Step 6
The Cisco CRM Communications Connector Client Confirm Installation window appears
(see Figure 31).Figure 31 Cisco CRM Communications Connector Client Confirm Installation Window
Step 7
The installation is now ready to begin copying files.
After the files are copied, the Cisco CRM Communications Connector Client Configuration window appears allowing you to configure the Cisco CRM Communications Connector Client (see Figure 32).
Figure 32 Cisco CRM Communications Connector Client Configuration TAPI Configuration
Tab-View Window
Step 8
The TAPI Configuration tab allows you to specify which line should be monitored for incoming and outgoing calls. Optionally, you can also request to completely ignore either inbound or outbound calls (or both).
The TAPI Lookup timeout specifies a value, after which time (in milliseconds) if the TAPI client has not provided the Connector Client with Caller ID information, the Connector Client will manually ask the provider for the caller ID information. If you find that the client frequently reports the wrong phone number (such as the internal voice mail pilot extension) then try increasing this value.
Step 9
The Cisco CRM Communications Connector Client Configuration Ignore List tab-view window appears (see Figure 33).
Figure 33 Cisco CRM Communications Connector Client Configuration Ignore List
Tab-View Window
The Ignore List tab allows you to specify specific phone numbers that the Connector Client should ignore when processing inbound/outbound phone numbers.
The first four boxes allow you to specify numbers to ignore when the phone number either begins with, ends with, is exactly, or contains the specified digit strings. In these four boxes, only digits are allowed.
The fifth box, Custom / Advanced, allows you to specify regular expressions of phone number digit strings to ignore.
For example, if you do not want to track internal phone call activity, In the Custom/Advanced box enter the following string:
^\d{4}This string instructs the Cisco CRM Communications Connector to ignore 4-digit internal phone-extension numbers. Depending on the number of digits of your internal phone-extension configuration, if necessary, replace the digit 4 with the digit corresponding to your configuration.
Step 10
The Cisco CRM Communications Connector Client Configuration CRM Configuration tab-view window appears (see Figure 34).
Figure 34 Cisco CRM Communications Connector Client Configuration CRM Configuration Tab-View Window
The CRM Configuration tab allows you to specify server and login information for both the Cisco CRM Communications Connector Server, and the Microsoft CRM server.
Step 11
On initial configuration, when you changes the value in this field, the value in the "CRM Connector Server Web Path" will update with the same value. Change this value if the Server Connector Web Components were installed on a different server or have a different access URL.
Note
Step 12
Step 13
Step 14
If successful, the status shows "Connected" and the "Dial Plan Configuration" drop-down menu becomes enabled.
Step 15
Step 16
The Cisco CRM Communications Connector Client Configuration Logging tab-view window appears (see Figure 35).
Figure 35 Cisco CRM Communications Connector Client Configuration Logging Tab-View Window
The Logging tab allows you to configure how the client logs system events (available logging levels include messages from all previous levels).
Step 17
Step 18
The available logging levels are:
•
•
•
•
•
•
The "Critical Errors" level produces virtually no output, while the "Debug4" level produces large output.
Note
Note
Step 19
•
•
Figure 36 Specifying Logging Information Destination
If you check Log to File (see Figure 37):
Figure 37 Log to File Field Options
a.
b.
c.
If you check Enable Log to Window (see Figure 38):
Figure 38 Enable Log to Window Field Option
a.
Step 20
The Installation Complete dialog appears (see Figure 39). The client is now installed and ready to run from the Start Menu on your PC.
Figure 39 Cisco CRM Communications Connector Client Configuration Window
Installation Complete
Step 21
What to Do Next
You are now ready to integrate Cisco CRM Communications Connector 2.1.2 with Cisco IPCC Express (see "Integrating Cisco CRM Communications Connector with Cisco IPCC Express" section).
![]()
![]()
![]()
![]()
![]()
![]()
![]()
![]()
Posted: Thu Apr 19 16:43:48 PDT 2007
All contents are Copyright © 1992--2007 Cisco Systems, Inc. All rights reserved.
Important Notices and Privacy Statement.