8.10 Red Hat NetworkRed Hat provides a service known as Red Hat Network (http://rhn.redhat.com), designed to help you keep your Red Hat Linux system up-to-date and secure. If you purchased the official boxed-set release of Red Hat Linux, you're entitled to a 30-day subscription to Red Hat Network for one system. You can purchase additional subscriptions for $60 per year, per system. Any Red Hat Linux user is eligible for a Demo account, which provides complimentary access to software updates and update notifications. Unlike paid accounts, a Demo account does not provide priority access during periods of high load. Moreover, only a single computer can be associated with a Demo account. The Red Hat Network provides access to security alerts, bug fix alerts, and enhancement alerts published by Red Hat. Updated packages can be downloaded or automatically installed via the Red Hat Update Agent. The Red Hat Network is of significant benefit to administrators of multiple systems, who might otherwise have difficulty applying patches to close security loopholes and fix problems quickly. 8.10.1 Using Red Hat NetworkTo use Red Hat Network, your computer must be able to access the Internet. To set up your computer, you must perform two steps:
Once your computer is set up to use Red Hat Network, updates can be accomplished automatically based on a schedule or manually, by using the Red Hat Update Agent. The following sections describe these procedures as they existed at the time of writing. However, Red Hat may revise the operation of Red Hat Network at any time. For more information on using Red Hat Network, see the Red Hat Network User Reference Guide, available at http://www.redhat.com/docs/manuals/RHNetwork. 8.10.1.1 Signing upTo sign up for Red Hat Network, point your browser to the main Red Hat Network web page, http://rhn.redhat.com. Then click the link marked "Sign Up." The web page shown as Figure 8-6 appears. Figure 8-6. The Red Hat Network sign up web page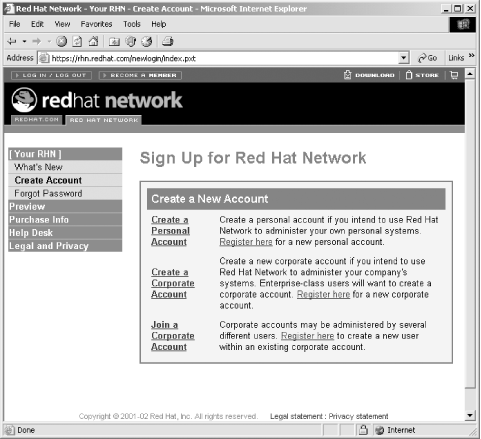 Click the link marked "Create a Personal Account." The web page shown in Figure 8-7 appears. Fill in the requested information and then click the Create Login button at the bottom of the form. Figure 8-7. The Red Hat Network personal account sign up page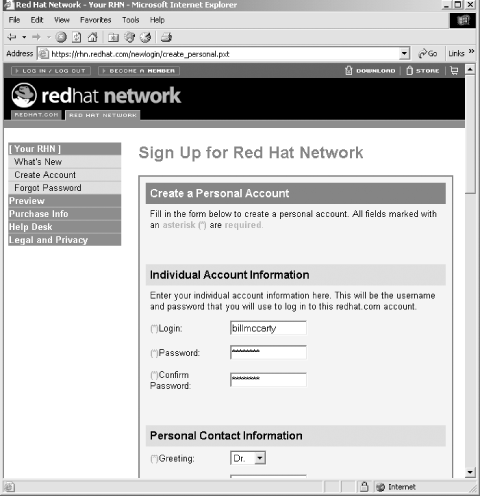 8.10.1.2 Creating a system profileOnce you've signed up for Red Hat Network, you can create a profile describing your system. To do so, click the Red Hat Network Alert Notification Tool icon that appears near the right of the desktop panel. If you've not yet created a profile, the icon will resemble a red ball with a superimposed exclamation mark. Otherwise, it may take the form of a green, blue, or gray ball. Clicking the Notification Tool icon starts a configuration dialogue. First, the dialogue asks you to read and accept the Red Hat Network terms of service. Then, it presents the Proxy Configuration dialog box, shown in Figure 8-8. If your computer is behind a firewall that requires you to use a proxy sever to access the Web, you must enable the HTTP proxy and specify its hostname and port. Most users don't require a proxy. If you suspect that you do, you can likely obtain the proper information by inspecting the configuration of your Windows web browser, if any. Otherwise, you can obtain the necessary configuration information from your network administrator. Figure 8-8. The Proxy Configuration dialog box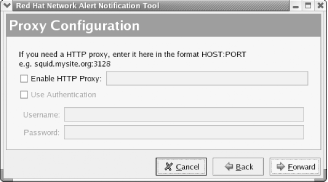 After you complete the dialogue, the Notification Tool will attempt to access Red Hat Network. Unless you've already configured a profile for your system, the Red Hat Network Registration dialog box shown in Figure 8-9 appears. To register your computer with Red Hat Network by creating a system profile describing it, click Register with RHN. The configuration dialog box shown in Figure 8-10 appears. Figure 8-9. The Red Hat Network Registration dialog box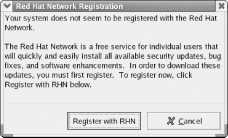 Figure 8-10. Configuring the Red Hat Network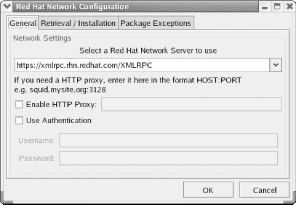 The configuration dialog box includes three tabs: General, Retrieval/Installation, and Package Exceptions. Generally, the default settings are appropriate. However, systems on your network require a proxy server in order to access the Web, so you must enable and specify an HTTP proxy just as you did for the Notification Tool. Click OK to continue. Unless you've installed Red Hat's GPG key on your GPG keyring, the dialog box shown in Figure 8-11 appears. Figure 8-11. Installing the GPG key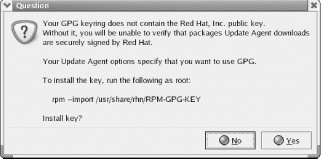 The Update Agent uses Red Hat's GPG key to verify that package updates originate from Red Hat and that they have not been altered. This security mechanism is intended to prevent you from inadvertently installing a package that a malicious person has substituted for an authentic one. To install the GPG key, simply click the Yes button. You don't need to issue the command shown in the text of the dialog box. Next, the Update Agent asks you to read Red Hat's privacy statement. Clicking Forward takes you to the next step, registering or updating a user account, as shown in Figure 8-12. Figure 8-12. Registering or updating a user account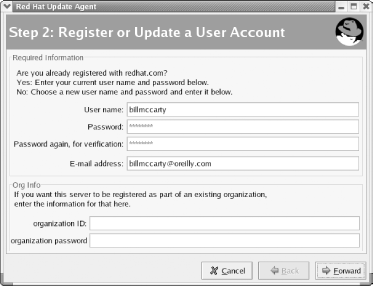 To register your user account, specify the username, password, and email address you used when you signed up for Red Hat Network. Then, click Forward. The Registering a System Profile—Hardware dialog box appears, as shown in Figure 8-13. This dialog box enables you to specify a name to be associated with the profile you're about to create. Enter a profile name and click Forward to continue. Figure 8-13. Registering a system profile—hardware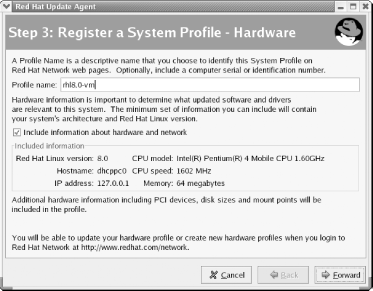 The Registering a System Profile—Packages dialog box appears, as shown in Figure 8-14. If you're unwilling to transmit the package configuration to Red Hat, you can disable one or more checkboxes. However, Red Hat Network will not be able to properly update your system unless you transmit full and accurate information on the installed packages. So, you should not generally disable any checkboxes on this form. Click Forward to continue. Figure 8-14. Registering a system profile—packages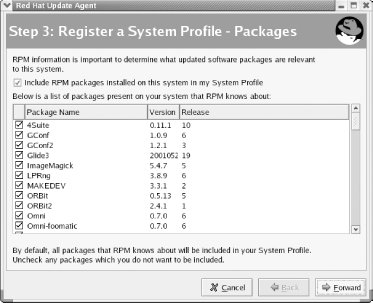 The Send Profile Information to Red Hat Network dialog box appears, as shown in Figure 8-15. Click Forward to continue. The next dialog box, shown in Figure 8-16, lets you subscribe to the channel that provides updates to Red Hat Linux 8.0. Normally, only one channel should appear and you should not need to make changes to the defaults. Click Forward to continue. Figure 8-15. Sending the profile information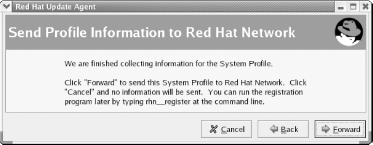 Figure 8-16. Specifying channels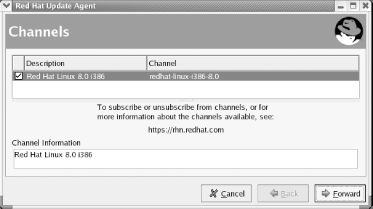 As shown in Figure 8-17, the Update Agent obtains and displays a list of installed packages for which updates are available. To update a package, enable the associated checkbox. You can view information about the updates associated with a package by selecting the package name and clicking View Advisory. Select the packages you want to update and then click Forward. If you do not want to update any packages at this time, click Cancel. Figure 8-17. The available package updates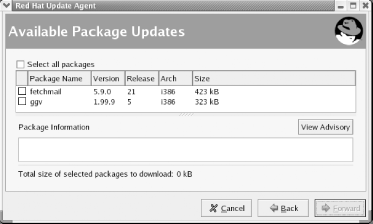
After you click Forward, the Update Agent will retrieve any specified packages and update your system. Separate dialog boxes present the progress and completion of package retrieval and installation. 8.10.1.3 Updating your systemAfter you initially set up your system to use Red Hat Network, you
can update it at any time. To do so, choose System Tools
|
