8.1 The Package Management ToolRed Hat Linux 8.0 features a
new package management tool that's much easier to
use than GnomeRPM, the tool included in previous versions of Red Hat
Linux. To launch the package management tool, choose System Settings
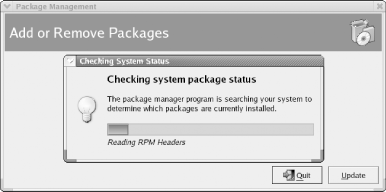
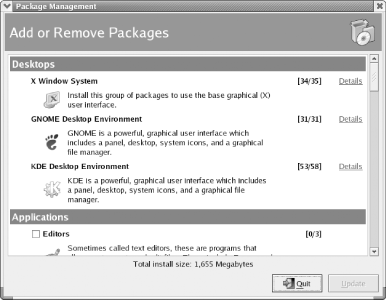
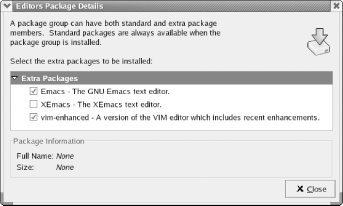
Figure 8-2. The package management tool Figure 8-3. The Add or Remove Packages window 8.1.1 Installing Package Groups and PackagesTo specify that a package group should be installed, select the checkbox next to the name of an uninstalled package group. In Figure 8-3, the Editors package group is not installed, as indicated by the unchecked checkbox to the left of the package group's name. By enabling the checkbox, you can specify that you want to install the package group. Installation does not begin until you click the Update button. Most package groups contain optional packages that you can install or omit, according to your preference. The numbers to the right of the package group name indicate how many of the optional packages are installed. If you've just specified that a package group should be installed, the numbers indicate how many of the optional packages will be installed when you click the Update button. For example, in Figure 8-3, the 0/3 associated with the Editors package group indicates that none of the three associated packages is currently installed. If you enable the checkbox associated with the Editors package group, the numbers immediately change to 2/3, meaning that two of the three associated packages will be installed when you click the Update button. To learn more about the optional packages associated with a package group, click the Details link. The Package Details window appears, as shown in Figure 8-4. This window provides checkboxes that you can use to specify which optional packages you want installed. If you can't see the list of package names, expand the tree by clicking the triangle next to the text Extra Packages. When you're done viewing the package details, close the window by clicking Close. You can then install the selected packages by clicking Update. The package management tool will prompt you to insert the appropriate installation CD, in necessary. To close the Add or Remove Packages window without installing or removing any packages, click the Quit button.
Figure 8-4. The Package Details window 8.1.2 Removing Package Groups and PackagesYou can also delete package groups and packages by using the package management tool. To remove a package group, disable the checkbox associated with the package group. To remove a package, open the Package Details window and disable the checkbox associated with the package. No changes are made until you click the Update button of the Add or Remove Packages window.
8.1.3 Installing Packages from the Hard DiskIf you have several free gigabytes of disk storage, you may prefer to copy the Red Hat Linux installation media to your hard disk. Doing so avoids the need to insert CDs when installing packages. To set up your system for installing packages from the hard disk, open a terminal window, become the root user, and issue the following command to create the directory /redhat-tree/RedHat: mkdir -p /redhat-tree/RedHat The -p flag enables you to create the directory and its parent directory in a single command. Without the flag, the command will fail because the /redhat-tree directory does not exist. Next, mount installation CD 1 and copy the contents of the RedHat directory (/mnt/cdrom/RedHat) to the new directory: cp -a /mnt/cdrom/RedHat/* /redhat-tree/RedHat Finally, copy the files from installation CD 2 and CD 3 to the same location.
To install packages, launch the package management tool by issuing the command: redhat-config-packages --tree=/redhat-tree The tool will no longer prompt you to insert a CD; instead, it will obtain package files from the /redhat-tree directory. To avoid typing this command to install packages, you can create a panel launcher or menu item, as explained in Chapter 5 and Chapter 6. |
